{"_id":"@andersonmancini/lens-flare","_rev":"1-698b2ce7ce25fc5a4066643c46134f63","name":"@andersonmancini/lens-flare","dist-tags":{"latest":"1.0.1"},"versions":{"1.0.0":{"name":"@andersonmancini/lens-flare","version":"1.0.0","main":"dist/cjs/index.js","module":"dist/esm/index.js","scripts":{"dev":"node ./esbuild.dev.js","build":"node ./esbuild.build.js","clean":"rm -rf ./dist","prebuild":"npm run clean","predev":"npm run clean"},"devDependencies":{"@react-three/drei":"^9.58.5","@react-three/fiber":"^8.13.0","esbuild":"^0.17.19","maath":"^0.5.3","postprocessing":"^6.31.0","react":"^18.2.0","react-dom":"^18.2.0","three":"^0.152.2"},"peerDependencies":{"@react-three/drei":"^9.58.5","@react-three/fiber":"^8.13.0","maath":"^0.5.3","postprocessing":"^6.31.0","react":"^18.2.0","react-dom":"^18.2.0","three":"^0.152.2"},"description":"Lens flare for R3F","repository":{"type":"git","url":"git+https://github.com/ektogamat/R3F-Ultimate-Lens-Flare.git"},"keywords":["lens","flare"],"author":{"name":"Anderson Mancini"},"license":"CC0-1.0","bugs":{"url":"https://github.com/ektogamat/R3F-Ultimate-Lens-Flare/issues"},"homepage":"https://github.com/ektogamat/R3F-Ultimate-Lens-Flare#readme","gitHead":"1786a7a9fae2c68cae49bd253d3cb6f49dd8bd7f","_id":"@andersonmancini/lens-flare@1.0.0","_nodeVersion":"18.12.1","_npmVersion":"9.2.0","dist":{"integrity":"sha512-Wake80O4lf2ArLhDxMJmK/O6ZfBVD3bU7wHR2mEAiNYsD8Ltz+qC6DsEvYOz5LnzetBTWpinnGCYr/4AuqThcQ==","shasum":"106610f85dbba5561b8ccffc20ffae2411badf36","tarball":"https://registry.npmjs.org/@andersonmancini/lens-flare/-/lens-flare-1.0.0.tgz","fileCount":8,"unpackedSize":49396,"signatures":[{"keyid":"SHA256:jl3bwswu80PjjokCgh0o2w5c2U4LhQAE57gj9cz1kzA","sig":"MEYCIQClw8Qcdk51fMyPRbm/ysxg38Jz2oIXYMfwZVaWTpdKegIhAP3y8vvmKx8H+mVDcuDXg/1/o7OlI++0aFcuGmhmrGbL"}]},"_npmUser":{"name":"andersonmancini","email":"andersonmancini30@gmail.com"},"directories":{},"maintainers":[{"name":"andersonmancini","email":"andersonmancini30@gmail.com"}],"_npmOperationalInternal":{"host":"s3://npm-registry-packages","tmp":"tmp/lens-flare_1.0.0_1685577444486_0.1950911985266206"},"_hasShrinkwrap":false},"1.0.1":{"name":"@andersonmancini/lens-flare","version":"1.0.1","main":"dist/cjs/index.js","module":"dist/esm/index.js","scripts":{"dev":"node ./esbuild.dev.js","build":"node ./esbuild.build.js","clean":"rm -rf ./dist","prebuild":"npm run clean","predev":"npm run clean"},"devDependencies":{"@react-three/drei":"^9.58.5","@react-three/fiber":"^8.13.0","esbuild":"^0.17.19","maath":"^0.5.3","postprocessing":"^6.31.0","react":"^18.2.0","react-dom":"^18.2.0","three":"^0.152.2"},"peerDependencies":{"@react-three/drei":"^9.58.5","@react-three/fiber":"^8.13.0","maath":"^0.5.3","postprocessing":"^6.31.0","react":"^18.2.0","react-dom":"^18.2.0","three":"^0.152.2"},"gitHead":"16dddb3b6e4986d0d30092d5f3ec7272a47aa6ff","description":"#### by Anderson Mancini","_id":"@andersonmancini/lens-flare@1.0.1","_nodeVersion":"18.12.1","_npmVersion":"9.2.0","dist":{"integrity":"sha512-VhJpb0IFRW2Vlm57RuIoxZ6dgpsq8UnkI0w+MFe+fcnw0NDdhPCJeBgZEtWtza9dJGCxTEOEYMxk+ox3iSNQWw==","shasum":"04f4810a873508aa248d153f03d5d97996fc77a0","tarball":"https://registry.npmjs.org/@andersonmancini/lens-flare/-/lens-flare-1.0.1.tgz","fileCount":9,"unpackedSize":62684,"signatures":[{"keyid":"SHA256:jl3bwswu80PjjokCgh0o2w5c2U4LhQAE57gj9cz1kzA","sig":"MEQCIBPgbrrkApWOSAU9KxtiY/0lMhld1hoLItj50GE0zrPRAiAI+VC3CqPelKmduxbpsCuOstpl9rc4rL4k89wzgOqJxg=="}]},"_npmUser":{"name":"andersonmancini","email":"andersonmancini30@gmail.com"},"directories":{},"maintainers":[{"name":"andersonmancini","email":"andersonmancini30@gmail.com"}],"_npmOperationalInternal":{"host":"s3://npm-registry-packages","tmp":"tmp/lens-flare_1.0.1_1685578550472_0.8639769868482468"},"_hasShrinkwrap":false}},"time":{"created":"2023-05-31T23:57:24.426Z","1.0.0":"2023-05-31T23:57:24.784Z","modified":"2023-06-01T00:15:50.912Z","1.0.1":"2023-06-01T00:15:50.770Z"},"maintainers":[{"name":"andersonmancini","email":"andersonmancini30@gmail.com"}],"description":"#### by Anderson Mancini","readme":"# ULTIMATE LENS FLARE FOR REACT THREE FIBER\n\n#### by Anderson Mancini\n\n[](https://twitter.com/Andersonmancini)\n\nA EffectComposer Effect for React Three Post Processing, `Ultimate Lens flare` adds the optical aberration caused by the dispersion of light entering the lens through its edges.\n\n[](https://ultimate-lens-flare.vercel.app)\n\n[Click here to see an example](https://ultimate-lens-flare.vercel.app)\n\nThis captivating phenomenon creates a stunning optical effect that adds a touch of enchantment to your r3f projects, especially for sun lights. `Ultimate Lens Flare` creates mesmerizing circular or hexagonal bursts of light. Embrace the magic and elevate your projects with this unique and alluring effect. This captivating optical innovation introduces a new dimension to your content, amplifying its visual impact and captivating your audience.\n\nUnlock a world of possibilities with Ultimate Lens Flare's intuitive interface. Seamlessly adjust parameters such as brightness, star points, glare size, ghosts, burst and much more, while real-time previews allow you to see the impact of your adjustments instantly. Embrace your creativity and effortlessly bring your artistic vision to life.\n\n## More demos on CodeSandbox\n\n- [Ultimate Lens Flare Text3D example](https://codesandbox.io/s/anderson-mancini-lens-flare-glass-text-example-9elqmx)\n\n- [Ultimate Lens Flare simple example ](https://codesandbox.io/s/anderson-mancini-lens-flare-simple-example-ox6611)\n\n- [Ultimate Lens Flare multiple materials example ](https://codesandbox.io/s/anderson-mancini-lens-lensflare-materials-example-4gjc16)\n\n- [Ultimate Lens Flare Glass Dome example ](https://codesandbox.io/s/anderson-mancini-lens-lensflare-glass-dome-gjl302)\n\n- [Ultimate Lens Flare StarWars Ship example ](https://codesandbox.io/s/anderson-mancini-lens-lensflare-starwars-example-qmpuj1)\n\n### Customization options\n\nHere you can watch a video of customization options. You can fully customize it\n[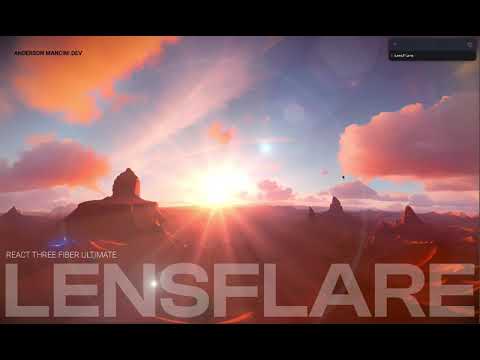](https://www.youtube.com/watch?v=a4W4SUZ5uu8)\n\n# HOW TO USE?\n\n## With the package\n\nFirst, install the `@andersonmancini/lens-flare` package on your project\n\n```shell\nnpm install @andersonmancini/lens-flare\n```\n\nThen, import it in your project:\n\n```js\nimport { LensFlare } from \"@andersonmancini/lens-flare\";\n```\n\nand add it to your `EffectComposer`:\n\n```js\n\n \n\n```\n\n## Manually\n\n### 1. Download the files component and save it on your project\n\n[Download the Ultimate Lens Flare source code](https://gist.github.com/ektogamat/9b02bf248cab901b1175524b00742964) and save into your project\n\n[Download the util source code](https://gist.github.com/ektogamat/18b84f5ad652091fe5a89555a5d30000) and save into your project in the same folder as the Ultimate Lens Flare is.\n\n### 2. Import the component\n\n```js\nimport LensFlare from \"./UltimateLensFlare\";\n// Remember to adjust the path to match your project's structure\n```\n\n### 3. Provide an image for the lens dirt as a prop and add this to your EffectComposer\n\nYou need to provide an image to act like a lens dirt filter. To implement this, supply an image with a 16:9 aspect ratio as a `dirtTextureFile` prop. It's important to keep the image size small to ensure efficient shader processing. You can find an example image in the public folder, but feel free to substitute it with any image of your choice. Remember to pass the file name as the `dirtTextureFile` prop, as demonstrated below.\n\n```js\n\n \n\n```\n\n\\*\\*This is a mandatory parameter and it expects a path to find the file on your project. Don't need to load a texture using useTexture.\n\n### And you are done ✨\n\n---\n\n# Changing the Blend Mode\n\nWith the aim of simplicity and user-friendliness, `Ultimate Lens Flare` seamlessly integrates into your workflow. It employs a custom shader pass on Effect Composer to effortlessly apply the lens flare effect by overlaying it on the scene.\n\nNevertheless, you have the flexibility to customize the effect to suit your specific requirements. The primary parameter that influences the overall appearance of the effect is the `blendFunction`. By default, this parameter is set to BlendFunction.NORMAL. However, you can modify it by providing a different blending mode through the blendFunction prop:\n\n```js\n\n \n\n```\n\nUnlock a world of stunning and diverse outcomes by exploring alternative Blend functions like `BlendFunction.PIN_LIGHT`, `BlendFunction.OVERLAY`, `BlendFunction.PIN_MULTIPLY`, and more. Import the BlendModes from post processing using `import { BlendFunction } from 'postprocessing'` to utilize these options. Prepare to be amazed by the myriad possibilities they offer.\n\n# Using LEVA to adjust the parameters\n\nEnjoy the convenience of fine-tuning various parameters within Ultimate Lens Flare. To simplify the process, import `folder` and `useControls` from `LEVA`. Copy and paste the following props to create an interactive interface for adjusting the values. Once you're satisfied with the results, manually transfer the values from the Leva controls back to the default value of useControls. Save your changes, and you're all set!\n\n```js\nimport { folder, useControls } from \"leva\";\n```\n\n```js\nconst lensFlareProps = useControls({\n LensFlare: folder(\n {\n enabled: { value: true, label: \"enabled?\" },\n opacity: { value: 1.0, min: 0.0, max: 1.0, label: \"opacity\" },\n position: { value: { x: -25, y: 6, z: -60 }, step: 1, label: \"position\" },\n glareSize: { value: 0.35, min: 0.01, max: 1.0, label: \"glareSize\" },\n starPoints: {\n value: 6.0,\n step: 1.0,\n min: 0,\n max: 32.0,\n label: \"starPoints\",\n },\n animated: { value: true, label: \"animated?\" },\n followMouse: { value: false, label: \"followMouse?\" },\n anamorphic: { value: false, label: \"anamorphic?\" },\n colorGain: { value: new Color(56, 22, 11), label: \"colorGain\" },\n\n Flare: folder({\n flareSpeed: {\n value: 0.4,\n step: 0.001,\n min: 0.0,\n max: 1.0,\n label: \"flareSpeed\",\n },\n flareShape: {\n value: 0.1,\n step: 0.001,\n min: 0.0,\n max: 1.0,\n label: \"flareShape\",\n },\n flareSize: {\n value: 0.005,\n step: 0.001,\n min: 0.0,\n max: 0.01,\n label: \"flareSize\",\n },\n }),\n\n SecondaryGhosts: folder({\n secondaryGhosts: { value: true, label: \"secondaryGhosts?\" },\n ghostScale: { value: 0.1, min: 0.01, max: 1.0, label: \"ghostScale\" },\n aditionalStreaks: { value: true, label: \"aditionalStreaks?\" },\n }),\n\n StartBurst: folder({\n starBurst: { value: true, label: \"starBurst?\" },\n haloScale: { value: 0.5, step: 0.01, min: 0.3, max: 1.0 },\n }),\n },\n { collapsed: true }\n ),\n});\n```\n\n#### All parameters are self-explanatory. However, it's important to note some key details about certain parameters.\n\n| Parameter | Explanation |\n| :-------------- | :-------------------------------- |\n| colorGain | Only accecpts RGB color format |\n| followMouse | Can't work with occlusion |\n| anamorphic | You should turn animation off |\n| dirtTextureFile | Can be changed to another texture |\n\n# Ignoring occlusion on some objects\n\nTo disable the occlusion effect, simply add `userData={{ lensflare: 'no-occlusion' }}` to your object/mesh. This feature is particularly useful for creating realistic skyboxes in demos. By utilizing this setting, the internal raycaster of Ultimate Lens Flare will exclude the designated object/mesh from occlusion calculations.\n\n# Improving performance\n\nFor optimal performance, it's crucial to employ the `` structure when utilizing this occlusion detection effect. This setup ensures a faster response time and enhances overall performance.\n\nIn the event of performance challenges, consider adjusting the `dpr` (device pixel ratio) and disabling `multisampling` on the EffectComposer, if feasible. These adjustments can help reclaim performance resources and improve the overall experience.\n\n⚠️ The `StarBurst` option is very intense for some GPU's to compute. If you have any issues with the performance, you can disable it. You can also use this drei component https://github.com/pmndrs/drei#performancemonitor to automatically disable this parameter when the performance drops.\n\n# Follow the mouse cursor or Fake Sun Vector Position\n\nYou can enable the `followMouse` to use this effect as a 2D effect, ignoring completelly the occlusion. If set to true, it will ignore the vector position to fake the sun light.\n\n```\n\n```\n\nYou can also use a position `{x: NUMBER, y: NUMBER, z: NUMBER}` to pass a position in the 3D world so the effect can read that position and project it into the effect. In order for this to work, `followMouse` needs to be set to `false`\n\n```\n\n```\n\n# Compatibility\n\n`Ultimate Lens Flare` is compatible with all modern browsers that support WebGL 2.0 (WebGL 1 is not supported), using three.js version r152 or later is recommended.\n\n# Limitations\n\nThe Ultimate Lens Flare leverages the raycaster to examine the material type of objects and determine if they are `MeshTransmissionMaterial` or `MeshPhysicalMaterial`. It checks for the transmission parameter to identify glass-like materials. Therefore, for an object to behave like glass, its material should have either `transmission = 1` or `transparent = true` and `opacity = NUMBER`. The effect automatically interprets the opacity `NUMBER` value to determine the brightness of the flare.\n\nFurthermore, the internal raycaster is configured to consider only the firstHit of the raycaster. This means that if the first detected object is neither transparent nor transmissive, it will occlude the effect.\n\n# Getting Started using this demo project\n\nDownload and install Node.js on your computer (https://nodejs.org/en/download/).\n\nThen, open VSCODE, drag the project folder to it. Open VSCODE terminal and install dependencies (you need to do this only in the first time)\n\n```shell\nnpm install\n```\n\nRun this command in your terminal to open a local server at localhost:3000\n\n```shell\nnpm run start\n```\n\n# How to contribute\n\n1. Install the dependency from the root of the project\n\n```shell\nnpm install\n```\n\n2. Start the project in dev mode\n\n```shell\nnpm run dev\n```\n\nThis will start the package in \"dev mode\" along with the example at `http://localhost:3000`\n\n3. Edit the code of the package in `package/lens-flare`. The lens flare effect itself is defined under `package/lens-flare/src/effect/LensFlare.jsx`.\n\n4. Every update made to the LensFlare effect should immediately be reflected on the example website.\n\n5. To try a build of the package run:\n\n```shell\nnpm run start\n```\n\nThis will bundle `@andersonmancini/lens-flare` and do a production build of the example and serve the resulting build at `http://localhost:3000`\n\n6. Submit a pull request for review with your changes!\n\n
\n\n# License\n\nA CC0 license is used for this project. You can do whatever you want with it, no attribution is required. However, if you do use it, I'd love to hear about it!\n\n# Can you leave a star please?\n\nI genuinely appreciate your support! If you're willing to show your appreciation, you can give me a star on GitHub 🎉 or consider buying a coffee to support my development at https://www.buymeacoffee.com/andersonmancini. The funds received will be utilized to create more valuable content about Three.js and invest in acquiring new courses. Thank you for your consideration!\n\n# Credits\n\nHard to remember everything I read to achieve this, but here's a list of resources that have been helpful to me:\n\n- https://www.shadertoy.com/view/4sK3W3\n- https://www.shadertoy.com/view/4sX3Rs\n- https://www.shadertoy.com/view/dllSRX\n- https://www.shadertoy.com/view/Xlc3D2\n- https://www.shadertoy.com/view/XtKfRV\n- https://blog.maximeheckel.com/posts/the-study-of-shaders-with-react-three-fiber/\n- https://blog.maximeheckel.com/posts/beautiful-and-mind-bending-effects-with-webgl-render-targets/\n- https://docs.pmnd.rs/react-postprocessing/effects/custom-effects\n- https://threejs.org/docs/index.html#manual/en/introduction/How-to-use-post-processing\n- https://threejs.org/docs/index.html#manual/en/introduction/Matrix-transformations\n- https://github.com/mrdoob/three.js/blob/master/examples/jsm/objects/Lensflare.js\n- https://chat.openai.com/chat\n- https://skybox.blockadelabs.com/\n\n### Special thanks\n\nHere is some of the many friends that helped me to achieve this effect:\n\n- https://twitter.com/0xca0a\n- https://github.com/abernier\n- https://twitter.com/N8Programs\n- https://twitter.com/MaximeHeckel\n- https://twitter.com/spidersharma\n- https://twitter.com/vis_prime\n- https://twitter.com/Cody_J_Bennett\n- https://twitter.com/0beqz\n- https://twitter.com/maya_ndljk\n- https://twitter.com/bruno_simon\n- https://twitter.com/CantBeFaraz\n- https://twitter.com/th_ebenezer\n- https://github.com/alynevieira\n","readmeFilename":"README.md"}