\n\n### How do I create a new page?\n\nA more correct way to say this would be \"How do I create a new route?\" The main\nfile `app.js` contains all the routes. Each route has a callback function\nassociated with it. Sometimes you will see three or more arguments for a route.\nIn a case like that, the first argument is still a URL string, while middle\narguments are what's called middleware. Think of middleware as a door. If this\ndoor prevents you from continuing forward, you won't get to your callback\nfunction. One such example is a route that requires authentication.\n\n```js\napp.get(\"/account\", passportConfig.isAuthenticated, userController.getAccount);\n```\n\nIt always goes from left to right. A user visits `/account` page. Then\n`isAuthenticated` middleware checks if you are authenticated:\n\n```js\nexports.isAuthenticated = (req, res, next) => {\n if (req.isAuthenticated()) {\n return next();\n }\n res.redirect(\"/login\");\n};\n```\n\nIf you are authenticated, you let this visitor pass through your \"door\" by\ncalling `return next();`. It then proceeds to the next middleware until it\nreaches the last argument, which is a callback function that typically renders a\ntemplate on `GET` requests or redirects on `POST` requests. In this case, if you\nare authenticated, you will be redirected to the _Account Management_ page;\notherwise, you will be redirected to the _Login_ page.\n\n```js\nexports.getAccount = (req, res) => {\n res.render(\"account/profile\", {\n title: \"Account Management\",\n });\n};\n```\n\nExpress.js has `app.get`, `app.post`, `app.put`, `app.delete`, but for the most\npart, you will only use the first two HTTP verbs, unless you are building a\nRESTful API. If you just want to display a page, then use `GET`, if you are\nsubmitting a form, sending a file then use `POST`.\n\nHere is a typical workflow for adding new routes to your application. Let's say\nwe are building a page that lists all books from the database.\n\n**Step 1.** Start by defining a route.\n\n```js\napp.get(\"/books\", bookController.getBooks);\n```\n\n---\n\n**Note:** As of Express 4.x you can define your routes like so:\n\n```js\napp.route(\"/books\")\n .get(bookController.getBooks)\n .post(bookController.createBooks)\n .put(bookController.updateBooks)\n .delete(bookController.deleteBooks);\n```\n\nAnd here is how a route would look if it required an _authentication_ and an\n_authorization_ middleware:\n\n```js\napp.route(\"/api/twitter\")\n .all(passportConfig.isAuthenticated)\n .all(passportConfig.isAuthorized)\n .get(apiController.getTwitter)\n .post(apiController.postTwitter);\n```\n\nUse whichever style that makes sense to you. Either one is acceptable. I think\nthat chaining HTTP verbs on `app.route` is a very clean and elegant approach,\nbut on the other hand, I can no longer see all my routes at a glance when you\nhave one route per line.\n\n**Step 2.** Create a new schema and a model `Book.js` inside the _models_\ndirectory.\n\n```js\nconst mongoose = require(\"mongoose\");\n\nconst bookSchema = new mongoose.Schema({\n name: String,\n});\n\nconst Book = mongoose.model(\"Book\", bookSchema);\nmodule.exports = Book;\n```\n\n**Step 3.** Create a new controller file called `book.js` inside the\n_controllers_ directory.\n\n```js\n/**\n * GET /books\n * List all books.\n */\nconst Book = require(\"../models/Book.js\");\n\nexports.getBooks = (req, res) => {\n Book.find((err, docs) => {\n res.render(\"books\", { books: docs });\n });\n};\n```\n\n**Step 4.** Import that controller in `app.js`.\n\n```js\nconst bookController = require(\"./controllers/book\");\n```\n\n**Step 5.** Create `books.pug` template.\n\n```pug\nextends layout\n\nblock content\n .page-header\n h3 All Books\n\n ul\n for book in books\n li= book.name\n```\n\nThat's it! I will say that you could have combined Step 1, 2, 3 as following:\n\n```js\napp.get(\"/books\", (req, res) => {\n Book.find((err, docs) => {\n res.render(\"books\", { books: docs });\n });\n});\n```\n\nSure, it's simpler, but as soon as you pass 1000 lines of code in `app.js` it\nbecomes a little challenging to navigate the file. I mean, the whole point of\nthis boilerplate project was to separate concerns, so you could work with your\nteammates without running into _MERGE CONFLICTS_. Imagine you have four\ndevelopers working on a single `app.js`, I promise you it won't be fun resolving\nmerge conflicts all the time. If you are the only developer, then it's okay. But\nas I said, once it gets up to a certain LoC size, it becomes difficult to\nmaintain everything in a single file.\n\nThat's all there is to it. Express.js is super simple to use. Most of the time\nyou will be dealing with other APIs to do the real work:\n[Mongoose](http://mongoosejs.com/docs/guide.html) for querying database,\nsocket.io for sending and receiving messages over websockets, sending emails via\n[Nodemailer](http://nodemailer.com/), form validation using\n[express-validator](https://github.com/ctavan/express-validator) library,\nparsing websites using [Cheerio](https://github.com/cheeriojs/cheerio), etc.\n\n
\n\n### How do I use Socket.io with Hackathon Starter?\n\n[Dan Stroot](https://github.com/dstroot) submitted an excellent\n[pull request](https://github.com/dstroot/hackathon-starter/commit/0a632def1ce8da446709d92812423d337c977d75)\nthat adds a real-time dashboard with socket.io. And as much as I'd like to add\nit to the project, I think it violates one of the main principles of the\nHackathon Starter:\n\n> When I started this project, my primary focus was on simplicity and ease of\n> use. I also tried to make it as generic and reusable as possible to cover most\n> use cases of hackathon web apps, **without being too specific**.\n\nWhen I need to use socket.io, I **really** need it, but most of the time - I\ndon't. But more importantly, websockets support is still experimental on most\nhosting providers. As of October 2013, Heroku supports websockets, but not until\nyou opt-in by running this command:\n\n```js\nheroku labs:enable websockets -a myapp\n```\n\nAnd what if you are deploying to OpenShift? They do support websockets, but it\nis currently in a preview state. So, for OpenShift you would need to change the\nsocket.io connect URI to the following:\n\n```js\nconst socket = io.connect(\"http://yoursite-namespace.rhcloud.com:8000\");\n```\n\nWait, why is it on port 8000? Who knows, and if I didn't run across this\n[blog post](http://velin-georgiev-blog.appspot.com/blog/set-up-nodejs-express-socketio-application-using-websockets-on-openshift-by-red-hat/)\nI wouldn't even know I had to use port 8000.\n\nI am really glad that Heroku and OpenShift at least have a websockets support,\nbecause many other PaaS providers still do not support it. Due to the\naforementioned issues with websockets, I cannot include socket.io as part of the\nHackathon Starter. _For now..._ If you need to use socket.io in your app, please\ncontinue reading.\n\nFirst, you need to install socket.io:\n\n```js\nnpm install socket.io\n```\n\nReplace `const app = express();` with the following code:\n\n```js\nconst app = express();\nconst server = require(\"http\").Server(app);\nconst io = require(\"socket.io\")(server);\n```\n\nI like to have the following code organization in `app.js` (from top to bottom):\nmodule dependencies, import controllers, import configs, connect to database,\nexpress configuration, routes, start the server, socket.io stuff. That way I\nalways know where to look for things.\n\nAdd the following code at the end of `app.js`:\n\n```js\nio.on(\"connection\", (socket) => {\n socket.emit(\"greet\", { hello: \"Hey there browser!\" });\n socket.on(\"respond\", (data) => {\n console.log(data);\n });\n socket.on(\"disconnect\", () => {\n console.log(\"Socket disconnected\");\n });\n});\n```\n\nOne last thing left to change:\n\n```js\napp.listen(app.get('port'), () => {\n```\n\nto\n\n```js\nserver.listen(app.get('port'), () => {\n```\n\nAt this point, we are done with the back-end.\n\nYou now have a choice - to include your JavaScript code in Pug templates or have\nall your client-side JavaScript in a separate file - in `main.js`. I admit, when\nI first started with Node.js and JavaScript in general, I placed all JavaScript\ncode inside templates because I have access to template variables passed in from\nExpress right then and there. It's the easiest thing you can do, but also the\nleast efficient and harder to maintain. Since then I almost never include inline\nJavaScript inside templates anymore.\n\nBut it's also understandable if you want to take the easier road. Most of the\ntime you don't even care about performance during hackathons, you just want to\n[_\"get shit done\"_](https://www.startupvitamins.com/media/products/13/aaron_levie_poster_black.jpg)\nbefore the time runs out. Well, either way, use whichever approach makes more\nsense to you. At the end of the day, it's **what** you build that matters, not\n**how** you build it.\n\nIf you want to stick all your JavaScript inside templates, then in\n`layout.pug` - your main template file, add this to `head` block.\n\n```pug\nscript(src='/socket.io/socket.io.js')\nscript.\n let socket = io.connect(window.location.href);\n socket.on('greet', function (data) {\n console.log(data);\n socket.emit('respond', { message: 'Hey there, server!' });\n });\n```\n\n**Note:** Notice the path of the `socket.io.js`, you don't actually have to have\n`socket.io.js` file anywhere in your project; it will be generated automatically\nat runtime.\n\nIf you want to have JavaScript code separate from templates, move that inline\nscript code into `main.js`, inside the `$(document).ready()` function:\n\n```js\n$(document).ready(function () {\n // Place JavaScript code here...\n let socket = io.connect(window.location.href);\n socket.on(\"greet\", function (data) {\n console.log(data);\n socket.emit(\"respond\", { message: \"Hey there, server!\" });\n });\n});\n```\n\nAnd we are done!\n\n## Cheatsheets\n\n###
 ES6 Cheatsheet\n\n#### Declarations\n\nDeclares a read-only named constant.\n\n```js\nconst name = \"yourName\";\n```\n\nDeclares a block scope local variable.\n\n```js\nlet index = 0;\n```\n\n#### Template Strings\n\nUsing the **\\`${}\\`** syntax, strings can embed expressions.\n\n```js\nconst name = \"Oggy\";\nconst age = 3;\n\nconsole.log(`My cat is named ${name} and is ${age} years old.`);\n```\n\n#### Modules\n\nTo import functions, objects or primitives exported from an external module.\nThese are the most common types of importing.\n\n```js\nconst name = require(\"module-name\");\n```\n\n```js\nconst { foo, bar } = require(\"module-name\");\n```\n\nTo export functions, objects or primitives from a given file or module.\n\n```js\nmodule.exports = { myFunction };\n```\n\n```js\nmodule.exports.name = \"yourName\";\n```\n\n```js\nmodule.exports = myFunctionOrClass;\n```\n\n#### Spread Operator\n\nThe spread operator allows an expression to be expanded in places where multiple\narguments (for function calls) or multiple elements (for array literals) are\nexpected.\n\n```js\nmyFunction(...iterableObject);\n```\n\n```jsx\n
 JavaScript Date Cheatsheet\n\n#### Unix Timestamp (seconds)\n\n```js\nMath.floor(Date.now() / 1000);\n```\n\n```MomentJS\nmoment().unix();\n```\n\n#### Add 30 minutes to a Date object\n\n```js\nvar now = new Date();\nnow.setMinutes(now.getMinutes() + 30);\n```\n\n```MomentJS\nmoment().add(30, 'minutes');\n```\n\n#### Date Formatting\n\n```js\n// DD-MM-YYYY\nvar now = new Date();\n\nvar DD = now.getDate();\nvar MM = now.getMonth() + 1;\nvar YYYY = now.getFullYear();\n\nif (DD < 10) {\n DD = \"0\" + DD;\n}\n\nif (MM < 10) {\n MM = \"0\" + MM;\n}\n\nconsole.log(MM + \"-\" + DD + \"-\" + YYYY); // 03-30-2016\n```\n\n```MomentJS\nconsole.log(moment(new Date(), 'MM-DD-YYYY'));\n```\n\n```js\n// hh:mm (12 hour time with am/pm)\nvar now = new Date();\nvar hours = now.getHours();\nvar minutes = now.getMinutes();\nvar amPm = hours >= 12 ? \"pm\" : \"am\";\n\nhours = hours % 12;\nhours = hours ? hours : 12;\nminutes = minutes < 10 ? \"0\" + minutes : minutes;\n\nconsole.log(hours + \":\" + minutes + \" \" + amPm); // 1:43 am\n```\n\n```MomentJS\nconsole.log(moment(new Date(), 'hh:mm A'));\n```\n\n#### Next week Date object\n\n```js\nvar today = new Date();\nvar nextWeek = new Date(today.getTime() + 7 * 24 * 60 * 60 * 1000);\n```\n\n```MomentJS\nmoment().add(7, 'days');\n```\n\n#### Yesterday Date object\n\n```js\nvar today = new Date();\nvar yesterday = date.setDate(date.getDate() - 1);\n```\n\n```MomentJS\nmoment().add(-1, 'days');\n```\n\n:top: [**back to top**](#table-of-contents)\n\n### Mongoose Cheatsheet\n\n#### Find all users:\n\n```js\nUser.find((err, users) => {\n console.log(users);\n});\n```\n\n#### Find a user by email:\n\n```js\nlet userEmail = \"example@gmail.com\";\nUser.findOne({ email: userEmail }, (err, user) => {\n console.log(user);\n});\n```\n\n#### Find 5 most recent user accounts:\n\n```js\nUser.find()\n .sort({ _id: -1 })\n .limit(5)\n .exec((err, users) => {\n console.log(users);\n });\n```\n\n#### Get the total count of a field from all documents:\n\nLet's suppose that each user has a `votes` field and you would like to count the\ntotal number of votes in your database across all users. One very inefficient\nway would be to loop through each document and manually accumulate the count. Or\nyou could use\n[MongoDB Aggregation Framework](https://docs.mongodb.org/manual/core/aggregation-introduction/)\ninstead:\n\n```js\nUser.aggregate(\n { $group: { _id: null, total: { $sum: \"$votes\" } } },\n (err, votesCount) => {\n console.log(votesCount.total);\n }\n);\n```\n\n:top: [**back to top**](#table-of-contents)\n\n## Docker\n\nYou will need docker and docker-compose installed to build the application.\n\n- [Docker installation](https://docs.docker.com/engine/installation/)\n\n- [Common problems setting up docker](https://docs.docker.com/toolbox/faqs/troubleshoot/)\n\nAfter installing docker, start the application with the following commands :\n\n```\n# To build the project for the first time or when you add dependencies\ndocker-compose build web\n\n# To start the application (or to restart after making changes to the source code)\ndocker-compose up web\n\n```\n\nTo view the app, find your docker IP address + port 8080 ( this will typically\nbe http://localhost:8080/ ). To use a port other than 8080, you would need to\nmodify the port in app.js, Dockerfile, and docker-compose.yml.\n\n## Deployment\n\nOnce you are ready to deploy your app, you will need to create an account with a\ncloud platform to host it. These are not the only choices, but they are my top\npicks. From my experience, the easiest way to get started is with **Heroku**. It\nwill automatically restart your Node.js process when it crashes, has\nzero-downtime deployments and supports custom domains on free accounts.\nAdditionally, you can create an account with **MongoDB Atlas** and then pick one\nof the _4_ providers below. Again, there are plenty of other choices, and you\nare not limited to just the ones listed below.\n\n### Deployment to Heroku\n\n
 \n\n- Download and install [Heroku Toolbelt](https://toolbelt.heroku.com/)\n- In a terminal, run `heroku login` and enter your Heroku credentials\n- From _your app_ directory run `heroku create`\n- Use the command `heroku config:set KEY=val` to set the different environment\n variables (KEY=val) for your application (i.e.\n `heroku config:set BASE_URL=[heroku App Name].herokuapp.com` or\n `heroku config:set MONGODB_URI=mongodb://dbuser:
 \n\n- Go to\n [https://www.mongodb.com/cloud/atlas](https://www.mongodb.com/cloud/atlas)\n- Click the green **Get started free** button\n- Fill in your information then hit **Get started free**\n- You will be redirected to Create New Cluster page.\n- Select a **Cloud Provider and Region** (such as AWS and a free tier region)\n- Select cluster Tier to **Free Shared Clusters**\n- Give Cluster a name (default: Cluster0)\n- Click on green **:zap:Create Cluster button**\n- Now, to access your database you need to create a DB user. To create a new\n MongoDB user, from the **Clusters view**, select the **Security tab**\n- Under the **MongoDB Users** tab, click on **+Add New User**\n- Fill in a username and password and give it either **Atlas Admin** User\n Privilege\n- Next, you will need to create an IP address whitelist and obtain the\n connection URI. In the Clusters view, under the cluster details (i.e.\n SANDBOX - Cluster0), click on the **CONNECT** button.\n- Under section **(1) Check the IP Whitelist**, click on **ALLOW ACCESS FROM\n ANYWHERE**. The form will add a field with `0.0.0.0/0`. Click **SAVE** to\n save the `0.0.0.0/0` whitelist.\n- Under section **(2) Choose a connection method**, click on **Connect Your\n Application**\n- In the new screen, select **Node.js** as Driver and version **2.2.12 or\n later**. _*WARNING*_: Do not pick 3.0 or later since connect-mongo can't\n handle mongodb+srv:// connection strings.\n- Finally, copy the URI connection string and replace the URI in MONGODB_URI\n of `.env.example` with this URI string. Make sure to replace the
  \n**NOTE** *These instructions might be out of date due to changes in OpenShift. Heroku is currently a good free alternative. If you the new process, please feel free to help us update this page*\n\n- First, install this Ruby gem: `sudo gem install rhc` :gem:\n- Run `rhc login` and enter your OpenShift credentials\n- From your app directory run `rhc app create MyApp nodejs-0.10`\n- **Note:** _MyApp_ is the name of your app (no spaces)\n- Once that is done, you will be provided with **URL**, **SSH** and **Git\n Remote** links\n- Visit provided **URL**, and you should see the _Welcome to your Node.js\n application on OpenShift_ page\n- Copy and paste **Git Remote** into\n `git remote add openshift YOUR_GIT_REMOTE`\n- Before you push your app, you need to do a few modifications to your code\n\nAdd these two lines to `app.js`, just place them anywhere before `app.listen()`:\n\n```js\nvar IP_ADDRESS = process.env.OPENSHIFT_NODEJS_IP || \"127.0.0.1\";\nvar PORT = process.env.OPENSHIFT_NODEJS_PORT || 8080;\n```\n\nThen change `app.listen()` to:\n\n```js\napp.listen(PORT, IP_ADDRESS, () => {\n console.log(\n `Express server listening on port ${PORT} in ${app.settings.env} mode`\n );\n});\n```\n\nAdd this to `package.json`, after _name_ and _version_. This is necessary\nbecause, by default, OpenShift looks for `server.js` file. And by specifying\n`supervisor app.js` it will automatically restart the server when node.js\nprocess crashes.\n\n```js\n\"main\": \"app.js\",\n\"scripts\": {\n \"start\": \"supervisor app.js\"\n},\n```\n\n- Finally, you can now push your code to OpenShift by running\n `git push -f openshift master`\n- **Note:** The first time you run this command, you have to pass `-f` (force)\n flag because OpenShift creates a dummy server with the welcome page when you\n create a new Node.js app. Passing `-f` flag will override everything with\n your _Hackathon Starter_ project repository. **Do not** run `git pull` as it\n will create unnecessary merge conflicts.\n- And you are done!\n\n---\n\n### Azure\n\n
 \n**NOTE** *Beyond the initial 12 month trial of Azure, the platform does not seem to offer a free tier for hosting NodeJS apps. If you are looking for a free tier service to host your app, Heroku might be a better choice at this point*\n\n- Login to [Windows Azure Management Portal](https://manage.windowsazure.com/)\n- Click the **+ NEW** button on the bottom left of the portal\n- Click **COMPUTE**, then **WEB APP**, then **QUICK CREATE**\n- Enter a name for **URL** and select the datacenter **REGION** for your web\n site\n- Click on **CREATE WEB APP** button\n- Once the web site status changes to _Running_, click on the name of the web\n site to access the Dashboard\n- At the bottom right of the Quickstart page, select **Set up a deployment\n from source control**\n- Select **Local Git repository** from the list, and then click the arrow\n- To enable Git publishing, Azure will ask you to create a user name and\n password\n- Once the Git repository is ready, you will be presented with a **GIT URL**\n- Inside your _Hackathon Starter_ directory, run\n `git remote add azure [Azure Git URL]`\n- To push your changes run `git push azure master`\n- **Note:** _You will be prompted for the password you created earlier_\n- On **Deployments** tab of your Windows Azure Web App, you will see the\n deployment history\n\n---\n\n## IBM Bluemix Cloud Platform\n\n**NOTE** _At this point it appears that Bluemix's free tier to host NodeJS apps\nis limited to 30 days. If you are looking for a free tier service to host your\napp, Heroku might be a better choice at this point_\n\n1. Create a Bluemix Account\n\n [Sign up](https://console.ng.bluemix.net/registration/?target=%2Fdashboard%2Fapps)\n for Bluemix, or use an existing account.\n\n1. Download and install the\n [Cloud Foundry CLI](https://github.com/cloudfoundry/cli) to push your\n applications to Bluemix.\n\n1. Create a `manifest.yml` file in the root of your application.\n\n```\napplications:\n- name:
  \n[Conversation](https://www.ibm.com/watson/services/conversation/)** - Quickly\nbuild and deploy chatbots and virtual agents across a variety of channels,\nincluding mobile devices, messaging platforms, and even robots.\n\n**
 \n[Discovery](https://www.ibm.com/watson/services/discovery/)** - Unlock hidden\nvalue in data to find answers, monitor trends and surface patterns with the\nworld’s most advanced cloud-native insight engine.\n\n**
 \n[Language Translator](https://www.ibm.com/watson/services/language-translator/)** -\nTranslate text from one language to another.\n\n**
 \n[Natural Language Classifier](https://www.ibm.com/watson/services/natural-language-classifier/)** -\nInterpret and classify natural language with confidence.\n\n**
 \n[Natural Language Understanding](https://www.ibm.com/watson/services/natural-language-understanding/)** -\nAnalyze text to extract meta-data from content such as concepts, entities,\nkeywords and more.\n\n**
 \n[Personality Insights](https://www.ibm.com/watson/services/personality-insights/)** -\nPredict personality characteristics, needs and values through written text.\n\n**
 \n[Speech to Text](https://www.ibm.com/watson/services/speech-to-text/)** -\nConvert audio and voice into written text for quick understanding of content.\n\n**
 \n[Text to Speech](https://www.ibm.com/watson/services/text-to-speech/)** -\nConvert written text into natural sounding audio in a variety of languages and\nvoices.\n\n**
 \n[Tone Analyzer](https://www.ibm.com/watson/services/tone-analyzer/)** -\nUnderstand emotions, social tendencies and perceived writing style.\n\n**
 \n[Visual Recognition](https://www.ibm.com/watson/services/visual-recognition/)** -\nTag, classify and search visual content using machine learning.\n\n[Click here](https://www.ibm.com/watson/developercloud/services-catalog.html)\nfor live demos of each Watson service.\n\n---\n\n### Google Cloud Platform\n\n
 \n\n- [Download and install Node.js](https://nodejs.org/)\n- [Select or create](https://console.cloud.google.com/project) a Google Cloud\n Platform Console project\n- [Enable billing](https://support.google.com/cloud/answer/6293499#enable-billing)\n for your project (there's a $300 free trial)\n- Install and initialize the\n [Google Cloud SDK](https://cloud.google.com/sdk/docs/quickstarts)\n- Create an `app.yaml` file at the root of your `hackathon-starter` folder\n with the following contents:\n\n ```yaml\n runtime: nodejs\n env: flex\n manual_scaling:\n instances: 1\n ```\n\n- Make sure you've set `MONGODB_URI` in `.env.example`\n- Run the following command to deploy the `hackathon-starter` app:\n\n ```bash\n gcloud app deploy\n ```\n\n- [Monitor your deployed app](https://console.cloud.google.com/appengine) in\n the Cloud Console\n- [View the logs](https://console.cloud.google.com/logs/viewer) for your app\n in the Cloud Console\n\n## Production\n\nIf you are starting with this boilerplate to build an application for prod\ndeployment, or if after your hackathon you would like to get your project\nhardened for production use, see\n[prod-checklist.md](https://github.com/sahat/hackathon-starter/blob/master/prod-checklist.md).\n\n## Changelog\n\nYou can find the changelog for the project in:\n[CHANGELOG.md](https://github.com/sahat/hackathon-starter/blob/master/CHANGELOG.md)\n\n## Contributing\n\nIf something is unclear, confusing, or needs to be refactored, please let me\nknow. Pull requests are always welcome, but due to the opinionated nature of\nthis project, I cannot accept every pull request. Please open an issue before\nsubmitting a pull request. This project uses\n[Airbnb JavaScript Style Guide](https://github.com/airbnb/javascript) with a few\nminor exceptions. If you are submitting a pull request that involves Pug\ntemplates, please make sure you are using _spaces_, not tabs.\n\n## License\n\nThe MIT License (MIT)\n\nCopyright (c) 2014-2020 Sahat Yalkabov\n\nPermission is hereby granted, free of charge, to any person obtaining a copy of\nthis software and associated documentation files (the \"Software\"), to deal in\nthe Software without restriction, including without limitation the rights to\nuse, copy, modify, merge, publish, distribute, sublicense, and/or sell copies of\nthe Software, and to permit persons to whom the Software is furnished to do so,\nsubject to the following conditions:\n\nThe above copyright notice and this permission notice shall be included in all\ncopies or substantial portions of the Software.\n\nTHE SOFTWARE IS PROVIDED \"AS IS\", WITHOUT WARRANTY OF ANY KIND, EXPRESS OR\nIMPLIED, INCLUDING BUT NOT LIMITED TO THE WARRANTIES OF MERCHANTABILITY, FITNESS\nFOR A PARTICULAR PURPOSE AND NONINFRINGEMENT. IN NO EVENT SHALL THE AUTHORS OR\nCOPYRIGHT HOLDERS BE LIABLE FOR ANY CLAIM, DAMAGES OR OTHER LIABILITY, WHETHER\nIN AN ACTION OF CONTRACT, TORT OR OTHERWISE, ARISING FROM, OUT OF OR IN\nCONNECTION WITH THE SOFTWARE OR THE USE OR OTHER DEALINGS IN THE SOFTWARE.\n","readmeFilename":"README.md","bugs":{"url":"https://github.com/sahat/hackathon-starter/issues"},"homepage":"https://github.com/sahat/hackathon-starter#readme","_id":"@atomist/hackathon-starter@6.0.1-master.5","_nodeVersion":"12.20.0","_npmVersion":"6.14.8","dist":{"integrity":"sha512-rC6nx5vwS9YWSX5fEumDwnwA11XQZ3VM8rJKr+35ECbZHnzIJRAPp2GS0TDYfWJU5ovSdCs+hJ7YcO7sQj4KGQ==","shasum":"3f43d9e6b37b168cb6586bfac3b80e8c724c14aa","tarball":"https://registry.npmjs.org/@atomist/hackathon-starter/-/hackathon-starter-6.0.1-master.5.tgz","fileCount":72,"unpackedSize":665547,"npm-signature":"-----BEGIN PGP SIGNATURE-----\r\nVersion: OpenPGP.js v3.0.13\r\nComment: https://openpgpjs.org\r\n\r\nwsFcBAEBCAAQBQJf0Ij7CRA9TVsSAnZWagAAqAkP/iGFfAWBWTLQjXDb/voH\nj6pLAthOyzKwKrYN10dZ7sZo9wzl7HnvGiog4umYqdctjJ6gAaSgLpYV9N/g\nlHdlFQEQHaq8TaOkn2IbHwb1CbXFR/KcB9rEYJiHTR0EFWtLsBW5vxdz6VYx\nirCIIKJAXSLBDZetU944n6ttoaBT6JTgb81hJGMw5fNBmK/3bWcJ7Ty6FN+j\nkrZr3tYTzIEvK2p2zzePMsqTZj1AXDvfWuLr40JQRtI6bfLmF5j/JPeDkuVq\n5hxuHHh6iF7xvoW6yCI2CXas8VU/ROcERCkDKAAT8fSqfbdSGiJGBIR04mya\nLGpyN91pRlq8AX4Sesop+W9MmjiJ1WLAU+OgLvOHpMXtScnhZ7YWVPpyuTIq\nZsZ3qAxt7WkslOAT7KYPGtjcBKoOWLRtOwLMj8pe3JT7e/0JsDuiWJKl53ar\njHubya+cH1kcqlFpXVcIwetMh5vEfx48bqtPcU2CO3gPOrIDT9a9r/FZFrQH\nP08v9IqZ8fEGVrCkOfiPfzho0WNoB77iJ5TGujk7c4pystsXKW921bfxjlmb\nO8/U+eRVU+UBMF5lC8Gk4jtDPuyiHXZaVrXzWwdqsLZ+mehTAU9ufZaLa6+R\nEXC7UJpQsnUlawYzqpGX9bHRd2UXUItQI1pBWFoJViLMk+bL8q5b8kbjy4pe\n5E02\r\n=DQpM\r\n-----END PGP SIGNATURE-----\r\n","signatures":[{"keyid":"SHA256:jl3bwswu80PjjokCgh0o2w5c2U4LhQAE57gj9cz1kzA","sig":"MEUCIQCNJPYYTIe50oW8CEbMa+snbc34uAtJHcs8KdD2MB6XdQIgY4ufWA8HxFNXX+vR8QdJoepcuSdoK4Wy6EkeOaWhM3k="}]},"_npmUser":{"name":"atomist-bot","email":"npm@atomist.com"},"directories":{},"maintainers":[{"name":"slimslenderslacks","email":"slimslenderslacks@gmail.com"},{"name":"cdupuis","email":"cd@atomist.com"},{"name":"ddatomist","email":"david@atomist.com"},{"name":"atomist-bot","email":"npm@atomist.com"}],"_npmOperationalInternal":{"host":"s3://npm-registry-packages","tmp":"tmp/hackathon-starter_6.0.1-master.5_1607502075340_0.13170216600350027"},"_hasShrinkwrap":false},"6.0.1-branch-atomist-prettier-config-master.1":{"name":"@atomist/hackathon-starter","version":"6.0.1-branch-atomist-prettier-config-master.1","description":"A boilerplate for Node.js web applications","repository":{"type":"git","url":"git+https://github.com/sahat/hackathon-starter.git"},"license":"MIT","author":{"name":"Sahat Yalkabov"},"contributors":[{"name":"Yashar Fakhari","url":"https://github.com/YasharF"}],"scripts":{"postinstall":"npm rebuild node-sass","start":"node app.js","test":"nyc mocha --timeout=10000 --exit","lint":"eslint \"**/*.js\"","atm:lint:prettier":"prettier --write"},"dependencies":{"@fortawesome/fontawesome-free":"^5.15.1","@ladjs/bootstrap-social":"^7.0.2","@octokit/rest":"^18.0.6","axios":"^0.20.0","bcrypt":"^5.0.0","body-parser":"^1.19.0","bootstrap":"^4.5.2","chalk":"^4.1.0","chart.js":"^2.9.3","cheerio":"^1.0.0-rc.3","compression":"^1.7.4","connect-mongo":"^3.2.0","dotenv":"^8.2.0","errorhandler":"^1.5.1","express":"^4.17.1","express-flash":"^0.0.2","express-handlebars":"^5.1.0","express-session":"^1.17.1","express-status-monitor":"^1.3.3","googleapis":"^61.0.0","instagram-node":"^0.5.8","jquery":"^3.5.1","lastfm":"^0.9.3","lob":"^6.1.0","lodash":"^4.17.20","lusca":"^1.6.1","mailchecker":"^3.3.14","moment":"^2.29.1","mongoose":"^5.10.9","morgan":"^1.10.0","multer":"^1.4.2","node-quickbooks":"^2.0.37","node-sass":"^4.14.1","node-sass-middleware":"^0.11.0","nodemailer":"^6.4.13","passport":"^0.4.1","passport-facebook":"^3.0.0","passport-github2":"^0.1.12","passport-google-oauth":"^2.0.0","passport-instagram":"^1.0.0","passport-linkedin-oauth2":"^2.0.0","passport-local":"^1.0.0","passport-oauth":"^1.0.0","passport-oauth2-refresh":"^2.0.0","passport-openid":"^0.4.0","passport-snapchat":"^1.0.0","passport-twitch-new":"^0.0.2","passport-twitter":"^1.0.4","paypal-rest-sdk":"^1.8.1","popper.js":"^1.16.1","pug":"^3.0.0","stripe":"^8.110.0","tumblr.js":"^3.0.0","twilio":"^3.49.4","twitter-lite":"^0.14.0","validator":"^13.1.17"},"devDependencies":{"chai":"^4.2.0","eslint":"^7.11.0","eslint-config-airbnb-base":"^14.2.0","eslint-plugin-chai-friendly":"^0.6.0","eslint-plugin-import":"^2.22.1","husky":"^4.3.5","lint-staged":"^10.5.3","mocha":"^8.1.3","nyc":"^15.1.0","prettier":"^2.2.1","sinon":"^9.2.0","supertest":"^5.0.0"},"engines":{"node":">=10.22.1","npm":">=6.14.6"},"husky":{"hooks":{"pre-commit":"lint-staged"}},"lint-staged":{"**/*.@(graphql|json|markdown|yaml|yml|md)":"npm run atm:lint:prettier"},"readme":"\nHackathon Starter =======================\n\n[](https://david-dm.org/sahat/hackathon-starter)\n[](https://david-dm.org/sahat/hackathon-starter?type=dev)\n[](https://travis-ci.org/sahat/hackathon-starter)\n[](https://gitter.im/sahat/hackathon-starter?utm_source=badge&utm_medium=badge&utm_campaign=pr-badge&utm_content=badge)\n\n**Live Demo**: https://hackathon-starter.walcony.com\n\nJump to\n[What's new?](https://github.com/sahat/hackathon-starter/blob/master/CHANGELOG.md)\n\nA boilerplate for **Node.js** web applications.\n\nIf you have attended any hackathons in the past, then you know how much time it\ntakes to get a project started: decide on what to build, pick a programming\nlanguage, pick a web framework, pick a CSS framework. A while later, you might\nhave an initial project up on GitHub and only then can other team members start\ncontributing. Or how about doing something as simple as _Sign in with Facebook_\nauthentication? You can spend hours on it if you are not familiar with how OAuth\n2.0 works.\n\nWhen I started this project, my primary focus was on **simplicity** and **ease\nof use**. I also tried to make it as **generic** and **reusable** as possible to\ncover most use cases of hackathon web apps, without being too specific. In the\nworst case, you can use this as a learning guide for your projects, if for\nexample you are only interested in **Sign in with Google** authentication and\nnothing else.\n\n### Testimonials\n\n> [**“Nice! That README alone is already gold!”**](https://www.producthunt.com/tech/hackathon-starter#comment-224732)
\n\n- [Download and install Node.js](https://nodejs.org/)\n- [Select or create](https://console.cloud.google.com/project) a Google Cloud\n Platform Console project\n- [Enable billing](https://support.google.com/cloud/answer/6293499#enable-billing)\n for your project (there's a $300 free trial)\n- Install and initialize the\n [Google Cloud SDK](https://cloud.google.com/sdk/docs/quickstarts)\n- Create an `app.yaml` file at the root of your `hackathon-starter` folder\n with the following contents:\n\n ```yaml\n runtime: nodejs\n env: flex\n manual_scaling:\n instances: 1\n ```\n\n- Make sure you've set `MONGODB_URI` in `.env.example`\n- Run the following command to deploy the `hackathon-starter` app:\n\n ```bash\n gcloud app deploy\n ```\n\n- [Monitor your deployed app](https://console.cloud.google.com/appengine) in\n the Cloud Console\n- [View the logs](https://console.cloud.google.com/logs/viewer) for your app\n in the Cloud Console\n\n## Production\n\nIf you are starting with this boilerplate to build an application for prod\ndeployment, or if after your hackathon you would like to get your project\nhardened for production use, see\n[prod-checklist.md](https://github.com/sahat/hackathon-starter/blob/master/prod-checklist.md).\n\n## Changelog\n\nYou can find the changelog for the project in:\n[CHANGELOG.md](https://github.com/sahat/hackathon-starter/blob/master/CHANGELOG.md)\n\n## Contributing\n\nIf something is unclear, confusing, or needs to be refactored, please let me\nknow. Pull requests are always welcome, but due to the opinionated nature of\nthis project, I cannot accept every pull request. Please open an issue before\nsubmitting a pull request. This project uses\n[Airbnb JavaScript Style Guide](https://github.com/airbnb/javascript) with a few\nminor exceptions. If you are submitting a pull request that involves Pug\ntemplates, please make sure you are using _spaces_, not tabs.\n\n## License\n\nThe MIT License (MIT)\n\nCopyright (c) 2014-2020 Sahat Yalkabov\n\nPermission is hereby granted, free of charge, to any person obtaining a copy of\nthis software and associated documentation files (the \"Software\"), to deal in\nthe Software without restriction, including without limitation the rights to\nuse, copy, modify, merge, publish, distribute, sublicense, and/or sell copies of\nthe Software, and to permit persons to whom the Software is furnished to do so,\nsubject to the following conditions:\n\nThe above copyright notice and this permission notice shall be included in all\ncopies or substantial portions of the Software.\n\nTHE SOFTWARE IS PROVIDED \"AS IS\", WITHOUT WARRANTY OF ANY KIND, EXPRESS OR\nIMPLIED, INCLUDING BUT NOT LIMITED TO THE WARRANTIES OF MERCHANTABILITY, FITNESS\nFOR A PARTICULAR PURPOSE AND NONINFRINGEMENT. IN NO EVENT SHALL THE AUTHORS OR\nCOPYRIGHT HOLDERS BE LIABLE FOR ANY CLAIM, DAMAGES OR OTHER LIABILITY, WHETHER\nIN AN ACTION OF CONTRACT, TORT OR OTHERWISE, ARISING FROM, OUT OF OR IN\nCONNECTION WITH THE SOFTWARE OR THE USE OR OTHER DEALINGS IN THE SOFTWARE.\n","readmeFilename":"README.md","bugs":{"url":"https://github.com/sahat/hackathon-starter/issues"},"homepage":"https://github.com/sahat/hackathon-starter#readme","_id":"@atomist/hackathon-starter@6.0.1-master.5","_nodeVersion":"12.20.0","_npmVersion":"6.14.8","dist":{"integrity":"sha512-rC6nx5vwS9YWSX5fEumDwnwA11XQZ3VM8rJKr+35ECbZHnzIJRAPp2GS0TDYfWJU5ovSdCs+hJ7YcO7sQj4KGQ==","shasum":"3f43d9e6b37b168cb6586bfac3b80e8c724c14aa","tarball":"https://registry.npmjs.org/@atomist/hackathon-starter/-/hackathon-starter-6.0.1-master.5.tgz","fileCount":72,"unpackedSize":665547,"npm-signature":"-----BEGIN PGP SIGNATURE-----\r\nVersion: OpenPGP.js v3.0.13\r\nComment: https://openpgpjs.org\r\n\r\nwsFcBAEBCAAQBQJf0Ij7CRA9TVsSAnZWagAAqAkP/iGFfAWBWTLQjXDb/voH\nj6pLAthOyzKwKrYN10dZ7sZo9wzl7HnvGiog4umYqdctjJ6gAaSgLpYV9N/g\nlHdlFQEQHaq8TaOkn2IbHwb1CbXFR/KcB9rEYJiHTR0EFWtLsBW5vxdz6VYx\nirCIIKJAXSLBDZetU944n6ttoaBT6JTgb81hJGMw5fNBmK/3bWcJ7Ty6FN+j\nkrZr3tYTzIEvK2p2zzePMsqTZj1AXDvfWuLr40JQRtI6bfLmF5j/JPeDkuVq\n5hxuHHh6iF7xvoW6yCI2CXas8VU/ROcERCkDKAAT8fSqfbdSGiJGBIR04mya\nLGpyN91pRlq8AX4Sesop+W9MmjiJ1WLAU+OgLvOHpMXtScnhZ7YWVPpyuTIq\nZsZ3qAxt7WkslOAT7KYPGtjcBKoOWLRtOwLMj8pe3JT7e/0JsDuiWJKl53ar\njHubya+cH1kcqlFpXVcIwetMh5vEfx48bqtPcU2CO3gPOrIDT9a9r/FZFrQH\nP08v9IqZ8fEGVrCkOfiPfzho0WNoB77iJ5TGujk7c4pystsXKW921bfxjlmb\nO8/U+eRVU+UBMF5lC8Gk4jtDPuyiHXZaVrXzWwdqsLZ+mehTAU9ufZaLa6+R\nEXC7UJpQsnUlawYzqpGX9bHRd2UXUItQI1pBWFoJViLMk+bL8q5b8kbjy4pe\n5E02\r\n=DQpM\r\n-----END PGP SIGNATURE-----\r\n","signatures":[{"keyid":"SHA256:jl3bwswu80PjjokCgh0o2w5c2U4LhQAE57gj9cz1kzA","sig":"MEUCIQCNJPYYTIe50oW8CEbMa+snbc34uAtJHcs8KdD2MB6XdQIgY4ufWA8HxFNXX+vR8QdJoepcuSdoK4Wy6EkeOaWhM3k="}]},"_npmUser":{"name":"atomist-bot","email":"npm@atomist.com"},"directories":{},"maintainers":[{"name":"slimslenderslacks","email":"slimslenderslacks@gmail.com"},{"name":"cdupuis","email":"cd@atomist.com"},{"name":"ddatomist","email":"david@atomist.com"},{"name":"atomist-bot","email":"npm@atomist.com"}],"_npmOperationalInternal":{"host":"s3://npm-registry-packages","tmp":"tmp/hackathon-starter_6.0.1-master.5_1607502075340_0.13170216600350027"},"_hasShrinkwrap":false},"6.0.1-branch-atomist-prettier-config-master.1":{"name":"@atomist/hackathon-starter","version":"6.0.1-branch-atomist-prettier-config-master.1","description":"A boilerplate for Node.js web applications","repository":{"type":"git","url":"git+https://github.com/sahat/hackathon-starter.git"},"license":"MIT","author":{"name":"Sahat Yalkabov"},"contributors":[{"name":"Yashar Fakhari","url":"https://github.com/YasharF"}],"scripts":{"postinstall":"npm rebuild node-sass","start":"node app.js","test":"nyc mocha --timeout=10000 --exit","lint":"eslint \"**/*.js\"","atm:lint:prettier":"prettier --write"},"dependencies":{"@fortawesome/fontawesome-free":"^5.15.1","@ladjs/bootstrap-social":"^7.0.2","@octokit/rest":"^18.0.6","axios":"^0.20.0","bcrypt":"^5.0.0","body-parser":"^1.19.0","bootstrap":"^4.5.2","chalk":"^4.1.0","chart.js":"^2.9.3","cheerio":"^1.0.0-rc.3","compression":"^1.7.4","connect-mongo":"^3.2.0","dotenv":"^8.2.0","errorhandler":"^1.5.1","express":"^4.17.1","express-flash":"^0.0.2","express-handlebars":"^5.1.0","express-session":"^1.17.1","express-status-monitor":"^1.3.3","googleapis":"^61.0.0","instagram-node":"^0.5.8","jquery":"^3.5.1","lastfm":"^0.9.3","lob":"^6.1.0","lodash":"^4.17.20","lusca":"^1.6.1","mailchecker":"^3.3.14","moment":"^2.29.1","mongoose":"^5.10.9","morgan":"^1.10.0","multer":"^1.4.2","node-quickbooks":"^2.0.37","node-sass":"^4.14.1","node-sass-middleware":"^0.11.0","nodemailer":"^6.4.13","passport":"^0.4.1","passport-facebook":"^3.0.0","passport-github2":"^0.1.12","passport-google-oauth":"^2.0.0","passport-instagram":"^1.0.0","passport-linkedin-oauth2":"^2.0.0","passport-local":"^1.0.0","passport-oauth":"^1.0.0","passport-oauth2-refresh":"^2.0.0","passport-openid":"^0.4.0","passport-snapchat":"^1.0.0","passport-twitch-new":"^0.0.2","passport-twitter":"^1.0.4","paypal-rest-sdk":"^1.8.1","popper.js":"^1.16.1","pug":"^3.0.0","stripe":"^8.110.0","tumblr.js":"^3.0.0","twilio":"^3.49.4","twitter-lite":"^0.14.0","validator":"^13.1.17"},"devDependencies":{"chai":"^4.2.0","eslint":"^7.11.0","eslint-config-airbnb-base":"^14.2.0","eslint-plugin-chai-friendly":"^0.6.0","eslint-plugin-import":"^2.22.1","husky":"^4.3.5","lint-staged":"^10.5.3","mocha":"^8.1.3","nyc":"^15.1.0","prettier":"^2.2.1","sinon":"^9.2.0","supertest":"^5.0.0"},"engines":{"node":">=10.22.1","npm":">=6.14.6"},"husky":{"hooks":{"pre-commit":"lint-staged"}},"lint-staged":{"**/*.@(graphql|json|markdown|yaml|yml|md)":"npm run atm:lint:prettier"},"readme":"\nHackathon Starter =======================\n\n[](https://david-dm.org/sahat/hackathon-starter)\n[](https://david-dm.org/sahat/hackathon-starter?type=dev)\n[](https://travis-ci.org/sahat/hackathon-starter)\n[](https://gitter.im/sahat/hackathon-starter?utm_source=badge&utm_medium=badge&utm_campaign=pr-badge&utm_content=badge)\n\n**Live Demo**: https://hackathon-starter.walcony.com\n\nJump to\n[What's new?](https://github.com/sahat/hackathon-starter/blob/master/CHANGELOG.md)\n\nA boilerplate for **Node.js** web applications.\n\nIf you have attended any hackathons in the past, then you know how much time it\ntakes to get a project started: decide on what to build, pick a programming\nlanguage, pick a web framework, pick a CSS framework. A while later, you might\nhave an initial project up on GitHub and only then can other team members start\ncontributing. Or how about doing something as simple as _Sign in with Facebook_\nauthentication? You can spend hours on it if you are not familiar with how OAuth\n2.0 works.\n\nWhen I started this project, my primary focus was on **simplicity** and **ease\nof use**. I also tried to make it as **generic** and **reusable** as possible to\ncover most use cases of hackathon web apps, without being too specific. In the\nworst case, you can use this as a learning guide for your projects, if for\nexample you are only interested in **Sign in with Google** authentication and\nnothing else.\n\n### Testimonials\n\n> [**“Nice! That README alone is already gold!”**](https://www.producthunt.com/tech/hackathon-starter#comment-224732)\n> — Adrian Le Bas\n\n> [**“Awesome. Simply awesome.”**](https://www.producthunt.com/tech/hackathon-starter#comment-224966)
\n> — Steven Rueter\n\n> [**“I'm using it for a year now and many projects, it's an awesome boilerplate and the project is well maintained!”**](https://www.producthunt.com/tech/hackathon-starter#comment-228610)
\n> — Kevin Granger\n\n> **“Small world with Sahat's project. We were using his hackathon starter for\n> our hackathon this past weekend and got some prizes. Really handy repo!”**
\n> — Interview candidate for one of the companies I used to work with.\n\n
Modern Theme
\n\n\n\nFlatly Bootstrap Theme
\n\n\n\nAPI Examples
\n\n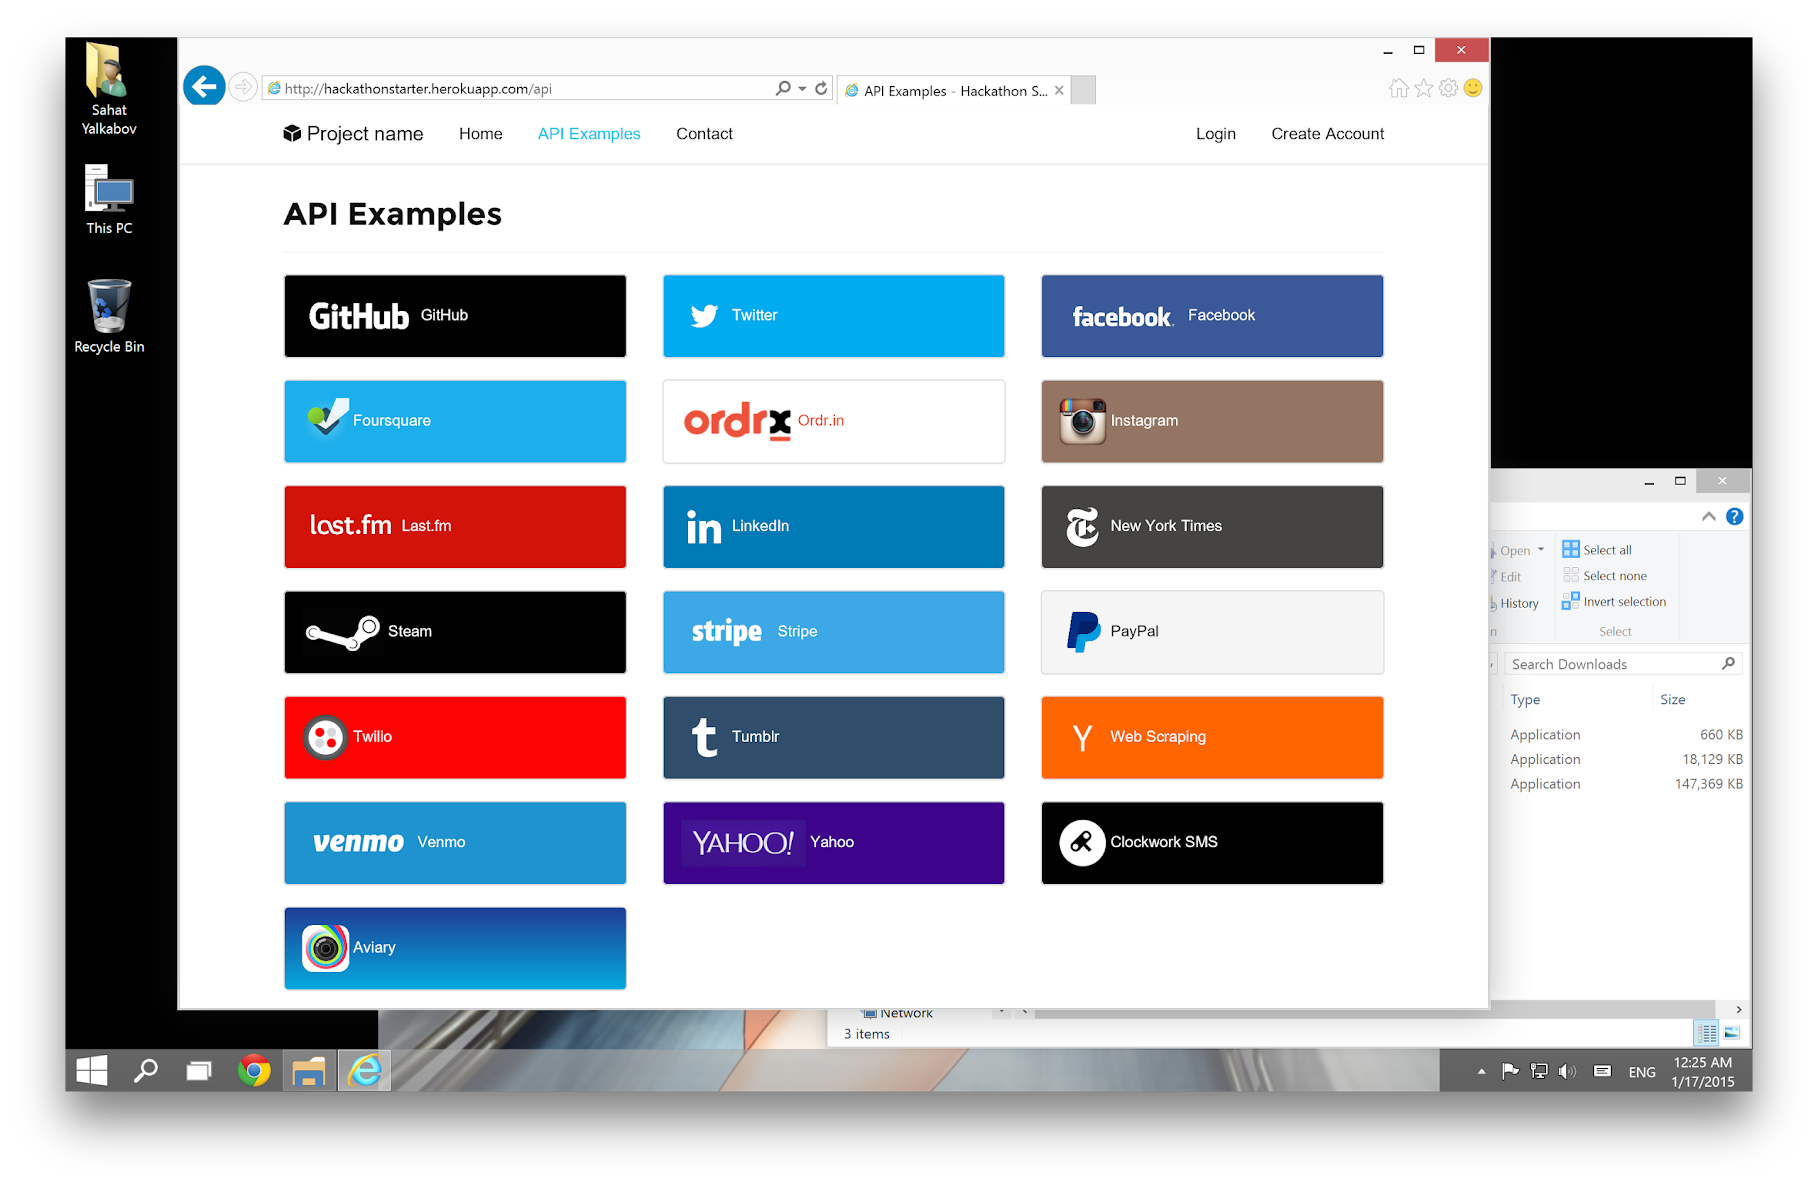\n\n## Table of Contents\n\n- [Features](#features)\n- [Prerequisites](#prerequisites)\n- [Getting Started](#getting-started)\n- [Obtaining API Keys](#obtaining-api-keys)\n- [Project Structure](#project-structure)\n- [List of Packages](#list-of-packages)\n- [Useful Tools and Resources](#useful-tools-and-resources)\n- [Recommended Design Resources](#recommended-design-resources)\n- [Recommended Node.js Libraries](#recommended-nodejs-libraries)\n- [Recommended Client-side Libraries](#recommended-client-side-libraries)\n- [Pro Tips](#pro-tips)\n- [FAQ](#faq)\n- [How It Works](#how-it-works-mini-guides)\n- [Cheatsheets](#cheatsheets)\n - [ES6](#-es6-cheatsheet)\n - [JavaScript Date](#-javascript-date-cheatsheet)\n - [Mongoose Cheatsheet](#mongoose-cheatsheet)\n- [Deployment](#deployment)\n- [Docker](#docker)\n- [Production](#production)\n- [Changelog](#changelog)\n- [Contributing](#contributing)\n- [License](#license)\n\n## Features\n\n- **Local Authentication** using Email and Password\n- **OAuth 1.0a Authentication** via Twitter\n- **OAuth 2.0 Authentication** via Facebook, Google, GitHub, LinkedIn,\n Instagram\n- Flash notifications\n- MVC Project Structure\n- Node.js clusters support\n- Sass stylesheets (auto-compiled via middleware)\n- Bootstrap 4 + Extra Themes\n- Contact Form (powered by Mailgun, Sendgrid or Mandrill)\n- **Account Management**\n- Gravatar\n- Profile Details\n- Change Password\n- Forgot Password\n- Reset Password\n- Link multiple OAuth strategies to one account\n- Delete Account\n- CSRF protection\n- **API Examples**: Facebook, Foursquare, Last.fm, Tumblr, Twitter, Stripe,\n LinkedIn and more.\n\n## Prerequisites\n\n- [MongoDB](https://www.mongodb.com/download-center/community)\n- [Node.js 10+](http://nodejs.org)\n- Command Line Tools\n- **Mac\n OS X:** [Xcode](https://itunes.apple.com/us/app/xcode/id497799835?mt=12) (or\n **OS X 10.9+**: `xcode-select --install`)\n-
  **Windows:**\n [Visual Studio](https://www.visualstudio.com/products/visual-studio-community-vs)\n OR [Visual Studio Code](https://code.visualstudio.com) +\n [Windows Subsystem for Linux - Ubuntu](https://docs.microsoft.com/en-us/windows/wsl/install-win10)\n-
  **Ubuntu**\n /\n
  **Linux\n Mint:** `sudo apt-get install build-essential`\n-
  **Fedora**:\n `sudo dnf groupinstall \"Development Tools\"`\n-
  **OpenSUSE:**\n `sudo zypper install --type pattern devel_basis`\n\n**Note:** If you are new to Node or Express, you may find\n[Node.js & Express From Scratch series](https://www.youtube.com/watch?v=Ad2ngx6CT0M&list=PLillGF-RfqbYRpji8t4SxUkMxfowG4Kqp&index=3)\nhelpful for learning the basics of Node and Express. Alternatively, here is\nanother great tutorial for complete beginners -\n[Getting Started With Node.js, Express, MongoDB](http://cwbuecheler.com/web/tutorials/2013/node-express-mongo/).\n\n## Getting Started\n\nThe easiest way to get started is to clone the repository:\n\n```bash\n# Get the latest snapshot\ngit clone https://github.com/sahat/hackathon-starter.git myproject\n\n# Change directory\ncd myproject\n\n# Install NPM dependencies\nnpm install\n\n# Then simply start your app\nnode app.js\n```\n\n**Warning:** If you want to use some API that need https to work (for example\nPinterest or facebook), you will need to download [ngrok](https://ngrok.com/).\nYou must start ngrok after starting the project.\n\n```bash\n# start ngrok to intercept the data exchanged on port 8080\n./ngrok http 8080\n```\n\nNext, you must use the https URL defined by ngrok, for example,\n`https://hackaton.ngrok.io`\n\n**Note:** I highly recommend installing\n[Nodemon](https://github.com/remy/nodemon). It watches for any changes in your\nnode.js app and automatically restarts the server. Once installed, instead of\n`node app.js` use `nodemon app.js`. It will save you a lot of time in the long\nrun, because you won't need to manually restart the server each time you make a\nsmall change in code. To install, run `sudo npm install -g nodemon`.\n\n## Obtaining API Keys\n\nTo use any of the included APIs or OAuth authentication methods, you will need\nto obtain appropriate credentials: Client ID, Client Secret, API Key, or\nUsername & Password. You will need to go through each provider to generate new\ncredentials.\n\n
 \n\n- Visit\n Google\n reCAPTCHA Admin Console\n- Enter your application's name as the **Label**\n- Chose **reCAPTCHA v2**, **\"I'm not a robot\" Checkbox**\n- Enter _localhost_ as the domain. You can have other domains added in\n addition to _localhost_\n- Accept the terms and submit the form\n- Copy the _Site Key_ and the _Secret key_ into `.env`. These keys will be\n accessible under Settings, reCAPTCHA keys drop down if you need them again\n later.\n\n
\n\n
 \n\n- Visit\n Google\n Cloud Console\n- Click on the **Create Project** button\n- Enter _Project Name_, then click on **Create** button\n- Then click on _APIs & auth_ in the sidebar and select _API_ tab\n- Click on **Google+ API** under _Social APIs_, then click **Enable API**\n- Click on **Google Drive API** under _G Suite_, then click **Enable API**\n- Click on **Google Sheets API** under _G Suite_, then click **Enable API**\n- Next, under _APIs & auth_ in the sidebar click on _Credentials_ tab\n- Click on **Create new Client ID** button\n- Select _Web Application_ and click on **Configure Consent Screen**\n- Fill out the required fields then click on **Save**\n- In the _Create Client ID_ modal dialog:\n- **Application Type**: Web Application\n- **Authorized Javascript origins**: http://localhost:8080\n- **Authorized redirect URI**: http://localhost:8080/auth/google/callback\n- Click on **Create Client ID** button\n- Copy and paste _Client ID_ and _Client secret_ keys into `.env`\n\n**Note:** When you ready to deploy to production don't forget to add your new\nURL to _Authorized Javascript origins_ and _Authorized redirect URI_, e.g.\n`http://my-awesome-app.herokuapp.com` and\n`http://my-awesome-app.herokuapp.com/auth/google/callback` respectively. The\nsame goes for other providers.\n\n
\n\n
 \n\n- Visit Snap Kit\n Developer Portal\n- Click on the **+** button to create an app\n- Enter a name for your app\n- Enable the scopes that you will want to use in your app\n- Click on the **Continue** button\n- Find the **Kits** section and make sure that **Login Kit** is enabled\n- Find the **Redirect URLs** section, click the **+ Add** button, and enter\n `http://localhost:8080/auth/snapchat/callback`\n- Find the **Development Environment** section. Click the **Generate** button\n next to the _Confidential OAuth2 Client_ heading within it.\n- Copy and paste the generated _Private Key_ and _OAuth2 Client ID_ keys into\n `.env`\n- **Note:** _OAuth2 Client ID_ is **SNAPCHAT_ID**, _Private Key_ is\n **SNAPCHAT_SECRET** in `.env`\n- To prepare the app for submission, fill out the rest of the required fields:\n _Category_, _Description_, _Privacy Policy Url_, and _App Icon_\n\n**Note:** For production use, don't forget to:\n\n- generate a _Confidential OAuth2 Client_ in the **Production Environment**\n and use the production _Private Key_ and _OAuth2 Client ID_\n- add the production URL to **Redirect URLs** section, e.g.\n `http://my-awesome-app.herokuapp.com/auth/snapchat/callback`\n- submit the app for review and wait for approval\n\n
\n\n
 \n\n- Visit Facebook\n Developers\n- Click **My Apps**, then select \\*_Add a New App_ from the dropdown menu\n- Enter a new name for your app\n- Click on the **Create App ID** button\n- Find the Facebook Login Product and click on **Facebook Login**\n- Instead of going through their Quickstart, click on **Settings** for your\n app in the top left corner\n- Copy and paste _App ID_ and _App Secret_ keys into `.env`\n- **Note:** _App ID_ is **FACEBOOK_ID**, _App Secret_ is **FACEBOOK_SECRET**\n in `.env`\n- Enter `localhost` under _App Domains_\n- Choose a **Category** that best describes your app\n- Click on **+ Add Platform** and select **Website**\n- Enter `http://localhost:8080` under _Site URL_\n- Click on the _Settings_ tab in the left nav under Facebook Login\n- Enter `http://localhost:8080/auth/facebook/callback` under Valid OAuth\n redirect URIs\n\n**Note:** After a successful sign in with Facebook, a user will be redirected\nback to the home page with appended hash `#_=_` in the URL. It is _not_ a bug.\nSee this\n[Stack Overflow](https://stackoverflow.com/questions/7131909/facebook-callback-appends-to-return-url)\ndiscussion for ways to handle it.\n\n
\n\n
 \n\n- Go to Account\n Settings\n- Select **Developer settings** from the sidebar\n- Then click on **OAuth Apps** and then on **Register new application**\n- Enter _Application Name_ and _Homepage URL_\n- For _Authorization Callback URL_: http://localhost:8080/auth/github/callback\n- Click **Register application**\n- Now copy and paste _Client ID_ and _Client Secret_ keys into `.env` file\n\n
\n\n
 \n\n- Sign in at\n https://apps.twitter.com\n- Click **Create a new application**\n- Enter your application name, website and description\n- For **Callback URL**: http://127.0.0.1:8080/auth/twitter/callback\n- Go to **Settings** tab\n- Under _Application Type_ select **Read and Write** access\n- Check the box **Allow this application to be used to Sign in with Twitter**\n- Click **Update this Twitter's applications settings**\n- Copy and paste _Consumer Key_ and _Consumer Secret_ keys into `.env` file\n\n
\n\n
 \n\n- Sign in at\n LinkedIn Developer\n Network\n- From the account name dropdown menu select **API Keys**\n- _It may ask you to sign in once again_\n- Click **+ Add New Application** button\n- Fill out all the _required_ fields\n- **OAuth 2.0 Redirect URLs**: http://localhost:8080/auth/linkedin/callback\n- **JavaScript API Domains**: http://localhost:8080\n- For **Default Application Permissions** make sure at least the following is\n checked:\n- `r_basicprofile`\n- Finish by clicking **Add Application** button\n- Copy and paste _API Key_ and _Secret Key_ keys into `.env` file\n- _API Key_ is your **clientID**\n- _Secret Key_ is your **clientSecret**\n\n
\n\n
 \n\n- Sign up or log into your\n dashboard\n- Click on your profile and click on Account Settings\n- Then click on **API Keys**\n- Copy the **Secret Key**. and add this into `.env` file\n\n
\n\n
 \n\n- Visit PayPal\n Developer\n- Log in to your PayPal account\n- Click **Applications > Create App** in the navigation bar\n- Enter _Application Name_, then click **Create app**\n- Copy and paste _Client ID_ and _Secret_ keys into `.env` file\n- _App ID_ is **client_id**, _App Secret_ is **client_secret**\n- Change **host** to api.paypal.com if you want to test against production and\n use the live credentials\n\n
\n\n
 \n\n- Go to Foursquare\n for Developers\n- Click on **My Apps** in the top menu\n- Click the **Create A New App** button\n- Enter _App Name_, _Welcome page url_,\n- For **Redirect URI**: http://localhost:8080/auth/foursquare/callback\n- Click **Save Changes**\n- Copy and paste _Client ID_ and _Client Secret_ keys into `.env` file\n\n
\n\n
 \n\n- Go to\n http://www.tumblr.com/oauth/apps\n- Once signed in, click **+Register application**\n- Fill in all the details\n- For **Default Callback URL**: `http://localhost:8080/auth/tumblr/callback`\n- Click **✔Register**\n- Copy and paste _OAuth consumer key_ and _OAuth consumer secret_ keys into\n `.env` file\n\n
\n\n
 \n\n- Go to\n http://steamcommunity.com/dev/apikey\n- Sign in with your existing Steam account\n- Enter your _Domain Name_, then and click **Register**\n- Copy and paste _Key_ into `.env` file\n\n
\n
 \n\n- Visit the\n Twitch\n developer dashboard\n- If prompted, authorize the dashboard to access your twitch account\n- In the Console, click on Register Your Application\n- Enter the name of your application\n- Use OAuth Redirect URLs enter `http://localhost:8080/auth/twitch/callback`\n- Set Category to Website Integration and press the Create button\n- After the applicaiton has been created, click on the Manage button\n- Copy and paste _Client ID_ into `.env`\n- If there is no Client Secret displayed, click on New Secret button and then\n copy and paste the _Client secret_ into `.env`\n\n
\n\n
 \n\n- Go to\n https://sendgrid.com/user/signup\n- Sign up and **confirm** your account via the _activation email_\n- Then enter your SendGrid _Username_ and _Password_ into `.env` file\n\n
\n\n
 \n\n- Go to\n http://www.mailgun.com\n- Sign up and add your _Domain Name_\n- From the domain overview, copy and paste the default SMTP _Login_ and\n _Password_ into `.env` file\n\n
\n\n
 \n\n- Go to\n https://developer.here.com\n- Sign up and create a Freemium project\n- Create JAVASCRIPT/REST credentials. Copy and paste the APP_ID and APP into\n `.env` file.\n- Note that these credentials are available on the client side, and you need\n to create a domain whitelist for your app credentials when you are publicly\n launching the app.\n\n
\n\n
 \n\n- Go to\n https://www.twilio.com/try-twilio\n- Sign up for an account.\n- Once logged into the dashboard, expand the link 'show api credentials'\n- Copy your Account Sid and Auth Token\n\n
\n\n
 \n\n- Go to\n https://developer.intuit.com/app/developer/qbo/docs/get-started\n- Use the Sign Up option in the upper right corner of the screen (nav bar) to\n get a free developer account and a sandbox company.\n- Create a new app by going to your Dashboard using the My Apps option in the\n top nav bar or by going to\n https://developer.intuit.com/app/developer/myapps\n- In your App, under Development, Keys & OAuth (right nav), find the Client ID\n and Client Secret for your `.env` file\n\n## Project Structure\n\n| Name | Description |\n| ---------------------------------- | ------------------------------------------------------------ |\n| **config**/passport.js | Passport Local and OAuth strategies, plus login middleware. |\n| **controllers**/api.js | Controller for /api route and all api examples. |\n| **controllers**/contact.js | Controller for contact form. |\n| **controllers**/home.js | Controller for home page (index). |\n| **controllers**/user.js | Controller for user account management. |\n| **models**/User.js | Mongoose schema and model for User. |\n| **public**/ | Static assets (fonts, css, js, img). |\n| **public**/**js**/application.js | Specify client-side JavaScript dependencies. |\n| **public**/**js**/main.js | Place your client-side JavaScript here. |\n| **public**/**css**/main.scss | Main stylesheet for your app. |\n| **public/css/themes**/default.scss | Some Bootstrap overrides to make it look prettier. |\n| **views/account**/ | Templates for _login, password reset, signup, profile_. |\n| **views/api**/ | Templates for API Examples. |\n| **views/partials**/flash.pug | Error, info and success flash notifications. |\n| **views/partials**/header.pug | Navbar partial template. |\n| **views/partials**/footer.pug | Footer partial template. |\n| **views**/layout.pug | Base template. |\n| **views**/home.pug | Home page template. |\n| .dockerignore | Folder and files ignored by docker usage. |\n| .env.example | Your API keys, tokens, passwords and database URI. |\n| .eslintrc | Rules for eslint linter. |\n| .gitignore | Folder and files ignored by git. |\n| .travis.yml | Configuration files for continuous integration. |\n| app.js | The main application file. |\n| docker-compose.yml | Docker compose configuration file. |\n| Dockerfile | Docker configuration file. |\n| package.json | NPM dependencies. |\n| package-lock.json | Contains exact versions of NPM dependencies in package.json. |\n\n**Note:** There is no preference how you name or structure your views. You could\nplace all your templates in a top-level `views` directory without having a\nnested folder structure, if that makes things easier for you. Just don't forget\nto update `extends ../layout` and corresponding `res.render()` paths in\ncontrollers.\n\n## List of Packages\n\n| Package | Description |\n| --------------------------- | ----------------------------------------------------------------------- |\n| @octokit/rest | GitHub API library. |\n| bcrypt | Library for hashing and salting user passwords. |\n| body-parser | Node.js body parsing middleware. |\n| chai | BDD/TDD assertion library. |\n| chalk | Terminal string styling done right. |\n| cheerio | Scrape web pages using jQuery-style syntax. |\n| compression | Node.js compression middleware. |\n| connect-mongo | MongoDB session store for Express. |\n| dotenv | Loads environment variables from .env file. |\n| errorhandler | Development-only error handler middleware. |\n| eslint | Linter JavaScript. |\n| eslint-config-airbnb-base | Configuration eslint by airbnb. |\n| eslint-plugin-chai-friendly | Makes eslint friendly towards Chai.js 'expect' and 'should' statements. |\n| eslint-plugin-import | ESLint plugin with rules that help validate proper imports. |\n| express | Node.js web framework. |\n| express-flash | Provides flash messages for Express. |\n| express-session | Simple session middleware for Express. |\n| express-status-monitor | Reports real-time server metrics for Express. |\n| instagram-node | Instagram API library. |\n| lastfm | Last.fm API library. |\n| lob | Lob API library. |\n| lodash | A utility library for working with arrays, numbers, objects, strings. |\n| lusca | CSRF middleware. |\n| mailchecker | Verifies that an email address is valid and not a disposable address. |\n| mocha | Test framework. |\n| moment | Parse, validate, compute dates and times. |\n| mongoose | MongoDB ODM. |\n| morgan | HTTP request logger middleware for node.js. |\n| multer | Node.js middleware for handling `multipart/form-data`. |\n| node-foursquare | Foursquare API library. |\n| node-sass | Node.js bindings to libsass. |\n| node-sass-middleware | Sass middleware compiler. |\n| nyc | Coverage test. |\n| nodemailer | Node.js library for sending emails. |\n| node-quickbooks | Quickbooks API library. |\n| passport | Simple and elegant authentication library for node.js. |\n| passport-facebook | Sign-in with Facebook plugin. |\n| passport-github | Sign-in with GitHub plugin. |\n| passport-google-oauth | Sign-in with Google plugin. |\n| passport-instagram | Sign-in with Instagram plugin. |\n| passport-linkedin-oauth2 | Sign-in with LinkedIn plugin. |\n| passport-local | Sign-in with Username and Password plugin. |\n| passport-openid | Sign-in with OpenId plugin. |\n| passport-oauth | Allows you to set up your own OAuth 1.0a and OAuth 2.0 strategies. |\n| passport-oauth2-refresh | A library to refresh OAuth 2.0 access tokens using refresh tokens. |\n| passport-snapchat | Sign-in with Snapchat plugin. |\n| passport-twitter | Sign-in with Twitter plugin. |\n| passport-twitch-new | Sign-in with Twitch plugin. |\n| paypal-rest-sdk | PayPal APIs library. |\n| pug | Template engine for Express. |\n| sinon | Test spies, stubs and mocks for JavaScript. |\n| stripe | Offical Stripe API library. |\n| supertest | HTTP assertion library. |\n| tumblr.js | Tumblr API library. |\n| twilio | Twilio API library. |\n| twitter-lite | Twitter API library. |\n| validator | A library of string validators and sanitizers. |\n\n## Useful Tools and Resources\n\n- [JavaScripting](http://www.javascripting.com/) - The Database of JavaScript\n Libraries\n- [JS Recipes](http://sahatyalkabov.com/jsrecipes/) - JavaScript tutorials for\n backend and frontend development.\n- [HTML to Pug converter](https://html-to-pug.com/) - HTML to PUG is a free\n online converter helping you to convert HTML files to pug syntax in\n real-time.\n- [JavascriptOO](http://www.javascriptoo.com/) - A directory of JavaScript\n libraries with examples, CDN links, statistics, and videos.\n- [Favicon Generator](http://realfavicongenerator.net/) - Generate favicons\n for PC, Android, iOS, Windows 8.\n\n## Recommended Design Resources\n\n- [Code Guide](http://codeguide.co/) - Standards for developing flexible,\n durable, and sustainable HTML and CSS.\n- [Bootsnipp](http://bootsnipp.com/) - Code snippets for Bootstrap.\n- [Bootstrap Zero](https://www.bootstrapzero.com) - Free Bootstrap templates\n themes.\n- [Google Bootstrap](http://todc.github.io/todc-bootstrap/) - Google-styled\n theme for Bootstrap.\n- [Font Awesome Icons](http://fortawesome.github.io/Font-Awesome/icons/) -\n It's already part of the Hackathon Starter, so use this page as a reference.\n- [Colors](http://clrs.cc) - A nicer color palette for the web.\n- [Creative Button Styles](http://tympanus.net/Development/CreativeButtons/) -\n awesome button styles.\n- [Creative Link Effects](http://tympanus.net/Development/CreativeLinkEffects/) -\n Beautiful link effects in CSS.\n- [Medium Scroll Effect](http://codepen.io/andreasstorm/pen/pyjEh) - Fade\n in/out header background image as you scroll.\n- [GeoPattern](https://github.com/btmills/geopattern) - SVG background pattern\n generator.\n- [Trianglify](https://github.com/qrohlf/trianglify) - SVG low-poly background\n pattern generator.\n\n## Recommended Node.js Libraries\n\n- [Nodemon](https://github.com/remy/nodemon) - Automatically restart Node.js\n server on code changes.\n- [geoip-lite](https://github.com/bluesmoon/node-geoip) - Geolocation\n coordinates from IP address.\n- [Filesize.js](http://filesizejs.com/) - Pretty file sizes, e.g.\n `filesize(265318); // \"265.32 kB\"`.\n- [Numeral.js](http://numeraljs.com) - Library for formatting and manipulating\n numbers.\n- [Node Inspector](https://github.com/node-inspector/node-inspector) - Node.js\n debugger based on Chrome Developer Tools.\n- [node-taglib](https://github.com/nikhilm/node-taglib) - Library for reading\n the meta-data of several popular audio formats.\n- [sharp](https://github.com/lovell/sharp) - Node.js module for resizing JPEG,\n PNG, WebP and TIFF images.\n\n## Recommended Client-side Libraries\n\n- [Framework7](http://www.idangero.us/framework7/) - Full Featured HTML\n Framework For Building iOS7 Apps.\n- [InstantClick](http://instantclick.io) - Makes your pages load instantly by\n pre-loading them on mouse hover.\n- [NProgress.js](https://github.com/rstacruz/nprogress) - Slim progress bars\n like on YouTube and Medium.\n- [Hover](https://github.com/IanLunn/Hover) - Awesome CSS3 animations on mouse\n hover.\n- [Magnific Popup](http://dimsemenov.com/plugins/magnific-popup/) - Responsive\n jQuery Lightbox Plugin.\n- [jQuery Raty](http://wbotelhos.com/raty/) - Star Rating Plugin.\n- [Headroom.js](http://wicky.nillia.ms/headroom.js/) - Hide your header until\n you need it.\n- [X-editable](http://vitalets.github.io/x-editable/) - Edit form elements\n inline.\n- [Offline.js](http://github.hubspot.com/offline/docs/welcome/) - Detect when\n user's internet connection goes offline.\n- [Alertify.js](http://fabien-d.github.io/alertify.js/) - Sweet looking alerts\n and browser dialogs.\n- [selectize.js](http://selectize.github.io/selectize.js) - Styleable select\n elements and input tags.\n- [drop.js](http://github.hubspot.com/drop/docs/welcome/) - Powerful\n Javascript and CSS library for creating dropdowns and other floating\n displays.\n- [scrollReveal.js](https://github.com/jlmakes/scrollReveal.js) - Declarative\n on-scroll reveal animations.\n\n## Pro Tips\n\n- Use [async.parallel()](https://github.com/caolan/async#parallel) when you\n need to run multiple asynchronous tasks, and then render a page, but only\n when all tasks are completed. For example, you might want to scrape three\n different websites for some data and render the results in a template after\n all three websites have been scraped.\n- Need to find a specific object inside an Array? Use\n [\\_.find](http://lodash.com/docs#find) function from Lodash. For example,\n this is how you would retrieve a Twitter token from database:\n `var token = _.find(req.user.tokens, { kind: 'twitter' });`, where 1st\n parameter is an array, and a 2nd parameter is an object to search for.\n\n## FAQ\n\n### Why do I get `403 Error: Forbidden` when submitting a form?\n\nYou need to add the following hidden input element to your form. This has been\nadded in the\n[pull request #40](https://github.com/sahat/hackathon-starter/pull/40) as part\nof the CSRF protection.\n\n```\ninput(type='hidden', name='_csrf', value=_csrf)\n```\n\n**Note:** It is now possible to whitelist certain URLs. In other words you can\nspecify a list of routes that should bypass CSRF verification check.\n\n**Note 2:** To whitelist dynamic URLs use regular expression tests inside the\nCSRF middleware to see if `req.originalUrl` matches your desired pattern.\n\n### I am getting MongoDB Connection Error, how do I fix it?\n\nThat's a custom error message defined in `app.js` to indicate that there was a\nproblem connecting to MongoDB:\n\n```js\nmongoose.connection.on(\"error\", (err) => {\n console.error(err);\n console.log(\n \"%s MongoDB connection error. Please make sure MongoDB is running.\",\n chalk.red(\"✗\")\n );\n process.exit();\n});\n```\n\nYou need to have a MongoDB server running before launching `app.js`. You can\ndownload MongoDB [here](https://www.mongodb.com/download-center/community), or\ninstall it via a package manager.\n\nWindows users, read\n[Install MongoDB on Windows](https://docs.mongodb.org/manual/tutorial/install-mongodb-on-windows/).\n\n**Tip:** If you are always connected to the internet, you could just use\n[MongoDB Atlas](https://www.mongodb.com/cloud/atlas) or\n[Compose](https://www.compose.io/) instead of downloading and installing MongoDB\nlocally. You will only need to update database credentials in `.env` file.\n\n### I get an error when I deploy my app, why?\n\nChances are you haven't changed the _Database URI_ in `.env`. If `MONGODB` is\nset to `localhost`, it will only work on your machine as long as MongoDB is\nrunning. When you deploy to Heroku, OpenShift or some other provider, you will\nnot have MongoDB running on `localhost`. You need to create an account with\n[MongoDB Atlas](https://www.mongodb.com/cloud/atlas) or\n[Compose](https://www.compose.io/), then create a free tier database. See\n[Deployment](#deployment) for more information on how to setup an account and a\nnew database step-by-step with MongoDB Atlas.\n\n### Why Pug (Jade) instead of Handlebars?\n\nWhen I first started this project I didn't have any experience with Handlebars.\nSince then I have worked on Ember.js apps and got myself familiar with the\nHandlebars syntax. While it is true Handlebars is easier, because it looks like\ngood old HTML, I have no regrets picking Jade over Handlebars. First off, it's\nthe default template engine in Express, so someone who has built Express apps in\nthe past already knows it. Secondly, I find `extends` and `block` to be\nindispensable, which as far as I know, Handlebars does not have out of the box.\nAnd lastly, subjectively speaking, Jade looks much cleaner and shorter than\nHandlebars, or any non-HAML style for that matter.\n\n### Why do you have all routes defined in app.js?\n\nFor the sake of simplicity. While there might be a better approach, such as\npassing `app` context to each controller as outlined in this\n[blog](http://timstermatic.github.io/blog/2013/08/17/a-simple-mvc-framework-with-node-and-express/),\nI find such style to be confusing for beginners. It took me a long time to grasp\nthe concept of `exports` and `module.exports`, let alone having a global `app`\nreference in other files. That to me is backward thinking. The `app.js` is the\n\"heart of the app\", it should be the one referencing models, routes,\ncontrollers, etc. When working solo on small projects, I prefer to have\neverything inside `app.js` as is the case with\n[this](<(https://github.com/sahat/ember-sass-express-starter/blob/master/app.js)>)\nREST API server.\n\n### How do I switch SendGrid for another email delivery service, like Mailgun or SparkPost?\n\nInside the `nodemailer.createTransport` method arguments, change the service\nfrom `'Sendgrid'` to some other email service. Also, be sure to update both\nusername and password below that. See the\n[list of all supported services](https://github.com/nodemailer/nodemailer-wellknown#supported-services)\nby Nodemailer.\n\n## How It Works (mini guides)\n\nThis section is intended for giving you a detailed explanation of how a\nparticular functionality works. Maybe you are just curious about how it works,\nor perhaps you are lost and confused while reading the code, I hope it provides\nsome guidance to you.\n\n### Custom HTML and CSS Design 101\n\n[HTML5 UP](http://html5up.net/) has many beautiful templates that you can\ndownload for free.\n\nWhen you download the ZIP file, it will come with _index.html_, _images_, _css_\nand _js_ folders. So, how do you integrate it with Hackathon Starter? Hackathon\nStarter uses Bootstrap CSS framework, but these templates do not. Trying to use\nboth CSS files at the same time will likely result in undesired effects.\n\n**Note:** Using the custom templates approach, you should understand that you\ncannot reuse any of the views I have created: layout, home page, api browser,\nlogin, signup, account management, contact. Those views were built using\nBootstrap grid and styles. You will have to manually update the grid using a\ndifferent syntax provided in the template. **Having said that, you can mix and\nmatch if you want to do so: Use Bootstrap for main app interface, and a custom\ntemplate for a landing page.**\n\nLet's start from the beginning. For this example I will use\n[Escape Velocity](http://html5up.net/escape-velocity/) template:\n\n\n**Note:** For the sake of simplicity I will only consider `index.html`, and skip\n`left-sidebar.html`, `no-sidebar.html`, `right-sidebar.html`.\n\nMove all JavaScript files from `html5up-escape-velocity/js` to `public/js`. Then\nmove all CSS files from `html5up-escape-velocity/css` to `public/css`. And\nfinally, move all images from `html5up-escape-velocity/images` to\n`public/images`. You could move it to the existing **img** folder, but that\nwould require manually changing every `img` reference. Grab the contents of\n`index.html` and paste it into [HTML To Pug](https://html-to-pug.com/).\n\n**Note:** Do not forget to update all the CSS and JS paths accordingly.\n\nCreate a new file `escape-velocity.pug` and paste the Pug markup in `views`\nfolder. Whenever you see the code `res.render('account/login')` - that means it\nwill search for `views/account/login.pug` file.\n\nLet's see how it looks. Create a new controller **escapeVelocity** inside\n`controllers/home.js`:\n\n```js\nexports.escapeVelocity = (req, res) => {\n res.render(\"escape-velocity\", {\n title: \"Landing Page\",\n });\n};\n```\n\nAnd then create a route in `app.js`. I placed it right after the index\ncontroller:\n\n```js\napp.get(\"/escape-velocity\", homeController.escapeVelocity);\n```\n\nRestart the server (if you are not using **nodemon**); then you should see the\nnew template at\n[http://localhost:8080/escape-velocity](http://localhost:8080/escape-velocity).\n\nI will stop right here, but if you would like to use this template as more than\njust a single page, take a look at how these Pug templates work: `layout.pug` -\nbase template, `index.pug` - home page, `partials/header.pug` - Bootstrap\nnavbar, `partials/footer.pug` - sticky footer. You will have to manually break\nit apart into smaller pieces. Figure out which part of the template you want to\nkeep the same on all pages - that's your new `layout.pug`. Then, each page that\nchanges, be it `index.pug`, `about.pug`, `contact.pug` will be embedded in your\nnew `layout.pug` via `block content`. Use existing templates as a reference.\n\nThis is a rather lengthy process, and templates you get from elsewhere might\nhave yet another grid system. That's why I chose _Bootstrap_ for the Hackathon\nStarter. Many people are already familiar with _Bootstrap_, plus it's easy to\nget started with it if you have never used _Bootstrap_. You can also buy many\nbeautifully designed _Bootstrap_ themes at\n[Themeforest](http://themeforest.net/), and use them as a drop-in replacement\nfor Hackathon Starter. However, if you would like to go with a completely custom\nHTML/CSS design, this should help you to get started!\n\n
\n\n- Go to\n https://developer.intuit.com/app/developer/qbo/docs/get-started\n- Use the Sign Up option in the upper right corner of the screen (nav bar) to\n get a free developer account and a sandbox company.\n- Create a new app by going to your Dashboard using the My Apps option in the\n top nav bar or by going to\n https://developer.intuit.com/app/developer/myapps\n- In your App, under Development, Keys & OAuth (right nav), find the Client ID\n and Client Secret for your `.env` file\n\n## Project Structure\n\n| Name | Description |\n| ---------------------------------- | ------------------------------------------------------------ |\n| **config**/passport.js | Passport Local and OAuth strategies, plus login middleware. |\n| **controllers**/api.js | Controller for /api route and all api examples. |\n| **controllers**/contact.js | Controller for contact form. |\n| **controllers**/home.js | Controller for home page (index). |\n| **controllers**/user.js | Controller for user account management. |\n| **models**/User.js | Mongoose schema and model for User. |\n| **public**/ | Static assets (fonts, css, js, img). |\n| **public**/**js**/application.js | Specify client-side JavaScript dependencies. |\n| **public**/**js**/main.js | Place your client-side JavaScript here. |\n| **public**/**css**/main.scss | Main stylesheet for your app. |\n| **public/css/themes**/default.scss | Some Bootstrap overrides to make it look prettier. |\n| **views/account**/ | Templates for _login, password reset, signup, profile_. |\n| **views/api**/ | Templates for API Examples. |\n| **views/partials**/flash.pug | Error, info and success flash notifications. |\n| **views/partials**/header.pug | Navbar partial template. |\n| **views/partials**/footer.pug | Footer partial template. |\n| **views**/layout.pug | Base template. |\n| **views**/home.pug | Home page template. |\n| .dockerignore | Folder and files ignored by docker usage. |\n| .env.example | Your API keys, tokens, passwords and database URI. |\n| .eslintrc | Rules for eslint linter. |\n| .gitignore | Folder and files ignored by git. |\n| .travis.yml | Configuration files for continuous integration. |\n| app.js | The main application file. |\n| docker-compose.yml | Docker compose configuration file. |\n| Dockerfile | Docker configuration file. |\n| package.json | NPM dependencies. |\n| package-lock.json | Contains exact versions of NPM dependencies in package.json. |\n\n**Note:** There is no preference how you name or structure your views. You could\nplace all your templates in a top-level `views` directory without having a\nnested folder structure, if that makes things easier for you. Just don't forget\nto update `extends ../layout` and corresponding `res.render()` paths in\ncontrollers.\n\n## List of Packages\n\n| Package | Description |\n| --------------------------- | ----------------------------------------------------------------------- |\n| @octokit/rest | GitHub API library. |\n| bcrypt | Library for hashing and salting user passwords. |\n| body-parser | Node.js body parsing middleware. |\n| chai | BDD/TDD assertion library. |\n| chalk | Terminal string styling done right. |\n| cheerio | Scrape web pages using jQuery-style syntax. |\n| compression | Node.js compression middleware. |\n| connect-mongo | MongoDB session store for Express. |\n| dotenv | Loads environment variables from .env file. |\n| errorhandler | Development-only error handler middleware. |\n| eslint | Linter JavaScript. |\n| eslint-config-airbnb-base | Configuration eslint by airbnb. |\n| eslint-plugin-chai-friendly | Makes eslint friendly towards Chai.js 'expect' and 'should' statements. |\n| eslint-plugin-import | ESLint plugin with rules that help validate proper imports. |\n| express | Node.js web framework. |\n| express-flash | Provides flash messages for Express. |\n| express-session | Simple session middleware for Express. |\n| express-status-monitor | Reports real-time server metrics for Express. |\n| instagram-node | Instagram API library. |\n| lastfm | Last.fm API library. |\n| lob | Lob API library. |\n| lodash | A utility library for working with arrays, numbers, objects, strings. |\n| lusca | CSRF middleware. |\n| mailchecker | Verifies that an email address is valid and not a disposable address. |\n| mocha | Test framework. |\n| moment | Parse, validate, compute dates and times. |\n| mongoose | MongoDB ODM. |\n| morgan | HTTP request logger middleware for node.js. |\n| multer | Node.js middleware for handling `multipart/form-data`. |\n| node-foursquare | Foursquare API library. |\n| node-sass | Node.js bindings to libsass. |\n| node-sass-middleware | Sass middleware compiler. |\n| nyc | Coverage test. |\n| nodemailer | Node.js library for sending emails. |\n| node-quickbooks | Quickbooks API library. |\n| passport | Simple and elegant authentication library for node.js. |\n| passport-facebook | Sign-in with Facebook plugin. |\n| passport-github | Sign-in with GitHub plugin. |\n| passport-google-oauth | Sign-in with Google plugin. |\n| passport-instagram | Sign-in with Instagram plugin. |\n| passport-linkedin-oauth2 | Sign-in with LinkedIn plugin. |\n| passport-local | Sign-in with Username and Password plugin. |\n| passport-openid | Sign-in with OpenId plugin. |\n| passport-oauth | Allows you to set up your own OAuth 1.0a and OAuth 2.0 strategies. |\n| passport-oauth2-refresh | A library to refresh OAuth 2.0 access tokens using refresh tokens. |\n| passport-snapchat | Sign-in with Snapchat plugin. |\n| passport-twitter | Sign-in with Twitter plugin. |\n| passport-twitch-new | Sign-in with Twitch plugin. |\n| paypal-rest-sdk | PayPal APIs library. |\n| pug | Template engine for Express. |\n| sinon | Test spies, stubs and mocks for JavaScript. |\n| stripe | Offical Stripe API library. |\n| supertest | HTTP assertion library. |\n| tumblr.js | Tumblr API library. |\n| twilio | Twilio API library. |\n| twitter-lite | Twitter API library. |\n| validator | A library of string validators and sanitizers. |\n\n## Useful Tools and Resources\n\n- [JavaScripting](http://www.javascripting.com/) - The Database of JavaScript\n Libraries\n- [JS Recipes](http://sahatyalkabov.com/jsrecipes/) - JavaScript tutorials for\n backend and frontend development.\n- [HTML to Pug converter](https://html-to-pug.com/) - HTML to PUG is a free\n online converter helping you to convert HTML files to pug syntax in\n real-time.\n- [JavascriptOO](http://www.javascriptoo.com/) - A directory of JavaScript\n libraries with examples, CDN links, statistics, and videos.\n- [Favicon Generator](http://realfavicongenerator.net/) - Generate favicons\n for PC, Android, iOS, Windows 8.\n\n## Recommended Design Resources\n\n- [Code Guide](http://codeguide.co/) - Standards for developing flexible,\n durable, and sustainable HTML and CSS.\n- [Bootsnipp](http://bootsnipp.com/) - Code snippets for Bootstrap.\n- [Bootstrap Zero](https://www.bootstrapzero.com) - Free Bootstrap templates\n themes.\n- [Google Bootstrap](http://todc.github.io/todc-bootstrap/) - Google-styled\n theme for Bootstrap.\n- [Font Awesome Icons](http://fortawesome.github.io/Font-Awesome/icons/) -\n It's already part of the Hackathon Starter, so use this page as a reference.\n- [Colors](http://clrs.cc) - A nicer color palette for the web.\n- [Creative Button Styles](http://tympanus.net/Development/CreativeButtons/) -\n awesome button styles.\n- [Creative Link Effects](http://tympanus.net/Development/CreativeLinkEffects/) -\n Beautiful link effects in CSS.\n- [Medium Scroll Effect](http://codepen.io/andreasstorm/pen/pyjEh) - Fade\n in/out header background image as you scroll.\n- [GeoPattern](https://github.com/btmills/geopattern) - SVG background pattern\n generator.\n- [Trianglify](https://github.com/qrohlf/trianglify) - SVG low-poly background\n pattern generator.\n\n## Recommended Node.js Libraries\n\n- [Nodemon](https://github.com/remy/nodemon) - Automatically restart Node.js\n server on code changes.\n- [geoip-lite](https://github.com/bluesmoon/node-geoip) - Geolocation\n coordinates from IP address.\n- [Filesize.js](http://filesizejs.com/) - Pretty file sizes, e.g.\n `filesize(265318); // \"265.32 kB\"`.\n- [Numeral.js](http://numeraljs.com) - Library for formatting and manipulating\n numbers.\n- [Node Inspector](https://github.com/node-inspector/node-inspector) - Node.js\n debugger based on Chrome Developer Tools.\n- [node-taglib](https://github.com/nikhilm/node-taglib) - Library for reading\n the meta-data of several popular audio formats.\n- [sharp](https://github.com/lovell/sharp) - Node.js module for resizing JPEG,\n PNG, WebP and TIFF images.\n\n## Recommended Client-side Libraries\n\n- [Framework7](http://www.idangero.us/framework7/) - Full Featured HTML\n Framework For Building iOS7 Apps.\n- [InstantClick](http://instantclick.io) - Makes your pages load instantly by\n pre-loading them on mouse hover.\n- [NProgress.js](https://github.com/rstacruz/nprogress) - Slim progress bars\n like on YouTube and Medium.\n- [Hover](https://github.com/IanLunn/Hover) - Awesome CSS3 animations on mouse\n hover.\n- [Magnific Popup](http://dimsemenov.com/plugins/magnific-popup/) - Responsive\n jQuery Lightbox Plugin.\n- [jQuery Raty](http://wbotelhos.com/raty/) - Star Rating Plugin.\n- [Headroom.js](http://wicky.nillia.ms/headroom.js/) - Hide your header until\n you need it.\n- [X-editable](http://vitalets.github.io/x-editable/) - Edit form elements\n inline.\n- [Offline.js](http://github.hubspot.com/offline/docs/welcome/) - Detect when\n user's internet connection goes offline.\n- [Alertify.js](http://fabien-d.github.io/alertify.js/) - Sweet looking alerts\n and browser dialogs.\n- [selectize.js](http://selectize.github.io/selectize.js) - Styleable select\n elements and input tags.\n- [drop.js](http://github.hubspot.com/drop/docs/welcome/) - Powerful\n Javascript and CSS library for creating dropdowns and other floating\n displays.\n- [scrollReveal.js](https://github.com/jlmakes/scrollReveal.js) - Declarative\n on-scroll reveal animations.\n\n## Pro Tips\n\n- Use [async.parallel()](https://github.com/caolan/async#parallel) when you\n need to run multiple asynchronous tasks, and then render a page, but only\n when all tasks are completed. For example, you might want to scrape three\n different websites for some data and render the results in a template after\n all three websites have been scraped.\n- Need to find a specific object inside an Array? Use\n [\\_.find](http://lodash.com/docs#find) function from Lodash. For example,\n this is how you would retrieve a Twitter token from database:\n `var token = _.find(req.user.tokens, { kind: 'twitter' });`, where 1st\n parameter is an array, and a 2nd parameter is an object to search for.\n\n## FAQ\n\n### Why do I get `403 Error: Forbidden` when submitting a form?\n\nYou need to add the following hidden input element to your form. This has been\nadded in the\n[pull request #40](https://github.com/sahat/hackathon-starter/pull/40) as part\nof the CSRF protection.\n\n```\ninput(type='hidden', name='_csrf', value=_csrf)\n```\n\n**Note:** It is now possible to whitelist certain URLs. In other words you can\nspecify a list of routes that should bypass CSRF verification check.\n\n**Note 2:** To whitelist dynamic URLs use regular expression tests inside the\nCSRF middleware to see if `req.originalUrl` matches your desired pattern.\n\n### I am getting MongoDB Connection Error, how do I fix it?\n\nThat's a custom error message defined in `app.js` to indicate that there was a\nproblem connecting to MongoDB:\n\n```js\nmongoose.connection.on(\"error\", (err) => {\n console.error(err);\n console.log(\n \"%s MongoDB connection error. Please make sure MongoDB is running.\",\n chalk.red(\"✗\")\n );\n process.exit();\n});\n```\n\nYou need to have a MongoDB server running before launching `app.js`. You can\ndownload MongoDB [here](https://www.mongodb.com/download-center/community), or\ninstall it via a package manager.\n\nWindows users, read\n[Install MongoDB on Windows](https://docs.mongodb.org/manual/tutorial/install-mongodb-on-windows/).\n\n**Tip:** If you are always connected to the internet, you could just use\n[MongoDB Atlas](https://www.mongodb.com/cloud/atlas) or\n[Compose](https://www.compose.io/) instead of downloading and installing MongoDB\nlocally. You will only need to update database credentials in `.env` file.\n\n### I get an error when I deploy my app, why?\n\nChances are you haven't changed the _Database URI_ in `.env`. If `MONGODB` is\nset to `localhost`, it will only work on your machine as long as MongoDB is\nrunning. When you deploy to Heroku, OpenShift or some other provider, you will\nnot have MongoDB running on `localhost`. You need to create an account with\n[MongoDB Atlas](https://www.mongodb.com/cloud/atlas) or\n[Compose](https://www.compose.io/), then create a free tier database. See\n[Deployment](#deployment) for more information on how to setup an account and a\nnew database step-by-step with MongoDB Atlas.\n\n### Why Pug (Jade) instead of Handlebars?\n\nWhen I first started this project I didn't have any experience with Handlebars.\nSince then I have worked on Ember.js apps and got myself familiar with the\nHandlebars syntax. While it is true Handlebars is easier, because it looks like\ngood old HTML, I have no regrets picking Jade over Handlebars. First off, it's\nthe default template engine in Express, so someone who has built Express apps in\nthe past already knows it. Secondly, I find `extends` and `block` to be\nindispensable, which as far as I know, Handlebars does not have out of the box.\nAnd lastly, subjectively speaking, Jade looks much cleaner and shorter than\nHandlebars, or any non-HAML style for that matter.\n\n### Why do you have all routes defined in app.js?\n\nFor the sake of simplicity. While there might be a better approach, such as\npassing `app` context to each controller as outlined in this\n[blog](http://timstermatic.github.io/blog/2013/08/17/a-simple-mvc-framework-with-node-and-express/),\nI find such style to be confusing for beginners. It took me a long time to grasp\nthe concept of `exports` and `module.exports`, let alone having a global `app`\nreference in other files. That to me is backward thinking. The `app.js` is the\n\"heart of the app\", it should be the one referencing models, routes,\ncontrollers, etc. When working solo on small projects, I prefer to have\neverything inside `app.js` as is the case with\n[this](<(https://github.com/sahat/ember-sass-express-starter/blob/master/app.js)>)\nREST API server.\n\n### How do I switch SendGrid for another email delivery service, like Mailgun or SparkPost?\n\nInside the `nodemailer.createTransport` method arguments, change the service\nfrom `'Sendgrid'` to some other email service. Also, be sure to update both\nusername and password below that. See the\n[list of all supported services](https://github.com/nodemailer/nodemailer-wellknown#supported-services)\nby Nodemailer.\n\n## How It Works (mini guides)\n\nThis section is intended for giving you a detailed explanation of how a\nparticular functionality works. Maybe you are just curious about how it works,\nor perhaps you are lost and confused while reading the code, I hope it provides\nsome guidance to you.\n\n### Custom HTML and CSS Design 101\n\n[HTML5 UP](http://html5up.net/) has many beautiful templates that you can\ndownload for free.\n\nWhen you download the ZIP file, it will come with _index.html_, _images_, _css_\nand _js_ folders. So, how do you integrate it with Hackathon Starter? Hackathon\nStarter uses Bootstrap CSS framework, but these templates do not. Trying to use\nboth CSS files at the same time will likely result in undesired effects.\n\n**Note:** Using the custom templates approach, you should understand that you\ncannot reuse any of the views I have created: layout, home page, api browser,\nlogin, signup, account management, contact. Those views were built using\nBootstrap grid and styles. You will have to manually update the grid using a\ndifferent syntax provided in the template. **Having said that, you can mix and\nmatch if you want to do so: Use Bootstrap for main app interface, and a custom\ntemplate for a landing page.**\n\nLet's start from the beginning. For this example I will use\n[Escape Velocity](http://html5up.net/escape-velocity/) template:\n\n\n**Note:** For the sake of simplicity I will only consider `index.html`, and skip\n`left-sidebar.html`, `no-sidebar.html`, `right-sidebar.html`.\n\nMove all JavaScript files from `html5up-escape-velocity/js` to `public/js`. Then\nmove all CSS files from `html5up-escape-velocity/css` to `public/css`. And\nfinally, move all images from `html5up-escape-velocity/images` to\n`public/images`. You could move it to the existing **img** folder, but that\nwould require manually changing every `img` reference. Grab the contents of\n`index.html` and paste it into [HTML To Pug](https://html-to-pug.com/).\n\n**Note:** Do not forget to update all the CSS and JS paths accordingly.\n\nCreate a new file `escape-velocity.pug` and paste the Pug markup in `views`\nfolder. Whenever you see the code `res.render('account/login')` - that means it\nwill search for `views/account/login.pug` file.\n\nLet's see how it looks. Create a new controller **escapeVelocity** inside\n`controllers/home.js`:\n\n```js\nexports.escapeVelocity = (req, res) => {\n res.render(\"escape-velocity\", {\n title: \"Landing Page\",\n });\n};\n```\n\nAnd then create a route in `app.js`. I placed it right after the index\ncontroller:\n\n```js\napp.get(\"/escape-velocity\", homeController.escapeVelocity);\n```\n\nRestart the server (if you are not using **nodemon**); then you should see the\nnew template at\n[http://localhost:8080/escape-velocity](http://localhost:8080/escape-velocity).\n\nI will stop right here, but if you would like to use this template as more than\njust a single page, take a look at how these Pug templates work: `layout.pug` -\nbase template, `index.pug` - home page, `partials/header.pug` - Bootstrap\nnavbar, `partials/footer.pug` - sticky footer. You will have to manually break\nit apart into smaller pieces. Figure out which part of the template you want to\nkeep the same on all pages - that's your new `layout.pug`. Then, each page that\nchanges, be it `index.pug`, `about.pug`, `contact.pug` will be embedded in your\nnew `layout.pug` via `block content`. Use existing templates as a reference.\n\nThis is a rather lengthy process, and templates you get from elsewhere might\nhave yet another grid system. That's why I chose _Bootstrap_ for the Hackathon\nStarter. Many people are already familiar with _Bootstrap_, plus it's easy to\nget started with it if you have never used _Bootstrap_. You can also buy many\nbeautifully designed _Bootstrap_ themes at\n[Themeforest](http://themeforest.net/), and use them as a drop-in replacement\nfor Hackathon Starter. However, if you would like to go with a completely custom\nHTML/CSS design, this should help you to get started!\n\n\n\n### How do flash messages work in this project?\n\nFlash messages allow you to display a message at the end of the request and\naccess it on next request and only next request. For instance, on a failed login\nattempt, you would display an alert with some error message, but as soon as you\nrefresh that page or visit a different page and come back to the login page,\nthat error message will be gone. It is only displayed once. This project uses\n_express-flash_ module for flash messages. And that module is built on top of\n_connect-flash_, which is what I used in this project initially. With\n_express-flash_ you don't have to explicitly send a flash message to every view\ninside `res.render()`. All flash messages are available in your views via\n`messages` object by default, thanks to _express-flash_.\n\nFlash messages have a two-step process. You use\n`req.flash('errors', { msg: 'Error messages goes here' }` to create a flash\nmessage in your controllers, and then display them in your views:\n\n```pug\nif messages.errors\n .alert.alert-danger.fade.in\n for error in messages.errors\n div= error.msg\n```\n\nIn the first step, `'errors'` is the name of a flash message, which should match\nthe name of the property on `messages` object in your views. You place alert\nmessages inside `if message.errors` because you don't want to show them flash\nmessages are present. The reason why you pass an error like\n`{ msg: 'Error message goes here' }` instead of just a string -\n`'Error message goes here'`, is for the sake of consistency. To clarify that,\n_express-validator_ module which is used for validating and sanitizing user's\ninput, returns all errors as an array of objects, where each object has a `msg`\nproperty with a message why an error has occurred. Here is a more general\nexample of what express-validator returns when there are errors present:\n\n```js\n[\n { param: \"name\", msg: \"Name is required\", value: \"
\n\n### How do I create a new page?\n\nA more correct way to say this would be \"How do I create a new route?\" The main\nfile `app.js` contains all the routes. Each route has a callback function\nassociated with it. Sometimes you will see three or more arguments for a route.\nIn a case like that, the first argument is still a URL string, while middle\narguments are what's called middleware. Think of middleware as a door. If this\ndoor prevents you from continuing forward, you won't get to your callback\nfunction. One such example is a route that requires authentication.\n\n```js\napp.get(\"/account\", passportConfig.isAuthenticated, userController.getAccount);\n```\n\nIt always goes from left to right. A user visits `/account` page. Then\n`isAuthenticated` middleware checks if you are authenticated:\n\n```js\nexports.isAuthenticated = (req, res, next) => {\n if (req.isAuthenticated()) {\n return next();\n }\n res.redirect(\"/login\");\n};\n```\n\nIf you are authenticated, you let this visitor pass through your \"door\" by\ncalling `return next();`. It then proceeds to the next middleware until it\nreaches the last argument, which is a callback function that typically renders a\ntemplate on `GET` requests or redirects on `POST` requests. In this case, if you\nare authenticated, you will be redirected to the _Account Management_ page;\notherwise, you will be redirected to the _Login_ page.\n\n```js\nexports.getAccount = (req, res) => {\n res.render(\"account/profile\", {\n title: \"Account Management\",\n });\n};\n```\n\nExpress.js has `app.get`, `app.post`, `app.put`, `app.delete`, but for the most\npart, you will only use the first two HTTP verbs, unless you are building a\nRESTful API. If you just want to display a page, then use `GET`, if you are\nsubmitting a form, sending a file then use `POST`.\n\nHere is a typical workflow for adding new routes to your application. Let's say\nwe are building a page that lists all books from the database.\n\n**Step 1.** Start by defining a route.\n\n```js\napp.get(\"/books\", bookController.getBooks);\n```\n\n---\n\n**Note:** As of Express 4.x you can define your routes like so:\n\n```js\napp.route(\"/books\")\n .get(bookController.getBooks)\n .post(bookController.createBooks)\n .put(bookController.updateBooks)\n .delete(bookController.deleteBooks);\n```\n\nAnd here is how a route would look if it required an _authentication_ and an\n_authorization_ middleware:\n\n```js\napp.route(\"/api/twitter\")\n .all(passportConfig.isAuthenticated)\n .all(passportConfig.isAuthorized)\n .get(apiController.getTwitter)\n .post(apiController.postTwitter);\n```\n\nUse whichever style that makes sense to you. Either one is acceptable. I think\nthat chaining HTTP verbs on `app.route` is a very clean and elegant approach,\nbut on the other hand, I can no longer see all my routes at a glance when you\nhave one route per line.\n\n**Step 2.** Create a new schema and a model `Book.js` inside the _models_\ndirectory.\n\n```js\nconst mongoose = require(\"mongoose\");\n\nconst bookSchema = new mongoose.Schema({\n name: String,\n});\n\nconst Book = mongoose.model(\"Book\", bookSchema);\nmodule.exports = Book;\n```\n\n**Step 3.** Create a new controller file called `book.js` inside the\n_controllers_ directory.\n\n```js\n/**\n * GET /books\n * List all books.\n */\nconst Book = require(\"../models/Book.js\");\n\nexports.getBooks = (req, res) => {\n Book.find((err, docs) => {\n res.render(\"books\", { books: docs });\n });\n};\n```\n\n**Step 4.** Import that controller in `app.js`.\n\n```js\nconst bookController = require(\"./controllers/book\");\n```\n\n**Step 5.** Create `books.pug` template.\n\n```pug\nextends layout\n\nblock content\n .page-header\n h3 All Books\n\n ul\n for book in books\n li= book.name\n```\n\nThat's it! I will say that you could have combined Step 1, 2, 3 as following:\n\n```js\napp.get(\"/books\", (req, res) => {\n Book.find((err, docs) => {\n res.render(\"books\", { books: docs });\n });\n});\n```\n\nSure, it's simpler, but as soon as you pass 1000 lines of code in `app.js` it\nbecomes a little challenging to navigate the file. I mean, the whole point of\nthis boilerplate project was to separate concerns, so you could work with your\nteammates without running into _MERGE CONFLICTS_. Imagine you have four\ndevelopers working on a single `app.js`, I promise you it won't be fun resolving\nmerge conflicts all the time. If you are the only developer, then it's okay. But\nas I said, once it gets up to a certain LoC size, it becomes difficult to\nmaintain everything in a single file.\n\nThat's all there is to it. Express.js is super simple to use. Most of the time\nyou will be dealing with other APIs to do the real work:\n[Mongoose](http://mongoosejs.com/docs/guide.html) for querying database,\nsocket.io for sending and receiving messages over websockets, sending emails via\n[Nodemailer](http://nodemailer.com/), form validation using\n[express-validator](https://github.com/ctavan/express-validator) library,\nparsing websites using [Cheerio](https://github.com/cheeriojs/cheerio), etc.\n\n
\n\n### How do I use Socket.io with Hackathon Starter?\n\n[Dan Stroot](https://github.com/dstroot) submitted an excellent\n[pull request](https://github.com/dstroot/hackathon-starter/commit/0a632def1ce8da446709d92812423d337c977d75)\nthat adds a real-time dashboard with socket.io. And as much as I'd like to add\nit to the project, I think it violates one of the main principles of the\nHackathon Starter:\n\n> When I started this project, my primary focus was on simplicity and ease of\n> use. I also tried to make it as generic and reusable as possible to cover most\n> use cases of hackathon web apps, **without being too specific**.\n\nWhen I need to use socket.io, I **really** need it, but most of the time - I\ndon't. But more importantly, websockets support is still experimental on most\nhosting providers. As of October 2013, Heroku supports websockets, but not until\nyou opt-in by running this command:\n\n```js\nheroku labs:enable websockets -a myapp\n```\n\nAnd what if you are deploying to OpenShift? They do support websockets, but it\nis currently in a preview state. So, for OpenShift you would need to change the\nsocket.io connect URI to the following:\n\n```js\nconst socket = io.connect(\"http://yoursite-namespace.rhcloud.com:8000\");\n```\n\nWait, why is it on port 8000? Who knows, and if I didn't run across this\n[blog post](http://velin-georgiev-blog.appspot.com/blog/set-up-nodejs-express-socketio-application-using-websockets-on-openshift-by-red-hat/)\nI wouldn't even know I had to use port 8000.\n\nI am really glad that Heroku and OpenShift at least have a websockets support,\nbecause many other PaaS providers still do not support it. Due to the\naforementioned issues with websockets, I cannot include socket.io as part of the\nHackathon Starter. _For now..._ If you need to use socket.io in your app, please\ncontinue reading.\n\nFirst, you need to install socket.io:\n\n```js\nnpm install socket.io\n```\n\nReplace `const app = express();` with the following code:\n\n```js\nconst app = express();\nconst server = require(\"http\").Server(app);\nconst io = require(\"socket.io\")(server);\n```\n\nI like to have the following code organization in `app.js` (from top to bottom):\nmodule dependencies, import controllers, import configs, connect to database,\nexpress configuration, routes, start the server, socket.io stuff. That way I\nalways know where to look for things.\n\nAdd the following code at the end of `app.js`:\n\n```js\nio.on(\"connection\", (socket) => {\n socket.emit(\"greet\", { hello: \"Hey there browser!\" });\n socket.on(\"respond\", (data) => {\n console.log(data);\n });\n socket.on(\"disconnect\", () => {\n console.log(\"Socket disconnected\");\n });\n});\n```\n\nOne last thing left to change:\n\n```js\napp.listen(app.get('port'), () => {\n```\n\nto\n\n```js\nserver.listen(app.get('port'), () => {\n```\n\nAt this point, we are done with the back-end.\n\nYou now have a choice - to include your JavaScript code in Pug templates or have\nall your client-side JavaScript in a separate file - in `main.js`. I admit, when\nI first started with Node.js and JavaScript in general, I placed all JavaScript\ncode inside templates because I have access to template variables passed in from\nExpress right then and there. It's the easiest thing you can do, but also the\nleast efficient and harder to maintain. Since then I almost never include inline\nJavaScript inside templates anymore.\n\nBut it's also understandable if you want to take the easier road. Most of the\ntime you don't even care about performance during hackathons, you just want to\n[_\"get shit done\"_](https://www.startupvitamins.com/media/products/13/aaron_levie_poster_black.jpg)\nbefore the time runs out. Well, either way, use whichever approach makes more\nsense to you. At the end of the day, it's **what** you build that matters, not\n**how** you build it.\n\nIf you want to stick all your JavaScript inside templates, then in\n`layout.pug` - your main template file, add this to `head` block.\n\n```pug\nscript(src='/socket.io/socket.io.js')\nscript.\n let socket = io.connect(window.location.href);\n socket.on('greet', function (data) {\n console.log(data);\n socket.emit('respond', { message: 'Hey there, server!' });\n });\n```\n\n**Note:** Notice the path of the `socket.io.js`, you don't actually have to have\n`socket.io.js` file anywhere in your project; it will be generated automatically\nat runtime.\n\nIf you want to have JavaScript code separate from templates, move that inline\nscript code into `main.js`, inside the `$(document).ready()` function:\n\n```js\n$(document).ready(function () {\n // Place JavaScript code here...\n let socket = io.connect(window.location.href);\n socket.on(\"greet\", function (data) {\n console.log(data);\n socket.emit(\"respond\", { message: \"Hey there, server!\" });\n });\n});\n```\n\nAnd we are done!\n\n## Cheatsheets\n\n###
ES6 Cheatsheet\n\n#### Declarations\n\nDeclares a read-only named constant.\n\n```js\nconst name = \"yourName\";\n```\n\nDeclares a block scope local variable.\n\n```js\nlet index = 0;\n```\n\n#### Template Strings\n\nUsing the **\\`${}\\`** syntax, strings can embed expressions.\n\n```js\nconst name = \"Oggy\";\nconst age = 3;\n\nconsole.log(`My cat is named ${name} and is ${age} years old.`);\n```\n\n#### Modules\n\nTo import functions, objects or primitives exported from an external module.\nThese are the most common types of importing.\n\n```js\nconst name = require(\"module-name\");\n```\n\n```js\nconst { foo, bar } = require(\"module-name\");\n```\n\nTo export functions, objects or primitives from a given file or module.\n\n```js\nmodule.exports = { myFunction };\n```\n\n```js\nmodule.exports.name = \"yourName\";\n```\n\n```js\nmodule.exports = myFunctionOrClass;\n```\n\n#### Spread Operator\n\nThe spread operator allows an expression to be expanded in places where multiple\narguments (for function calls) or multiple elements (for array literals) are\nexpected.\n\n```js\nmyFunction(...iterableObject);\n```\n\n```jsx\n JavaScript Date Cheatsheet\n\n#### Unix Timestamp (seconds)\n\n```js\nMath.floor(Date.now() / 1000);\n```\n\n```MomentJS\nmoment().unix();\n```\n\n#### Add 30 minutes to a Date object\n\n```js\nvar now = new Date();\nnow.setMinutes(now.getMinutes() + 30);\n```\n\n```MomentJS\nmoment().add(30, 'minutes');\n```\n\n#### Date Formatting\n\n```js\n// DD-MM-YYYY\nvar now = new Date();\n\nvar DD = now.getDate();\nvar MM = now.getMonth() + 1;\nvar YYYY = now.getFullYear();\n\nif (DD < 10) {\n DD = \"0\" + DD;\n}\n\nif (MM < 10) {\n MM = \"0\" + MM;\n}\n\nconsole.log(MM + \"-\" + DD + \"-\" + YYYY); // 03-30-2016\n```\n\n```MomentJS\nconsole.log(moment(new Date(), 'MM-DD-YYYY'));\n```\n\n```js\n// hh:mm (12 hour time with am/pm)\nvar now = new Date();\nvar hours = now.getHours();\nvar minutes = now.getMinutes();\nvar amPm = hours >= 12 ? \"pm\" : \"am\";\n\nhours = hours % 12;\nhours = hours ? hours : 12;\nminutes = minutes < 10 ? \"0\" + minutes : minutes;\n\nconsole.log(hours + \":\" + minutes + \" \" + amPm); // 1:43 am\n```\n\n```MomentJS\nconsole.log(moment(new Date(), 'hh:mm A'));\n```\n\n#### Next week Date object\n\n```js\nvar today = new Date();\nvar nextWeek = new Date(today.getTime() + 7 * 24 * 60 * 60 * 1000);\n```\n\n```MomentJS\nmoment().add(7, 'days');\n```\n\n#### Yesterday Date object\n\n```js\nvar today = new Date();\nvar yesterday = date.setDate(date.getDate() - 1);\n```\n\n```MomentJS\nmoment().add(-1, 'days');\n```\n\n:top: [**back to top**](#table-of-contents)\n\n### Mongoose Cheatsheet\n\n#### Find all users:\n\n```js\nUser.find((err, users) => {\n console.log(users);\n});\n```\n\n#### Find a user by email:\n\n```js\nlet userEmail = \"example@gmail.com\";\nUser.findOne({ email: userEmail }, (err, user) => {\n console.log(user);\n});\n```\n\n#### Find 5 most recent user accounts:\n\n```js\nUser.find()\n .sort({ _id: -1 })\n .limit(5)\n .exec((err, users) => {\n console.log(users);\n });\n```\n\n#### Get the total count of a field from all documents:\n\nLet's suppose that each user has a `votes` field and you would like to count the\ntotal number of votes in your database across all users. One very inefficient\nway would be to loop through each document and manually accumulate the count. Or\nyou could use\n[MongoDB Aggregation Framework](https://docs.mongodb.org/manual/core/aggregation-introduction/)\ninstead:\n\n```js\nUser.aggregate(\n { $group: { _id: null, total: { $sum: \"$votes\" } } },\n (err, votesCount) => {\n console.log(votesCount.total);\n }\n);\n```\n\n:top: [**back to top**](#table-of-contents)\n\n## Docker\n\nYou will need docker and docker-compose installed to build the application.\n\n- [Docker installation](https://docs.docker.com/engine/installation/)\n\n- [Common problems setting up docker](https://docs.docker.com/toolbox/faqs/troubleshoot/)\n\nAfter installing docker, start the application with the following commands :\n\n```\n# To build the project for the first time or when you add dependencies\ndocker-compose build web\n\n# To start the application (or to restart after making changes to the source code)\ndocker-compose up web\n\n```\n\nTo view the app, find your docker IP address + port 8080 ( this will typically\nbe http://localhost:8080/ ). To use a port other than 8080, you would need to\nmodify the port in app.js, Dockerfile, and docker-compose.yml.\n\n## Deployment\n\nOnce you are ready to deploy your app, you will need to create an account with a\ncloud platform to host it. These are not the only choices, but they are my top\npicks. From my experience, the easiest way to get started is with **Heroku**. It\nwill automatically restart your Node.js process when it crashes, has\nzero-downtime deployments and supports custom domains on free accounts.\nAdditionally, you can create an account with **MongoDB Atlas** and then pick one\nof the _4_ providers below. Again, there are plenty of other choices, and you\nare not limited to just the ones listed below.\n\n### Deployment to Heroku\n\n\n\n- Download and install [Heroku Toolbelt](https://toolbelt.heroku.com/)\n- In a terminal, run `heroku login` and enter your Heroku credentials\n- From _your app_ directory run `heroku create`\n- Use the command `heroku config:set KEY=val` to set the different environment\n variables (KEY=val) for your application (i.e.\n `heroku config:set BASE_URL=[heroku App Name].herokuapp.com` or\n `heroku config:set MONGODB_URI=mongodb://dbuser:\n\n- Go to\n [https://www.mongodb.com/cloud/atlas](https://www.mongodb.com/cloud/atlas)\n- Click the green **Get started free** button\n- Fill in your information then hit **Get started free**\n- You will be redirected to Create New Cluster page.\n- Select a **Cloud Provider and Region** (such as AWS and a free tier region)\n- Select cluster Tier to **Free Shared Clusters**\n- Give Cluster a name (default: Cluster0)\n- Click on green **:zap:Create Cluster button**\n- Now, to access your database you need to create a DB user. To create a new\n MongoDB user, from the **Clusters view**, select the **Security tab**\n- Under the **MongoDB Users** tab, click on **+Add New User**\n- Fill in a username and password and give it either **Atlas Admin** User\n Privilege\n- Next, you will need to create an IP address whitelist and obtain the\n connection URI. In the Clusters view, under the cluster details (i.e.\n SANDBOX - Cluster0), click on the **CONNECT** button.\n- Under section **(1) Check the IP Whitelist**, click on **ALLOW ACCESS FROM\n ANYWHERE**. The form will add a field with `0.0.0.0/0`. Click **SAVE** to\n save the `0.0.0.0/0` whitelist.\n- Under section **(2) Choose a connection method**, click on **Connect Your\n Application**\n- In the new screen, select **Node.js** as Driver and version **2.2.12 or\n later**. _*WARNING*_: Do not pick 3.0 or later since connect-mongo can't\n handle mongodb+srv:// connection strings.\n- Finally, copy the URI connection string and replace the URI in MONGODB_URI\n of `.env.example` with this URI string. Make sure to replace the \n**NOTE** *These instructions might be out of date due to changes in OpenShift. Heroku is currently a good free alternative. If you the new process, please feel free to help us update this page*\n\n- First, install this Ruby gem: `sudo gem install rhc` :gem:\n- Run `rhc login` and enter your OpenShift credentials\n- From your app directory run `rhc app create MyApp nodejs-0.10`\n- **Note:** _MyApp_ is the name of your app (no spaces)\n- Once that is done, you will be provided with **URL**, **SSH** and **Git\n Remote** links\n- Visit provided **URL**, and you should see the _Welcome to your Node.js\n application on OpenShift_ page\n- Copy and paste **Git Remote** into\n `git remote add openshift YOUR_GIT_REMOTE`\n- Before you push your app, you need to do a few modifications to your code\n\nAdd these two lines to `app.js`, just place them anywhere before `app.listen()`:\n\n```js\nvar IP_ADDRESS = process.env.OPENSHIFT_NODEJS_IP || \"127.0.0.1\";\nvar PORT = process.env.OPENSHIFT_NODEJS_PORT || 8080;\n```\n\nThen change `app.listen()` to:\n\n```js\napp.listen(PORT, IP_ADDRESS, () => {\n console.log(\n `Express server listening on port ${PORT} in ${app.settings.env} mode`\n );\n});\n```\n\nAdd this to `package.json`, after _name_ and _version_. This is necessary\nbecause, by default, OpenShift looks for `server.js` file. And by specifying\n`supervisor app.js` it will automatically restart the server when node.js\nprocess crashes.\n\n```js\n\"main\": \"app.js\",\n\"scripts\": {\n \"start\": \"supervisor app.js\"\n},\n```\n\n- Finally, you can now push your code to OpenShift by running\n `git push -f openshift master`\n- **Note:** The first time you run this command, you have to pass `-f` (force)\n flag because OpenShift creates a dummy server with the welcome page when you\n create a new Node.js app. Passing `-f` flag will override everything with\n your _Hackathon Starter_ project repository. **Do not** run `git pull` as it\n will create unnecessary merge conflicts.\n- And you are done!\n\n---\n\n### Azure\n\n\n**NOTE** *Beyond the initial 12 month trial of Azure, the platform does not seem to offer a free tier for hosting NodeJS apps. If you are looking for a free tier service to host your app, Heroku might be a better choice at this point*\n\n- Login to [Windows Azure Management Portal](https://manage.windowsazure.com/)\n- Click the **+ NEW** button on the bottom left of the portal\n- Click **COMPUTE**, then **WEB APP**, then **QUICK CREATE**\n- Enter a name for **URL** and select the datacenter **REGION** for your web\n site\n- Click on **CREATE WEB APP** button\n- Once the web site status changes to _Running_, click on the name of the web\n site to access the Dashboard\n- At the bottom right of the Quickstart page, select **Set up a deployment\n from source control**\n- Select **Local Git repository** from the list, and then click the arrow\n- To enable Git publishing, Azure will ask you to create a user name and\n password\n- Once the Git repository is ready, you will be presented with a **GIT URL**\n- Inside your _Hackathon Starter_ directory, run\n `git remote add azure [Azure Git URL]`\n- To push your changes run `git push azure master`\n- **Note:** _You will be prompted for the password you created earlier_\n- On **Deployments** tab of your Windows Azure Web App, you will see the\n deployment history\n\n---\n\n## IBM Bluemix Cloud Platform\n\n**NOTE** _At this point it appears that Bluemix's free tier to host NodeJS apps\nis limited to 30 days. If you are looking for a free tier service to host your\napp, Heroku might be a better choice at this point_\n\n1. Create a Bluemix Account\n\n [Sign up](https://console.ng.bluemix.net/registration/?target=%2Fdashboard%2Fapps)\n for Bluemix, or use an existing account.\n\n1. Download and install the\n [Cloud Foundry CLI](https://github.com/cloudfoundry/cli) to push your\n applications to Bluemix.\n\n1. Create a `manifest.yml` file in the root of your application.\n\n```\napplications:\n- name: \n[Conversation](https://www.ibm.com/watson/services/conversation/)** - Quickly\nbuild and deploy chatbots and virtual agents across a variety of channels,\nincluding mobile devices, messaging platforms, and even robots.\n\n**\n[Discovery](https://www.ibm.com/watson/services/discovery/)** - Unlock hidden\nvalue in data to find answers, monitor trends and surface patterns with the\nworld’s most advanced cloud-native insight engine.\n\n**\n[Language Translator](https://www.ibm.com/watson/services/language-translator/)** -\nTranslate text from one language to another.\n\n**\n[Natural Language Classifier](https://www.ibm.com/watson/services/natural-language-classifier/)** -\nInterpret and classify natural language with confidence.\n\n**\n[Natural Language Understanding](https://www.ibm.com/watson/services/natural-language-understanding/)** -\nAnalyze text to extract meta-data from content such as concepts, entities,\nkeywords and more.\n\n**\n[Personality Insights](https://www.ibm.com/watson/services/personality-insights/)** -\nPredict personality characteristics, needs and values through written text.\n\n**\n[Speech to Text](https://www.ibm.com/watson/services/speech-to-text/)** -\nConvert audio and voice into written text for quick understanding of content.\n\n**\n[Text to Speech](https://www.ibm.com/watson/services/text-to-speech/)** -\nConvert written text into natural sounding audio in a variety of languages and\nvoices.\n\n**\n[Tone Analyzer](https://www.ibm.com/watson/services/tone-analyzer/)** -\nUnderstand emotions, social tendencies and perceived writing style.\n\n**\n[Visual Recognition](https://www.ibm.com/watson/services/visual-recognition/)** -\nTag, classify and search visual content using machine learning.\n\n[Click here](https://www.ibm.com/watson/developercloud/services-catalog.html)\nfor live demos of each Watson service.\n\n---\n\n### Google Cloud Platform\n\n\n\n- [Download and install Node.js](https://nodejs.org/)\n- [Select or create](https://console.cloud.google.com/project) a Google Cloud\n Platform Console project\n- [Enable billing](https://support.google.com/cloud/answer/6293499#enable-billing)\n for your project (there's a $300 free trial)\n- Install and initialize the\n [Google Cloud SDK](https://cloud.google.com/sdk/docs/quickstarts)\n- Create an `app.yaml` file at the root of your `hackathon-starter` folder\n with the following contents:\n\n ```yaml\n runtime: nodejs\n env: flex\n manual_scaling:\n instances: 1\n ```\n\n- Make sure you've set `MONGODB_URI` in `.env.example`\n- Run the following command to deploy the `hackathon-starter` app:\n\n ```bash\n gcloud app deploy\n ```\n\n- [Monitor your deployed app](https://console.cloud.google.com/appengine) in\n the Cloud Console\n- [View the logs](https://console.cloud.google.com/logs/viewer) for your app\n in the Cloud Console\n\n## Production\n\nIf you are starting with this boilerplate to build an application for prod\ndeployment, or if after your hackathon you would like to get your project\nhardened for production use, see\n[prod-checklist.md](https://github.com/sahat/hackathon-starter/blob/master/prod-checklist.md).\n\n## Changelog\n\nYou can find the changelog for the project in:\n[CHANGELOG.md](https://github.com/sahat/hackathon-starter/blob/master/CHANGELOG.md)\n\n## Contributing\n\nIf something is unclear, confusing, or needs to be refactored, please let me\nknow. Pull requests are always welcome, but due to the opinionated nature of\nthis project, I cannot accept every pull request. Please open an issue before\nsubmitting a pull request. This project uses\n[Airbnb JavaScript Style Guide](https://github.com/airbnb/javascript) with a few\nminor exceptions. If you are submitting a pull request that involves Pug\ntemplates, please make sure you are using _spaces_, not tabs.\n\n## License\n\nThe MIT License (MIT)\n\nCopyright (c) 2014-2020 Sahat Yalkabov\n\nPermission is hereby granted, free of charge, to any person obtaining a copy of\nthis software and associated documentation files (the \"Software\"), to deal in\nthe Software without restriction, including without limitation the rights to\nuse, copy, modify, merge, publish, distribute, sublicense, and/or sell copies of\nthe Software, and to permit persons to whom the Software is furnished to do so,\nsubject to the following conditions:\n\nThe above copyright notice and this permission notice shall be included in all\ncopies or substantial portions of the Software.\n\nTHE SOFTWARE IS PROVIDED \"AS IS\", WITHOUT WARRANTY OF ANY KIND, EXPRESS OR\nIMPLIED, INCLUDING BUT NOT LIMITED TO THE WARRANTIES OF MERCHANTABILITY, FITNESS\nFOR A PARTICULAR PURPOSE AND NONINFRINGEMENT. IN NO EVENT SHALL THE AUTHORS OR\nCOPYRIGHT HOLDERS BE LIABLE FOR ANY CLAIM, DAMAGES OR OTHER LIABILITY, WHETHER\nIN AN ACTION OF CONTRACT, TORT OR OTHERWISE, ARISING FROM, OUT OF OR IN\nCONNECTION WITH THE SOFTWARE OR THE USE OR OTHER DEALINGS IN THE SOFTWARE.\n","readmeFilename":"README.md","gitHead":"f66ae83bc64281e937cd62a06129c28ff9b70924","bugs":{"url":"https://github.com/sahat/hackathon-starter/issues"},"homepage":"https://github.com/sahat/hackathon-starter#readme","_id":"@atomist/hackathon-starter@6.0.1-branch-atomist-prettier-config-master.1","_nodeVersion":"12.20.0","_npmVersion":"6.14.8","dist":{"integrity":"sha512-okM/2Mxt7svstGl9WAqsDXlPgIPrQDH58blafW6oPUT+iGZ73eRlG2H3NuA+E1Mjs+rCTm95O2/St+om9yfJsA==","shasum":"1735079e4dd6f478cf808adb5095fdd65a4d1c3d","tarball":"https://registry.npmjs.org/@atomist/hackathon-starter/-/hackathon-starter-6.0.1-branch-atomist-prettier-config-master.1.tgz","fileCount":72,"unpackedSize":665578,"npm-signature":"-----BEGIN PGP SIGNATURE-----\r\nVersion: OpenPGP.js v3.0.13\r\nComment: https://openpgpjs.org\r\n\r\nwsFcBAEBCAAQBQJf0IkECRA9TVsSAnZWagAAeX0P/jwMQd30avTKO8T0zbG3\nBD/KoJqtkqFf8lrPpYacOX853eMxhbvZijgtuM2msy5SkSAAshUNDQ9sY4Ya\nMxzAwIpxxnlytpYYNdApoRT2KWbPQ7Mzq/jb4Y+7pDwh8LZXUFlT1fu6MEw5\nhTuJdGmi8nSIv9amQMcP1O87q7f9iMCRi+BcKHI5Wr1HJFkA7PM/yDz0kkca\nBu0O5ADD9GXqHonfvNXAKb2biQjK1k2tInoi4PKXDcxZ80enzrRJm+8w+REn\nrMdLEMWxekRZucTd9dENqHe6HLiQklcrCvdzQ98BCZbMO+2ozx3ea6BtnYFE\n36hykmvHtlTxKVcScdHZqRhMCkOQhzN6foUGPXTuZ6VwFVtDpuKOOOxpZCcb\nauuuwZt5XZczq3sXK9o+Q12xJ7x0eBMzy7hvSGo9nH5SlwlamE4E4nmcwXi3\n1v5wwI5Yy5mtK9vJb6OCc5P77mAX2EsANeLXOsTiRTm5LSludHwWR1nTTfyw\nD7esmRr6h0FefnYdkD/Lek9kaClfgfR0IMAM8sk83mBTNMnkBfNQA0gUct0j\nTltuMww4LyimvzMd1bWhtojPNT3sybrpDCufGh4ul62X1WDImibvYq2ViLiT\nn+JQFKtTso8ijCOHbyPdgMJT+B9Uhg+U+B6hZ8/VzqmzihjM0DJ3kRkgdLgX\n6eUn\r\n=0sEW\r\n-----END PGP SIGNATURE-----\r\n","signatures":[{"keyid":"SHA256:jl3bwswu80PjjokCgh0o2w5c2U4LhQAE57gj9cz1kzA","sig":"MEYCIQCY0IKdc2JWgBd5Y2SJmwabphqxoCrqO1+8yIsIobHo3QIhAO2s0EtchdXZHgVUb8nGY189a4R7H2xTMwwUo9kYuK0g"}]},"_npmUser":{"name":"atomist-bot","email":"npm@atomist.com"},"directories":{},"maintainers":[{"name":"slimslenderslacks","email":"slimslenderslacks@gmail.com"},{"name":"cdupuis","email":"cd@atomist.com"},{"name":"ddatomist","email":"david@atomist.com"},{"name":"atomist-bot","email":"npm@atomist.com"}],"_npmOperationalInternal":{"host":"s3://npm-registry-packages","tmp":"tmp/hackathon-starter_6.0.1-branch-atomist-prettier-config-master.1_1607502084136_0.4531483724889731"},"_hasShrinkwrap":false},"6.0.1-branch-atomist-npm-update-master.0":{"name":"@atomist/hackathon-starter","version":"6.0.1-branch-atomist-npm-update-master.0","description":"A boilerplate for Node.js web applications","repository":{"type":"git","url":"git+https://github.com/sahat/hackathon-starter.git"},"license":"MIT","author":{"name":"Sahat Yalkabov"},"contributors":[{"name":"Yashar Fakhari","url":"https://github.com/YasharF"}],"scripts":{"postinstall":"npm rebuild node-sass","start":"node app.js","test":"nyc mocha --timeout=10000 --exit","lint":"eslint \"**/*.js\"","atm:lint:prettier":"prettier --write"},"dependencies":{"@fortawesome/fontawesome-free":"^5.15.1","@ladjs/bootstrap-social":"^7.0.2","@octokit/rest":"^18.0.12","axios":"^0.20.0","bcrypt":"^5.0.0","body-parser":"^1.19.0","bootstrap":"^4.5.3","chalk":"^4.1.0","chart.js":"^2.9.4","cheerio":"^1.0.0-rc.3","compression":"^1.7.4","connect-mongo":"^3.2.0","dotenv":"^8.2.0","errorhandler":"^1.5.1","express":"^4.17.1","express-flash":"^0.0.2","express-handlebars":"^5.2.0","express-session":"^1.17.1","express-status-monitor":"^1.3.3","googleapis":"^61.0.0","instagram-node":"^0.5.8","jquery":"^3.5.1","lastfm":"^0.9.3","lob":"^6.1.1","lodash":"^4.17.20","lusca":"^1.6.1","mailchecker":"^3.3.17","moment":"^2.29.1","mongoose":"^5.11.5","morgan":"^1.10.0","multer":"^1.4.2","node-quickbooks":"^2.0.37","node-sass":"^4.14.1","node-sass-middleware":"^0.11.0","nodemailer":"^6.4.16","passport":"^0.4.1","passport-facebook":"^3.0.0","passport-github2":"^0.1.12","passport-google-oauth":"^2.0.0","passport-instagram":"^1.0.0","passport-linkedin-oauth2":"^2.0.0","passport-local":"^1.0.0","passport-oauth":"^1.0.0","passport-oauth2-refresh":"^2.0.1","passport-openid":"^0.4.0","passport-snapchat":"^1.0.0","passport-twitch-new":"^0.0.2","passport-twitter":"^1.0.4","paypal-rest-sdk":"^1.8.1","popper.js":"^1.16.1","pug":"^3.0.0","stripe":"^8.127.0","tumblr.js":"^3.0.0","twilio":"^3.54.0","twitter-lite":"^0.14.0","validator":"^13.5.1"},"devDependencies":{"chai":"^4.2.0","eslint":"^7.15.0","eslint-config-airbnb-base":"^14.2.1","eslint-plugin-chai-friendly":"^0.6.0","eslint-plugin-import":"^2.22.1","husky":"^4.3.5","lint-staged":"^10.5.3","mocha":"^8.2.1","nyc":"^15.1.0","prettier":"^2.2.1","sinon":"^9.2.1","supertest":"^5.0.0"},"engines":{"node":">=10.22.1","npm":">=6.14.6"},"husky":{"hooks":{"pre-commit":"lint-staged"}},"lint-staged":{"**/*.@(graphql|json|markdown|yaml|yml|md)":"npm run atm:lint:prettier"},"gitHead":"e1bd410a554e7f9b5bdc097c36071af0f6f3a86a","readme":"\nHackathon Starter =======================\n\n[](https://david-dm.org/sahat/hackathon-starter)\n[](https://david-dm.org/sahat/hackathon-starter?type=dev)\n[](https://travis-ci.org/sahat/hackathon-starter)\n[](https://gitter.im/sahat/hackathon-starter?utm_source=badge&utm_medium=badge&utm_campaign=pr-badge&utm_content=badge)\n\n**Live Demo**: https://hackathon-starter.walcony.com\n\nJump to\n[What's new?](https://github.com/sahat/hackathon-starter/blob/master/CHANGELOG.md)\n\nA boilerplate for **Node.js** web applications.\n\nIf you have attended any hackathons in the past, then you know how much time it\ntakes to get a project started: decide on what to build, pick a programming\nlanguage, pick a web framework, pick a CSS framework. A while later, you might\nhave an initial project up on GitHub and only then can other team members start\ncontributing. Or how about doing something as simple as _Sign in with Facebook_\nauthentication? You can spend hours on it if you are not familiar with how OAuth\n2.0 works.\n\nWhen I started this project, my primary focus was on **simplicity** and **ease\nof use**. I also tried to make it as **generic** and **reusable** as possible to\ncover most use cases of hackathon web apps, without being too specific. In the\nworst case, you can use this as a learning guide for your projects, if for\nexample you are only interested in **Sign in with Google** authentication and\nnothing else.\n\n### Testimonials\n\n> [**“Nice! That README alone is already gold!”**](https://www.producthunt.com/tech/hackathon-starter#comment-224732)\n> — Adrian Le Bas\n\n> [**“Awesome. Simply awesome.”**](https://www.producthunt.com/tech/hackathon-starter#comment-224966)
\n> — Steven Rueter\n\n> [**“I'm using it for a year now and many projects, it's an awesome boilerplate and the project is well maintained!”**](https://www.producthunt.com/tech/hackathon-starter#comment-228610)
\n> — Kevin Granger\n\n> **“Small world with Sahat's project. We were using his hackathon starter for\n> our hackathon this past weekend and got some prizes. Really handy repo!”**
\n> — Interview candidate for one of the companies I used to work with.\n\n
Modern Theme
\n\n\n\nFlatly Bootstrap Theme
\n\n\n\nAPI Examples
\n\n\n\n## Table of Contents\n\n- [Features](#features)\n- [Prerequisites](#prerequisites)\n- [Getting Started](#getting-started)\n- [Obtaining API Keys](#obtaining-api-keys)\n- [Project Structure](#project-structure)\n- [List of Packages](#list-of-packages)\n- [Useful Tools and Resources](#useful-tools-and-resources)\n- [Recommended Design Resources](#recommended-design-resources)\n- [Recommended Node.js Libraries](#recommended-nodejs-libraries)\n- [Recommended Client-side Libraries](#recommended-client-side-libraries)\n- [Pro Tips](#pro-tips)\n- [FAQ](#faq)\n- [How It Works](#how-it-works-mini-guides)\n- [Cheatsheets](#cheatsheets)\n - [ES6](#-es6-cheatsheet)\n - [JavaScript Date](#-javascript-date-cheatsheet)\n - [Mongoose Cheatsheet](#mongoose-cheatsheet)\n- [Deployment](#deployment)\n- [Docker](#docker)\n- [Production](#production)\n- [Changelog](#changelog)\n- [Contributing](#contributing)\n- [License](#license)\n\n## Features\n\n- **Local Authentication** using Email and Password\n- **OAuth 1.0a Authentication** via Twitter\n- **OAuth 2.0 Authentication** via Facebook, Google, GitHub, LinkedIn,\n Instagram\n- Flash notifications\n- MVC Project Structure\n- Node.js clusters support\n- Sass stylesheets (auto-compiled via middleware)\n- Bootstrap 4 + Extra Themes\n- Contact Form (powered by Mailgun, Sendgrid or Mandrill)\n- **Account Management**\n- Gravatar\n- Profile Details\n- Change Password\n- Forgot Password\n- Reset Password\n- Link multiple OAuth strategies to one account\n- Delete Account\n- CSRF protection\n- **API Examples**: Facebook, Foursquare, Last.fm, Tumblr, Twitter, Stripe,\n LinkedIn and more.\n\n## Prerequisites\n\n- [MongoDB](https://www.mongodb.com/download-center/community)\n- [Node.js 10+](http://nodejs.org)\n- Command Line Tools\n- **Mac\n OS X:** [Xcode](https://itunes.apple.com/us/app/xcode/id497799835?mt=12) (or\n **OS X 10.9+**: `xcode-select --install`)\n- **Windows:**\n [Visual Studio](https://www.visualstudio.com/products/visual-studio-community-vs)\n OR [Visual Studio Code](https://code.visualstudio.com) +\n [Windows Subsystem for Linux - Ubuntu](https://docs.microsoft.com/en-us/windows/wsl/install-win10)\n- **Ubuntu**\n /\n **Linux\n Mint:** `sudo apt-get install build-essential`\n- **Fedora**:\n `sudo dnf groupinstall \"Development Tools\"`\n- **OpenSUSE:**\n `sudo zypper install --type pattern devel_basis`\n\n**Note:** If you are new to Node or Express, you may find\n[Node.js & Express From Scratch series](https://www.youtube.com/watch?v=Ad2ngx6CT0M&list=PLillGF-RfqbYRpji8t4SxUkMxfowG4Kqp&index=3)\nhelpful for learning the basics of Node and Express. Alternatively, here is\nanother great tutorial for complete beginners -\n[Getting Started With Node.js, Express, MongoDB](http://cwbuecheler.com/web/tutorials/2013/node-express-mongo/).\n\n## Getting Started\n\nThe easiest way to get started is to clone the repository:\n\n```bash\n# Get the latest snapshot\ngit clone https://github.com/sahat/hackathon-starter.git myproject\n\n# Change directory\ncd myproject\n\n# Install NPM dependencies\nnpm install\n\n# Then simply start your app\nnode app.js\n```\n\n**Warning:** If you want to use some API that need https to work (for example\nPinterest or facebook), you will need to download [ngrok](https://ngrok.com/).\nYou must start ngrok after starting the project.\n\n```bash\n# start ngrok to intercept the data exchanged on port 8080\n./ngrok http 8080\n```\n\nNext, you must use the https URL defined by ngrok, for example,\n`https://hackaton.ngrok.io`\n\n**Note:** I highly recommend installing\n[Nodemon](https://github.com/remy/nodemon). It watches for any changes in your\nnode.js app and automatically restarts the server. Once installed, instead of\n`node app.js` use `nodemon app.js`. It will save you a lot of time in the long\nrun, because you won't need to manually restart the server each time you make a\nsmall change in code. To install, run `sudo npm install -g nodemon`.\n\n## Obtaining API Keys\n\nTo use any of the included APIs or OAuth authentication methods, you will need\nto obtain appropriate credentials: Client ID, Client Secret, API Key, or\nUsername & Password. You will need to go through each provider to generate new\ncredentials.\n\n\n\n- Visit\n Google\n reCAPTCHA Admin Console\n- Enter your application's name as the **Label**\n- Chose **reCAPTCHA v2**, **\"I'm not a robot\" Checkbox**\n- Enter _localhost_ as the domain. You can have other domains added in\n addition to _localhost_\n- Accept the terms and submit the form\n- Copy the _Site Key_ and the _Secret key_ into `.env`. These keys will be\n accessible under Settings, reCAPTCHA keys drop down if you need them again\n later.\n\n\n\n
\n\n- Visit\n Google\n Cloud Console\n- Click on the **Create Project** button\n- Enter _Project Name_, then click on **Create** button\n- Then click on _APIs & auth_ in the sidebar and select _API_ tab\n- Click on **Google+ API** under _Social APIs_, then click **Enable API**\n- Click on **Google Drive API** under _G Suite_, then click **Enable API**\n- Click on **Google Sheets API** under _G Suite_, then click **Enable API**\n- Next, under _APIs & auth_ in the sidebar click on _Credentials_ tab\n- Click on **Create new Client ID** button\n- Select _Web Application_ and click on **Configure Consent Screen**\n- Fill out the required fields then click on **Save**\n- In the _Create Client ID_ modal dialog:\n- **Application Type**: Web Application\n- **Authorized Javascript origins**: http://localhost:8080\n- **Authorized redirect URI**: http://localhost:8080/auth/google/callback\n- Click on **Create Client ID** button\n- Copy and paste _Client ID_ and _Client secret_ keys into `.env`\n\n**Note:** When you ready to deploy to production don't forget to add your new\nURL to _Authorized Javascript origins_ and _Authorized redirect URI_, e.g.\n`http://my-awesome-app.herokuapp.com` and\n`http://my-awesome-app.herokuapp.com/auth/google/callback` respectively. The\nsame goes for other providers.\n\n\n\n
\n\n- Visit Snap Kit\n Developer Portal\n- Click on the **+** button to create an app\n- Enter a name for your app\n- Enable the scopes that you will want to use in your app\n- Click on the **Continue** button\n- Find the **Kits** section and make sure that **Login Kit** is enabled\n- Find the **Redirect URLs** section, click the **+ Add** button, and enter\n `http://localhost:8080/auth/snapchat/callback`\n- Find the **Development Environment** section. Click the **Generate** button\n next to the _Confidential OAuth2 Client_ heading within it.\n- Copy and paste the generated _Private Key_ and _OAuth2 Client ID_ keys into\n `.env`\n- **Note:** _OAuth2 Client ID_ is **SNAPCHAT_ID**, _Private Key_ is\n **SNAPCHAT_SECRET** in `.env`\n- To prepare the app for submission, fill out the rest of the required fields:\n _Category_, _Description_, _Privacy Policy Url_, and _App Icon_\n\n**Note:** For production use, don't forget to:\n\n- generate a _Confidential OAuth2 Client_ in the **Production Environment**\n and use the production _Private Key_ and _OAuth2 Client ID_\n- add the production URL to **Redirect URLs** section, e.g.\n `http://my-awesome-app.herokuapp.com/auth/snapchat/callback`\n- submit the app for review and wait for approval\n\n\n\n
\n\n- Visit Facebook\n Developers\n- Click **My Apps**, then select \\*_Add a New App_ from the dropdown menu\n- Enter a new name for your app\n- Click on the **Create App ID** button\n- Find the Facebook Login Product and click on **Facebook Login**\n- Instead of going through their Quickstart, click on **Settings** for your\n app in the top left corner\n- Copy and paste _App ID_ and _App Secret_ keys into `.env`\n- **Note:** _App ID_ is **FACEBOOK_ID**, _App Secret_ is **FACEBOOK_SECRET**\n in `.env`\n- Enter `localhost` under _App Domains_\n- Choose a **Category** that best describes your app\n- Click on **+ Add Platform** and select **Website**\n- Enter `http://localhost:8080` under _Site URL_\n- Click on the _Settings_ tab in the left nav under Facebook Login\n- Enter `http://localhost:8080/auth/facebook/callback` under Valid OAuth\n redirect URIs\n\n**Note:** After a successful sign in with Facebook, a user will be redirected\nback to the home page with appended hash `#_=_` in the URL. It is _not_ a bug.\nSee this\n[Stack Overflow](https://stackoverflow.com/questions/7131909/facebook-callback-appends-to-return-url)\ndiscussion for ways to handle it.\n\n\n\n
\n\n- Go to Account\n Settings\n- Select **Developer settings** from the sidebar\n- Then click on **OAuth Apps** and then on **Register new application**\n- Enter _Application Name_ and _Homepage URL_\n- For _Authorization Callback URL_: http://localhost:8080/auth/github/callback\n- Click **Register application**\n- Now copy and paste _Client ID_ and _Client Secret_ keys into `.env` file\n\n\n\n
\n\n- Sign in at\n https://apps.twitter.com\n- Click **Create a new application**\n- Enter your application name, website and description\n- For **Callback URL**: http://127.0.0.1:8080/auth/twitter/callback\n- Go to **Settings** tab\n- Under _Application Type_ select **Read and Write** access\n- Check the box **Allow this application to be used to Sign in with Twitter**\n- Click **Update this Twitter's applications settings**\n- Copy and paste _Consumer Key_ and _Consumer Secret_ keys into `.env` file\n\n\n\n
\n\n- Sign in at\n LinkedIn Developer\n Network\n- From the account name dropdown menu select **API Keys**\n- _It may ask you to sign in once again_\n- Click **+ Add New Application** button\n- Fill out all the _required_ fields\n- **OAuth 2.0 Redirect URLs**: http://localhost:8080/auth/linkedin/callback\n- **JavaScript API Domains**: http://localhost:8080\n- For **Default Application Permissions** make sure at least the following is\n checked:\n- `r_basicprofile`\n- Finish by clicking **Add Application** button\n- Copy and paste _API Key_ and _Secret Key_ keys into `.env` file\n- _API Key_ is your **clientID**\n- _Secret Key_ is your **clientSecret**\n\n\n\n
\n\n- Sign up or log into your\n dashboard\n- Click on your profile and click on Account Settings\n- Then click on **API Keys**\n- Copy the **Secret Key**. and add this into `.env` file\n\n\n\n
\n\n- Visit PayPal\n Developer\n- Log in to your PayPal account\n- Click **Applications > Create App** in the navigation bar\n- Enter _Application Name_, then click **Create app**\n- Copy and paste _Client ID_ and _Secret_ keys into `.env` file\n- _App ID_ is **client_id**, _App Secret_ is **client_secret**\n- Change **host** to api.paypal.com if you want to test against production and\n use the live credentials\n\n\n\n
\n\n- Go to Foursquare\n for Developers\n- Click on **My Apps** in the top menu\n- Click the **Create A New App** button\n- Enter _App Name_, _Welcome page url_,\n- For **Redirect URI**: http://localhost:8080/auth/foursquare/callback\n- Click **Save Changes**\n- Copy and paste _Client ID_ and _Client Secret_ keys into `.env` file\n\n\n\n
\n\n- Go to\n http://www.tumblr.com/oauth/apps\n- Once signed in, click **+Register application**\n- Fill in all the details\n- For **Default Callback URL**: `http://localhost:8080/auth/tumblr/callback`\n- Click **✔Register**\n- Copy and paste _OAuth consumer key_ and _OAuth consumer secret_ keys into\n `.env` file\n\n\n\n
\n\n- Go to\n http://steamcommunity.com/dev/apikey\n- Sign in with your existing Steam account\n- Enter your _Domain Name_, then and click **Register**\n- Copy and paste _Key_ into `.env` file\n\n\n
\n\n- Visit the\n Twitch\n developer dashboard\n- If prompted, authorize the dashboard to access your twitch account\n- In the Console, click on Register Your Application\n- Enter the name of your application\n- Use OAuth Redirect URLs enter `http://localhost:8080/auth/twitch/callback`\n- Set Category to Website Integration and press the Create button\n- After the applicaiton has been created, click on the Manage button\n- Copy and paste _Client ID_ into `.env`\n- If there is no Client Secret displayed, click on New Secret button and then\n copy and paste the _Client secret_ into `.env`\n\n\n\n
\n\n- Go to\n https://sendgrid.com/user/signup\n- Sign up and **confirm** your account via the _activation email_\n- Then enter your SendGrid _Username_ and _Password_ into `.env` file\n\n\n\n
\n\n- Go to\n http://www.mailgun.com\n- Sign up and add your _Domain Name_\n- From the domain overview, copy and paste the default SMTP _Login_ and\n _Password_ into `.env` file\n\n\n\n
\n\n- Go to\n https://developer.here.com\n- Sign up and create a Freemium project\n- Create JAVASCRIPT/REST credentials. Copy and paste the APP_ID and APP into\n `.env` file.\n- Note that these credentials are available on the client side, and you need\n to create a domain whitelist for your app credentials when you are publicly\n launching the app.\n\n\n\n
\n\n- Go to\n https://www.twilio.com/try-twilio\n- Sign up for an account.\n- Once logged into the dashboard, expand the link 'show api credentials'\n- Copy your Account Sid and Auth Token\n\n\n\n
\n\n- Go to\n https://developer.intuit.com/app/developer/qbo/docs/get-started\n- Use the Sign Up option in the upper right corner of the screen (nav bar) to\n get a free developer account and a sandbox company.\n- Create a new app by going to your Dashboard using the My Apps option in the\n top nav bar or by going to\n https://developer.intuit.com/app/developer/myapps\n- In your App, under Development, Keys & OAuth (right nav), find the Client ID\n and Client Secret for your `.env` file\n\n## Project Structure\n\n| Name | Description |\n| ---------------------------------- | ------------------------------------------------------------ |\n| **config**/passport.js | Passport Local and OAuth strategies, plus login middleware. |\n| **controllers**/api.js | Controller for /api route and all api examples. |\n| **controllers**/contact.js | Controller for contact form. |\n| **controllers**/home.js | Controller for home page (index). |\n| **controllers**/user.js | Controller for user account management. |\n| **models**/User.js | Mongoose schema and model for User. |\n| **public**/ | Static assets (fonts, css, js, img). |\n| **public**/**js**/application.js | Specify client-side JavaScript dependencies. |\n| **public**/**js**/main.js | Place your client-side JavaScript here. |\n| **public**/**css**/main.scss | Main stylesheet for your app. |\n| **public/css/themes**/default.scss | Some Bootstrap overrides to make it look prettier. |\n| **views/account**/ | Templates for _login, password reset, signup, profile_. |\n| **views/api**/ | Templates for API Examples. |\n| **views/partials**/flash.pug | Error, info and success flash notifications. |\n| **views/partials**/header.pug | Navbar partial template. |\n| **views/partials**/footer.pug | Footer partial template. |\n| **views**/layout.pug | Base template. |\n| **views**/home.pug | Home page template. |\n| .dockerignore | Folder and files ignored by docker usage. |\n| .env.example | Your API keys, tokens, passwords and database URI. |\n| .eslintrc | Rules for eslint linter. |\n| .gitignore | Folder and files ignored by git. |\n| .travis.yml | Configuration files for continuous integration. |\n| app.js | The main application file. |\n| docker-compose.yml | Docker compose configuration file. |\n| Dockerfile | Docker configuration file. |\n| package.json | NPM dependencies. |\n| package-lock.json | Contains exact versions of NPM dependencies in package.json. |\n\n**Note:** There is no preference how you name or structure your views. You could\nplace all your templates in a top-level `views` directory without having a\nnested folder structure, if that makes things easier for you. Just don't forget\nto update `extends ../layout` and corresponding `res.render()` paths in\ncontrollers.\n\n## List of Packages\n\n| Package | Description |\n| --------------------------- | ----------------------------------------------------------------------- |\n| @octokit/rest | GitHub API library. |\n| bcrypt | Library for hashing and salting user passwords. |\n| body-parser | Node.js body parsing middleware. |\n| chai | BDD/TDD assertion library. |\n| chalk | Terminal string styling done right. |\n| cheerio | Scrape web pages using jQuery-style syntax. |\n| compression | Node.js compression middleware. |\n| connect-mongo | MongoDB session store for Express. |\n| dotenv | Loads environment variables from .env file. |\n| errorhandler | Development-only error handler middleware. |\n| eslint | Linter JavaScript. |\n| eslint-config-airbnb-base | Configuration eslint by airbnb. |\n| eslint-plugin-chai-friendly | Makes eslint friendly towards Chai.js 'expect' and 'should' statements. |\n| eslint-plugin-import | ESLint plugin with rules that help validate proper imports. |\n| express | Node.js web framework. |\n| express-flash | Provides flash messages for Express. |\n| express-session | Simple session middleware for Express. |\n| express-status-monitor | Reports real-time server metrics for Express. |\n| instagram-node | Instagram API library. |\n| lastfm | Last.fm API library. |\n| lob | Lob API library. |\n| lodash | A utility library for working with arrays, numbers, objects, strings. |\n| lusca | CSRF middleware. |\n| mailchecker | Verifies that an email address is valid and not a disposable address. |\n| mocha | Test framework. |\n| moment | Parse, validate, compute dates and times. |\n| mongoose | MongoDB ODM. |\n| morgan | HTTP request logger middleware for node.js. |\n| multer | Node.js middleware for handling `multipart/form-data`. |\n| node-foursquare | Foursquare API library. |\n| node-sass | Node.js bindings to libsass. |\n| node-sass-middleware | Sass middleware compiler. |\n| nyc | Coverage test. |\n| nodemailer | Node.js library for sending emails. |\n| node-quickbooks | Quickbooks API library. |\n| passport | Simple and elegant authentication library for node.js. |\n| passport-facebook | Sign-in with Facebook plugin. |\n| passport-github | Sign-in with GitHub plugin. |\n| passport-google-oauth | Sign-in with Google plugin. |\n| passport-instagram | Sign-in with Instagram plugin. |\n| passport-linkedin-oauth2 | Sign-in with LinkedIn plugin. |\n| passport-local | Sign-in with Username and Password plugin. |\n| passport-openid | Sign-in with OpenId plugin. |\n| passport-oauth | Allows you to set up your own OAuth 1.0a and OAuth 2.0 strategies. |\n| passport-oauth2-refresh | A library to refresh OAuth 2.0 access tokens using refresh tokens. |\n| passport-snapchat | Sign-in with Snapchat plugin. |\n| passport-twitter | Sign-in with Twitter plugin. |\n| passport-twitch-new | Sign-in with Twitch plugin. |\n| paypal-rest-sdk | PayPal APIs library. |\n| pug | Template engine for Express. |\n| sinon | Test spies, stubs and mocks for JavaScript. |\n| stripe | Offical Stripe API library. |\n| supertest | HTTP assertion library. |\n| tumblr.js | Tumblr API library. |\n| twilio | Twilio API library. |\n| twitter-lite | Twitter API library. |\n| validator | A library of string validators and sanitizers. |\n\n## Useful Tools and Resources\n\n- [JavaScripting](http://www.javascripting.com/) - The Database of JavaScript\n Libraries\n- [JS Recipes](http://sahatyalkabov.com/jsrecipes/) - JavaScript tutorials for\n backend and frontend development.\n- [HTML to Pug converter](https://html-to-pug.com/) - HTML to PUG is a free\n online converter helping you to convert HTML files to pug syntax in\n real-time.\n- [JavascriptOO](http://www.javascriptoo.com/) - A directory of JavaScript\n libraries with examples, CDN links, statistics, and videos.\n- [Favicon Generator](http://realfavicongenerator.net/) - Generate favicons\n for PC, Android, iOS, Windows 8.\n\n## Recommended Design Resources\n\n- [Code Guide](http://codeguide.co/) - Standards for developing flexible,\n durable, and sustainable HTML and CSS.\n- [Bootsnipp](http://bootsnipp.com/) - Code snippets for Bootstrap.\n- [Bootstrap Zero](https://www.bootstrapzero.com) - Free Bootstrap templates\n themes.\n- [Google Bootstrap](http://todc.github.io/todc-bootstrap/) - Google-styled\n theme for Bootstrap.\n- [Font Awesome Icons](http://fortawesome.github.io/Font-Awesome/icons/) -\n It's already part of the Hackathon Starter, so use this page as a reference.\n- [Colors](http://clrs.cc) - A nicer color palette for the web.\n- [Creative Button Styles](http://tympanus.net/Development/CreativeButtons/) -\n awesome button styles.\n- [Creative Link Effects](http://tympanus.net/Development/CreativeLinkEffects/) -\n Beautiful link effects in CSS.\n- [Medium Scroll Effect](http://codepen.io/andreasstorm/pen/pyjEh) - Fade\n in/out header background image as you scroll.\n- [GeoPattern](https://github.com/btmills/geopattern) - SVG background pattern\n generator.\n- [Trianglify](https://github.com/qrohlf/trianglify) - SVG low-poly background\n pattern generator.\n\n## Recommended Node.js Libraries\n\n- [Nodemon](https://github.com/remy/nodemon) - Automatically restart Node.js\n server on code changes.\n- [geoip-lite](https://github.com/bluesmoon/node-geoip) - Geolocation\n coordinates from IP address.\n- [Filesize.js](http://filesizejs.com/) - Pretty file sizes, e.g.\n `filesize(265318); // \"265.32 kB\"`.\n- [Numeral.js](http://numeraljs.com) - Library for formatting and manipulating\n numbers.\n- [Node Inspector](https://github.com/node-inspector/node-inspector) - Node.js\n debugger based on Chrome Developer Tools.\n- [node-taglib](https://github.com/nikhilm/node-taglib) - Library for reading\n the meta-data of several popular audio formats.\n- [sharp](https://github.com/lovell/sharp) - Node.js module for resizing JPEG,\n PNG, WebP and TIFF images.\n\n## Recommended Client-side Libraries\n\n- [Framework7](http://www.idangero.us/framework7/) - Full Featured HTML\n Framework For Building iOS7 Apps.\n- [InstantClick](http://instantclick.io) - Makes your pages load instantly by\n pre-loading them on mouse hover.\n- [NProgress.js](https://github.com/rstacruz/nprogress) - Slim progress bars\n like on YouTube and Medium.\n- [Hover](https://github.com/IanLunn/Hover) - Awesome CSS3 animations on mouse\n hover.\n- [Magnific Popup](http://dimsemenov.com/plugins/magnific-popup/) - Responsive\n jQuery Lightbox Plugin.\n- [jQuery Raty](http://wbotelhos.com/raty/) - Star Rating Plugin.\n- [Headroom.js](http://wicky.nillia.ms/headroom.js/) - Hide your header until\n you need it.\n- [X-editable](http://vitalets.github.io/x-editable/) - Edit form elements\n inline.\n- [Offline.js](http://github.hubspot.com/offline/docs/welcome/) - Detect when\n user's internet connection goes offline.\n- [Alertify.js](http://fabien-d.github.io/alertify.js/) - Sweet looking alerts\n and browser dialogs.\n- [selectize.js](http://selectize.github.io/selectize.js) - Styleable select\n elements and input tags.\n- [drop.js](http://github.hubspot.com/drop/docs/welcome/) - Powerful\n Javascript and CSS library for creating dropdowns and other floating\n displays.\n- [scrollReveal.js](https://github.com/jlmakes/scrollReveal.js) - Declarative\n on-scroll reveal animations.\n\n## Pro Tips\n\n- Use [async.parallel()](https://github.com/caolan/async#parallel) when you\n need to run multiple asynchronous tasks, and then render a page, but only\n when all tasks are completed. For example, you might want to scrape three\n different websites for some data and render the results in a template after\n all three websites have been scraped.\n- Need to find a specific object inside an Array? Use\n [\\_.find](http://lodash.com/docs#find) function from Lodash. For example,\n this is how you would retrieve a Twitter token from database:\n `var token = _.find(req.user.tokens, { kind: 'twitter' });`, where 1st\n parameter is an array, and a 2nd parameter is an object to search for.\n\n## FAQ\n\n### Why do I get `403 Error: Forbidden` when submitting a form?\n\nYou need to add the following hidden input element to your form. This has been\nadded in the\n[pull request #40](https://github.com/sahat/hackathon-starter/pull/40) as part\nof the CSRF protection.\n\n```\ninput(type='hidden', name='_csrf', value=_csrf)\n```\n\n**Note:** It is now possible to whitelist certain URLs. In other words you can\nspecify a list of routes that should bypass CSRF verification check.\n\n**Note 2:** To whitelist dynamic URLs use regular expression tests inside the\nCSRF middleware to see if `req.originalUrl` matches your desired pattern.\n\n### I am getting MongoDB Connection Error, how do I fix it?\n\nThat's a custom error message defined in `app.js` to indicate that there was a\nproblem connecting to MongoDB:\n\n```js\nmongoose.connection.on(\"error\", (err) => {\n console.error(err);\n console.log(\n \"%s MongoDB connection error. Please make sure MongoDB is running.\",\n chalk.red(\"✗\")\n );\n process.exit();\n});\n```\n\nYou need to have a MongoDB server running before launching `app.js`. You can\ndownload MongoDB [here](https://www.mongodb.com/download-center/community), or\ninstall it via a package manager.\n\nWindows users, read\n[Install MongoDB on Windows](https://docs.mongodb.org/manual/tutorial/install-mongodb-on-windows/).\n\n**Tip:** If you are always connected to the internet, you could just use\n[MongoDB Atlas](https://www.mongodb.com/cloud/atlas) or\n[Compose](https://www.compose.io/) instead of downloading and installing MongoDB\nlocally. You will only need to update database credentials in `.env` file.\n\n### I get an error when I deploy my app, why?\n\nChances are you haven't changed the _Database URI_ in `.env`. If `MONGODB` is\nset to `localhost`, it will only work on your machine as long as MongoDB is\nrunning. When you deploy to Heroku, OpenShift or some other provider, you will\nnot have MongoDB running on `localhost`. You need to create an account with\n[MongoDB Atlas](https://www.mongodb.com/cloud/atlas) or\n[Compose](https://www.compose.io/), then create a free tier database. See\n[Deployment](#deployment) for more information on how to setup an account and a\nnew database step-by-step with MongoDB Atlas.\n\n### Why Pug (Jade) instead of Handlebars?\n\nWhen I first started this project I didn't have any experience with Handlebars.\nSince then I have worked on Ember.js apps and got myself familiar with the\nHandlebars syntax. While it is true Handlebars is easier, because it looks like\ngood old HTML, I have no regrets picking Jade over Handlebars. First off, it's\nthe default template engine in Express, so someone who has built Express apps in\nthe past already knows it. Secondly, I find `extends` and `block` to be\nindispensable, which as far as I know, Handlebars does not have out of the box.\nAnd lastly, subjectively speaking, Jade looks much cleaner and shorter than\nHandlebars, or any non-HAML style for that matter.\n\n### Why do you have all routes defined in app.js?\n\nFor the sake of simplicity. While there might be a better approach, such as\npassing `app` context to each controller as outlined in this\n[blog](http://timstermatic.github.io/blog/2013/08/17/a-simple-mvc-framework-with-node-and-express/),\nI find such style to be confusing for beginners. It took me a long time to grasp\nthe concept of `exports` and `module.exports`, let alone having a global `app`\nreference in other files. That to me is backward thinking. The `app.js` is the\n\"heart of the app\", it should be the one referencing models, routes,\ncontrollers, etc. When working solo on small projects, I prefer to have\neverything inside `app.js` as is the case with\n[this](<(https://github.com/sahat/ember-sass-express-starter/blob/master/app.js)>)\nREST API server.\n\n### How do I switch SendGrid for another email delivery service, like Mailgun or SparkPost?\n\nInside the `nodemailer.createTransport` method arguments, change the service\nfrom `'Sendgrid'` to some other email service. Also, be sure to update both\nusername and password below that. See the\n[list of all supported services](https://github.com/nodemailer/nodemailer-wellknown#supported-services)\nby Nodemailer.\n\n## How It Works (mini guides)\n\nThis section is intended for giving you a detailed explanation of how a\nparticular functionality works. Maybe you are just curious about how it works,\nor perhaps you are lost and confused while reading the code, I hope it provides\nsome guidance to you.\n\n### Custom HTML and CSS Design 101\n\n[HTML5 UP](http://html5up.net/) has many beautiful templates that you can\ndownload for free.\n\nWhen you download the ZIP file, it will come with _index.html_, _images_, _css_\nand _js_ folders. So, how do you integrate it with Hackathon Starter? Hackathon\nStarter uses Bootstrap CSS framework, but these templates do not. Trying to use\nboth CSS files at the same time will likely result in undesired effects.\n\n**Note:** Using the custom templates approach, you should understand that you\ncannot reuse any of the views I have created: layout, home page, api browser,\nlogin, signup, account management, contact. Those views were built using\nBootstrap grid and styles. You will have to manually update the grid using a\ndifferent syntax provided in the template. **Having said that, you can mix and\nmatch if you want to do so: Use Bootstrap for main app interface, and a custom\ntemplate for a landing page.**\n\nLet's start from the beginning. For this example I will use\n[Escape Velocity](http://html5up.net/escape-velocity/) template:\n\n\n**Note:** For the sake of simplicity I will only consider `index.html`, and skip\n`left-sidebar.html`, `no-sidebar.html`, `right-sidebar.html`.\n\nMove all JavaScript files from `html5up-escape-velocity/js` to `public/js`. Then\nmove all CSS files from `html5up-escape-velocity/css` to `public/css`. And\nfinally, move all images from `html5up-escape-velocity/images` to\n`public/images`. You could move it to the existing **img** folder, but that\nwould require manually changing every `img` reference. Grab the contents of\n`index.html` and paste it into [HTML To Pug](https://html-to-pug.com/).\n\n**Note:** Do not forget to update all the CSS and JS paths accordingly.\n\nCreate a new file `escape-velocity.pug` and paste the Pug markup in `views`\nfolder. Whenever you see the code `res.render('account/login')` - that means it\nwill search for `views/account/login.pug` file.\n\nLet's see how it looks. Create a new controller **escapeVelocity** inside\n`controllers/home.js`:\n\n```js\nexports.escapeVelocity = (req, res) => {\n res.render(\"escape-velocity\", {\n title: \"Landing Page\",\n });\n};\n```\n\nAnd then create a route in `app.js`. I placed it right after the index\ncontroller:\n\n```js\napp.get(\"/escape-velocity\", homeController.escapeVelocity);\n```\n\nRestart the server (if you are not using **nodemon**); then you should see the\nnew template at\n[http://localhost:8080/escape-velocity](http://localhost:8080/escape-velocity).\n\nI will stop right here, but if you would like to use this template as more than\njust a single page, take a look at how these Pug templates work: `layout.pug` -\nbase template, `index.pug` - home page, `partials/header.pug` - Bootstrap\nnavbar, `partials/footer.pug` - sticky footer. You will have to manually break\nit apart into smaller pieces. Figure out which part of the template you want to\nkeep the same on all pages - that's your new `layout.pug`. Then, each page that\nchanges, be it `index.pug`, `about.pug`, `contact.pug` will be embedded in your\nnew `layout.pug` via `block content`. Use existing templates as a reference.\n\nThis is a rather lengthy process, and templates you get from elsewhere might\nhave yet another grid system. That's why I chose _Bootstrap_ for the Hackathon\nStarter. Many people are already familiar with _Bootstrap_, plus it's easy to\nget started with it if you have never used _Bootstrap_. You can also buy many\nbeautifully designed _Bootstrap_ themes at\n[Themeforest](http://themeforest.net/), and use them as a drop-in replacement\nfor Hackathon Starter. However, if you would like to go with a completely custom\nHTML/CSS design, this should help you to get started!\n\n\n\n### How do flash messages work in this project?\n\nFlash messages allow you to display a message at the end of the request and\naccess it on next request and only next request. For instance, on a failed login\nattempt, you would display an alert with some error message, but as soon as you\nrefresh that page or visit a different page and come back to the login page,\nthat error message will be gone. It is only displayed once. This project uses\n_express-flash_ module for flash messages. And that module is built on top of\n_connect-flash_, which is what I used in this project initially. With\n_express-flash_ you don't have to explicitly send a flash message to every view\ninside `res.render()`. All flash messages are available in your views via\n`messages` object by default, thanks to _express-flash_.\n\nFlash messages have a two-step process. You use\n`req.flash('errors', { msg: 'Error messages goes here' }` to create a flash\nmessage in your controllers, and then display them in your views:\n\n```pug\nif messages.errors\n .alert.alert-danger.fade.in\n for error in messages.errors\n div= error.msg\n```\n\nIn the first step, `'errors'` is the name of a flash message, which should match\nthe name of the property on `messages` object in your views. You place alert\nmessages inside `if message.errors` because you don't want to show them flash\nmessages are present. The reason why you pass an error like\n`{ msg: 'Error message goes here' }` instead of just a string -\n`'Error message goes here'`, is for the sake of consistency. To clarify that,\n_express-validator_ module which is used for validating and sanitizing user's\ninput, returns all errors as an array of objects, where each object has a `msg`\nproperty with a message why an error has occurred. Here is a more general\nexample of what express-validator returns when there are errors present:\n\n```js\n[\n { param: \"name\", msg: \"Name is required\", value: \"
\n\n### How do I create a new page?\n\nA more correct way to say this would be \"How do I create a new route?\" The main\nfile `app.js` contains all the routes. Each route has a callback function\nassociated with it. Sometimes you will see three or more arguments for a route.\nIn a case like that, the first argument is still a URL string, while middle\narguments are what's called middleware. Think of middleware as a door. If this\ndoor prevents you from continuing forward, you won't get to your callback\nfunction. One such example is a route that requires authentication.\n\n```js\napp.get(\"/account\", passportConfig.isAuthenticated, userController.getAccount);\n```\n\nIt always goes from left to right. A user visits `/account` page. Then\n`isAuthenticated` middleware checks if you are authenticated:\n\n```js\nexports.isAuthenticated = (req, res, next) => {\n if (req.isAuthenticated()) {\n return next();\n }\n res.redirect(\"/login\");\n};\n```\n\nIf you are authenticated, you let this visitor pass through your \"door\" by\ncalling `return next();`. It then proceeds to the next middleware until it\nreaches the last argument, which is a callback function that typically renders a\ntemplate on `GET` requests or redirects on `POST` requests. In this case, if you\nare authenticated, you will be redirected to the _Account Management_ page;\notherwise, you will be redirected to the _Login_ page.\n\n```js\nexports.getAccount = (req, res) => {\n res.render(\"account/profile\", {\n title: \"Account Management\",\n });\n};\n```\n\nExpress.js has `app.get`, `app.post`, `app.put`, `app.delete`, but for the most\npart, you will only use the first two HTTP verbs, unless you are building a\nRESTful API. If you just want to display a page, then use `GET`, if you are\nsubmitting a form, sending a file then use `POST`.\n\nHere is a typical workflow for adding new routes to your application. Let's say\nwe are building a page that lists all books from the database.\n\n**Step 1.** Start by defining a route.\n\n```js\napp.get(\"/books\", bookController.getBooks);\n```\n\n---\n\n**Note:** As of Express 4.x you can define your routes like so:\n\n```js\napp.route(\"/books\")\n .get(bookController.getBooks)\n .post(bookController.createBooks)\n .put(bookController.updateBooks)\n .delete(bookController.deleteBooks);\n```\n\nAnd here is how a route would look if it required an _authentication_ and an\n_authorization_ middleware:\n\n```js\napp.route(\"/api/twitter\")\n .all(passportConfig.isAuthenticated)\n .all(passportConfig.isAuthorized)\n .get(apiController.getTwitter)\n .post(apiController.postTwitter);\n```\n\nUse whichever style that makes sense to you. Either one is acceptable. I think\nthat chaining HTTP verbs on `app.route` is a very clean and elegant approach,\nbut on the other hand, I can no longer see all my routes at a glance when you\nhave one route per line.\n\n**Step 2.** Create a new schema and a model `Book.js` inside the _models_\ndirectory.\n\n```js\nconst mongoose = require(\"mongoose\");\n\nconst bookSchema = new mongoose.Schema({\n name: String,\n});\n\nconst Book = mongoose.model(\"Book\", bookSchema);\nmodule.exports = Book;\n```\n\n**Step 3.** Create a new controller file called `book.js` inside the\n_controllers_ directory.\n\n```js\n/**\n * GET /books\n * List all books.\n */\nconst Book = require(\"../models/Book.js\");\n\nexports.getBooks = (req, res) => {\n Book.find((err, docs) => {\n res.render(\"books\", { books: docs });\n });\n};\n```\n\n**Step 4.** Import that controller in `app.js`.\n\n```js\nconst bookController = require(\"./controllers/book\");\n```\n\n**Step 5.** Create `books.pug` template.\n\n```pug\nextends layout\n\nblock content\n .page-header\n h3 All Books\n\n ul\n for book in books\n li= book.name\n```\n\nThat's it! I will say that you could have combined Step 1, 2, 3 as following:\n\n```js\napp.get(\"/books\", (req, res) => {\n Book.find((err, docs) => {\n res.render(\"books\", { books: docs });\n });\n});\n```\n\nSure, it's simpler, but as soon as you pass 1000 lines of code in `app.js` it\nbecomes a little challenging to navigate the file. I mean, the whole point of\nthis boilerplate project was to separate concerns, so you could work with your\nteammates without running into _MERGE CONFLICTS_. Imagine you have four\ndevelopers working on a single `app.js`, I promise you it won't be fun resolving\nmerge conflicts all the time. If you are the only developer, then it's okay. But\nas I said, once it gets up to a certain LoC size, it becomes difficult to\nmaintain everything in a single file.\n\nThat's all there is to it. Express.js is super simple to use. Most of the time\nyou will be dealing with other APIs to do the real work:\n[Mongoose](http://mongoosejs.com/docs/guide.html) for querying database,\nsocket.io for sending and receiving messages over websockets, sending emails via\n[Nodemailer](http://nodemailer.com/), form validation using\n[express-validator](https://github.com/ctavan/express-validator) library,\nparsing websites using [Cheerio](https://github.com/cheeriojs/cheerio), etc.\n\n
\n\n### How do I use Socket.io with Hackathon Starter?\n\n[Dan Stroot](https://github.com/dstroot) submitted an excellent\n[pull request](https://github.com/dstroot/hackathon-starter/commit/0a632def1ce8da446709d92812423d337c977d75)\nthat adds a real-time dashboard with socket.io. And as much as I'd like to add\nit to the project, I think it violates one of the main principles of the\nHackathon Starter:\n\n> When I started this project, my primary focus was on simplicity and ease of\n> use. I also tried to make it as generic and reusable as possible to cover most\n> use cases of hackathon web apps, **without being too specific**.\n\nWhen I need to use socket.io, I **really** need it, but most of the time - I\ndon't. But more importantly, websockets support is still experimental on most\nhosting providers. As of October 2013, Heroku supports websockets, but not until\nyou opt-in by running this command:\n\n```js\nheroku labs:enable websockets -a myapp\n```\n\nAnd what if you are deploying to OpenShift? They do support websockets, but it\nis currently in a preview state. So, for OpenShift you would need to change the\nsocket.io connect URI to the following:\n\n```js\nconst socket = io.connect(\"http://yoursite-namespace.rhcloud.com:8000\");\n```\n\nWait, why is it on port 8000? Who knows, and if I didn't run across this\n[blog post](http://velin-georgiev-blog.appspot.com/blog/set-up-nodejs-express-socketio-application-using-websockets-on-openshift-by-red-hat/)\nI wouldn't even know I had to use port 8000.\n\nI am really glad that Heroku and OpenShift at least have a websockets support,\nbecause many other PaaS providers still do not support it. Due to the\naforementioned issues with websockets, I cannot include socket.io as part of the\nHackathon Starter. _For now..._ If you need to use socket.io in your app, please\ncontinue reading.\n\nFirst, you need to install socket.io:\n\n```js\nnpm install socket.io\n```\n\nReplace `const app = express();` with the following code:\n\n```js\nconst app = express();\nconst server = require(\"http\").Server(app);\nconst io = require(\"socket.io\")(server);\n```\n\nI like to have the following code organization in `app.js` (from top to bottom):\nmodule dependencies, import controllers, import configs, connect to database,\nexpress configuration, routes, start the server, socket.io stuff. That way I\nalways know where to look for things.\n\nAdd the following code at the end of `app.js`:\n\n```js\nio.on(\"connection\", (socket) => {\n socket.emit(\"greet\", { hello: \"Hey there browser!\" });\n socket.on(\"respond\", (data) => {\n console.log(data);\n });\n socket.on(\"disconnect\", () => {\n console.log(\"Socket disconnected\");\n });\n});\n```\n\nOne last thing left to change:\n\n```js\napp.listen(app.get('port'), () => {\n```\n\nto\n\n```js\nserver.listen(app.get('port'), () => {\n```\n\nAt this point, we are done with the back-end.\n\nYou now have a choice - to include your JavaScript code in Pug templates or have\nall your client-side JavaScript in a separate file - in `main.js`. I admit, when\nI first started with Node.js and JavaScript in general, I placed all JavaScript\ncode inside templates because I have access to template variables passed in from\nExpress right then and there. It's the easiest thing you can do, but also the\nleast efficient and harder to maintain. Since then I almost never include inline\nJavaScript inside templates anymore.\n\nBut it's also understandable if you want to take the easier road. Most of the\ntime you don't even care about performance during hackathons, you just want to\n[_\"get shit done\"_](https://www.startupvitamins.com/media/products/13/aaron_levie_poster_black.jpg)\nbefore the time runs out. Well, either way, use whichever approach makes more\nsense to you. At the end of the day, it's **what** you build that matters, not\n**how** you build it.\n\nIf you want to stick all your JavaScript inside templates, then in\n`layout.pug` - your main template file, add this to `head` block.\n\n```pug\nscript(src='/socket.io/socket.io.js')\nscript.\n let socket = io.connect(window.location.href);\n socket.on('greet', function (data) {\n console.log(data);\n socket.emit('respond', { message: 'Hey there, server!' });\n });\n```\n\n**Note:** Notice the path of the `socket.io.js`, you don't actually have to have\n`socket.io.js` file anywhere in your project; it will be generated automatically\nat runtime.\n\nIf you want to have JavaScript code separate from templates, move that inline\nscript code into `main.js`, inside the `$(document).ready()` function:\n\n```js\n$(document).ready(function () {\n // Place JavaScript code here...\n let socket = io.connect(window.location.href);\n socket.on(\"greet\", function (data) {\n console.log(data);\n socket.emit(\"respond\", { message: \"Hey there, server!\" });\n });\n});\n```\n\nAnd we are done!\n\n## Cheatsheets\n\n###
ES6 Cheatsheet\n\n#### Declarations\n\nDeclares a read-only named constant.\n\n```js\nconst name = \"yourName\";\n```\n\nDeclares a block scope local variable.\n\n```js\nlet index = 0;\n```\n\n#### Template Strings\n\nUsing the **\\`${}\\`** syntax, strings can embed expressions.\n\n```js\nconst name = \"Oggy\";\nconst age = 3;\n\nconsole.log(`My cat is named ${name} and is ${age} years old.`);\n```\n\n#### Modules\n\nTo import functions, objects or primitives exported from an external module.\nThese are the most common types of importing.\n\n```js\nconst name = require(\"module-name\");\n```\n\n```js\nconst { foo, bar } = require(\"module-name\");\n```\n\nTo export functions, objects or primitives from a given file or module.\n\n```js\nmodule.exports = { myFunction };\n```\n\n```js\nmodule.exports.name = \"yourName\";\n```\n\n```js\nmodule.exports = myFunctionOrClass;\n```\n\n#### Spread Operator\n\nThe spread operator allows an expression to be expanded in places where multiple\narguments (for function calls) or multiple elements (for array literals) are\nexpected.\n\n```js\nmyFunction(...iterableObject);\n```\n\n```jsx\n JavaScript Date Cheatsheet\n\n#### Unix Timestamp (seconds)\n\n```js\nMath.floor(Date.now() / 1000);\n```\n\n```MomentJS\nmoment().unix();\n```\n\n#### Add 30 minutes to a Date object\n\n```js\nvar now = new Date();\nnow.setMinutes(now.getMinutes() + 30);\n```\n\n```MomentJS\nmoment().add(30, 'minutes');\n```\n\n#### Date Formatting\n\n```js\n// DD-MM-YYYY\nvar now = new Date();\n\nvar DD = now.getDate();\nvar MM = now.getMonth() + 1;\nvar YYYY = now.getFullYear();\n\nif (DD < 10) {\n DD = \"0\" + DD;\n}\n\nif (MM < 10) {\n MM = \"0\" + MM;\n}\n\nconsole.log(MM + \"-\" + DD + \"-\" + YYYY); // 03-30-2016\n```\n\n```MomentJS\nconsole.log(moment(new Date(), 'MM-DD-YYYY'));\n```\n\n```js\n// hh:mm (12 hour time with am/pm)\nvar now = new Date();\nvar hours = now.getHours();\nvar minutes = now.getMinutes();\nvar amPm = hours >= 12 ? \"pm\" : \"am\";\n\nhours = hours % 12;\nhours = hours ? hours : 12;\nminutes = minutes < 10 ? \"0\" + minutes : minutes;\n\nconsole.log(hours + \":\" + minutes + \" \" + amPm); // 1:43 am\n```\n\n```MomentJS\nconsole.log(moment(new Date(), 'hh:mm A'));\n```\n\n#### Next week Date object\n\n```js\nvar today = new Date();\nvar nextWeek = new Date(today.getTime() + 7 * 24 * 60 * 60 * 1000);\n```\n\n```MomentJS\nmoment().add(7, 'days');\n```\n\n#### Yesterday Date object\n\n```js\nvar today = new Date();\nvar yesterday = date.setDate(date.getDate() - 1);\n```\n\n```MomentJS\nmoment().add(-1, 'days');\n```\n\n:top: [**back to top**](#table-of-contents)\n\n### Mongoose Cheatsheet\n\n#### Find all users:\n\n```js\nUser.find((err, users) => {\n console.log(users);\n});\n```\n\n#### Find a user by email:\n\n```js\nlet userEmail = \"example@gmail.com\";\nUser.findOne({ email: userEmail }, (err, user) => {\n console.log(user);\n});\n```\n\n#### Find 5 most recent user accounts:\n\n```js\nUser.find()\n .sort({ _id: -1 })\n .limit(5)\n .exec((err, users) => {\n console.log(users);\n });\n```\n\n#### Get the total count of a field from all documents:\n\nLet's suppose that each user has a `votes` field and you would like to count the\ntotal number of votes in your database across all users. One very inefficient\nway would be to loop through each document and manually accumulate the count. Or\nyou could use\n[MongoDB Aggregation Framework](https://docs.mongodb.org/manual/core/aggregation-introduction/)\ninstead:\n\n```js\nUser.aggregate(\n { $group: { _id: null, total: { $sum: \"$votes\" } } },\n (err, votesCount) => {\n console.log(votesCount.total);\n }\n);\n```\n\n:top: [**back to top**](#table-of-contents)\n\n## Docker\n\nYou will need docker and docker-compose installed to build the application.\n\n- [Docker installation](https://docs.docker.com/engine/installation/)\n\n- [Common problems setting up docker](https://docs.docker.com/toolbox/faqs/troubleshoot/)\n\nAfter installing docker, start the application with the following commands :\n\n```\n# To build the project for the first time or when you add dependencies\ndocker-compose build web\n\n# To start the application (or to restart after making changes to the source code)\ndocker-compose up web\n\n```\n\nTo view the app, find your docker IP address + port 8080 ( this will typically\nbe http://localhost:8080/ ). To use a port other than 8080, you would need to\nmodify the port in app.js, Dockerfile, and docker-compose.yml.\n\n## Deployment\n\nOnce you are ready to deploy your app, you will need to create an account with a\ncloud platform to host it. These are not the only choices, but they are my top\npicks. From my experience, the easiest way to get started is with **Heroku**. It\nwill automatically restart your Node.js process when it crashes, has\nzero-downtime deployments and supports custom domains on free accounts.\nAdditionally, you can create an account with **MongoDB Atlas** and then pick one\nof the _4_ providers below. Again, there are plenty of other choices, and you\nare not limited to just the ones listed below.\n\n### Deployment to Heroku\n\n\n\n- Download and install [Heroku Toolbelt](https://toolbelt.heroku.com/)\n- In a terminal, run `heroku login` and enter your Heroku credentials\n- From _your app_ directory run `heroku create`\n- Use the command `heroku config:set KEY=val` to set the different environment\n variables (KEY=val) for your application (i.e.\n `heroku config:set BASE_URL=[heroku App Name].herokuapp.com` or\n `heroku config:set MONGODB_URI=mongodb://dbuser:\n\n- Go to\n [https://www.mongodb.com/cloud/atlas](https://www.mongodb.com/cloud/atlas)\n- Click the green **Get started free** button\n- Fill in your information then hit **Get started free**\n- You will be redirected to Create New Cluster page.\n- Select a **Cloud Provider and Region** (such as AWS and a free tier region)\n- Select cluster Tier to **Free Shared Clusters**\n- Give Cluster a name (default: Cluster0)\n- Click on green **:zap:Create Cluster button**\n- Now, to access your database you need to create a DB user. To create a new\n MongoDB user, from the **Clusters view**, select the **Security tab**\n- Under the **MongoDB Users** tab, click on **+Add New User**\n- Fill in a username and password and give it either **Atlas Admin** User\n Privilege\n- Next, you will need to create an IP address whitelist and obtain the\n connection URI. In the Clusters view, under the cluster details (i.e.\n SANDBOX - Cluster0), click on the **CONNECT** button.\n- Under section **(1) Check the IP Whitelist**, click on **ALLOW ACCESS FROM\n ANYWHERE**. The form will add a field with `0.0.0.0/0`. Click **SAVE** to\n save the `0.0.0.0/0` whitelist.\n- Under section **(2) Choose a connection method**, click on **Connect Your\n Application**\n- In the new screen, select **Node.js** as Driver and version **2.2.12 or\n later**. _*WARNING*_: Do not pick 3.0 or later since connect-mongo can't\n handle mongodb+srv:// connection strings.\n- Finally, copy the URI connection string and replace the URI in MONGODB_URI\n of `.env.example` with this URI string. Make sure to replace the \n**NOTE** *These instructions might be out of date due to changes in OpenShift. Heroku is currently a good free alternative. If you the new process, please feel free to help us update this page*\n\n- First, install this Ruby gem: `sudo gem install rhc` :gem:\n- Run `rhc login` and enter your OpenShift credentials\n- From your app directory run `rhc app create MyApp nodejs-0.10`\n- **Note:** _MyApp_ is the name of your app (no spaces)\n- Once that is done, you will be provided with **URL**, **SSH** and **Git\n Remote** links\n- Visit provided **URL**, and you should see the _Welcome to your Node.js\n application on OpenShift_ page\n- Copy and paste **Git Remote** into\n `git remote add openshift YOUR_GIT_REMOTE`\n- Before you push your app, you need to do a few modifications to your code\n\nAdd these two lines to `app.js`, just place them anywhere before `app.listen()`:\n\n```js\nvar IP_ADDRESS = process.env.OPENSHIFT_NODEJS_IP || \"127.0.0.1\";\nvar PORT = process.env.OPENSHIFT_NODEJS_PORT || 8080;\n```\n\nThen change `app.listen()` to:\n\n```js\napp.listen(PORT, IP_ADDRESS, () => {\n console.log(\n `Express server listening on port ${PORT} in ${app.settings.env} mode`\n );\n});\n```\n\nAdd this to `package.json`, after _name_ and _version_. This is necessary\nbecause, by default, OpenShift looks for `server.js` file. And by specifying\n`supervisor app.js` it will automatically restart the server when node.js\nprocess crashes.\n\n```js\n\"main\": \"app.js\",\n\"scripts\": {\n \"start\": \"supervisor app.js\"\n},\n```\n\n- Finally, you can now push your code to OpenShift by running\n `git push -f openshift master`\n- **Note:** The first time you run this command, you have to pass `-f` (force)\n flag because OpenShift creates a dummy server with the welcome page when you\n create a new Node.js app. Passing `-f` flag will override everything with\n your _Hackathon Starter_ project repository. **Do not** run `git pull` as it\n will create unnecessary merge conflicts.\n- And you are done!\n\n---\n\n### Azure\n\n\n**NOTE** *Beyond the initial 12 month trial of Azure, the platform does not seem to offer a free tier for hosting NodeJS apps. If you are looking for a free tier service to host your app, Heroku might be a better choice at this point*\n\n- Login to [Windows Azure Management Portal](https://manage.windowsazure.com/)\n- Click the **+ NEW** button on the bottom left of the portal\n- Click **COMPUTE**, then **WEB APP**, then **QUICK CREATE**\n- Enter a name for **URL** and select the datacenter **REGION** for your web\n site\n- Click on **CREATE WEB APP** button\n- Once the web site status changes to _Running_, click on the name of the web\n site to access the Dashboard\n- At the bottom right of the Quickstart page, select **Set up a deployment\n from source control**\n- Select **Local Git repository** from the list, and then click the arrow\n- To enable Git publishing, Azure will ask you to create a user name and\n password\n- Once the Git repository is ready, you will be presented with a **GIT URL**\n- Inside your _Hackathon Starter_ directory, run\n `git remote add azure [Azure Git URL]`\n- To push your changes run `git push azure master`\n- **Note:** _You will be prompted for the password you created earlier_\n- On **Deployments** tab of your Windows Azure Web App, you will see the\n deployment history\n\n---\n\n## IBM Bluemix Cloud Platform\n\n**NOTE** _At this point it appears that Bluemix's free tier to host NodeJS apps\nis limited to 30 days. If you are looking for a free tier service to host your\napp, Heroku might be a better choice at this point_\n\n1. Create a Bluemix Account\n\n [Sign up](https://console.ng.bluemix.net/registration/?target=%2Fdashboard%2Fapps)\n for Bluemix, or use an existing account.\n\n1. Download and install the\n [Cloud Foundry CLI](https://github.com/cloudfoundry/cli) to push your\n applications to Bluemix.\n\n1. Create a `manifest.yml` file in the root of your application.\n\n```\napplications:\n- name: \n[Conversation](https://www.ibm.com/watson/services/conversation/)** - Quickly\nbuild and deploy chatbots and virtual agents across a variety of channels,\nincluding mobile devices, messaging platforms, and even robots.\n\n**\n[Discovery](https://www.ibm.com/watson/services/discovery/)** - Unlock hidden\nvalue in data to find answers, monitor trends and surface patterns with the\nworld’s most advanced cloud-native insight engine.\n\n**\n[Language Translator](https://www.ibm.com/watson/services/language-translator/)** -\nTranslate text from one language to another.\n\n**\n[Natural Language Classifier](https://www.ibm.com/watson/services/natural-language-classifier/)** -\nInterpret and classify natural language with confidence.\n\n**\n[Natural Language Understanding](https://www.ibm.com/watson/services/natural-language-understanding/)** -\nAnalyze text to extract meta-data from content such as concepts, entities,\nkeywords and more.\n\n**\n[Personality Insights](https://www.ibm.com/watson/services/personality-insights/)** -\nPredict personality characteristics, needs and values through written text.\n\n**\n[Speech to Text](https://www.ibm.com/watson/services/speech-to-text/)** -\nConvert audio and voice into written text for quick understanding of content.\n\n**\n[Text to Speech](https://www.ibm.com/watson/services/text-to-speech/)** -\nConvert written text into natural sounding audio in a variety of languages and\nvoices.\n\n**\n[Tone Analyzer](https://www.ibm.com/watson/services/tone-analyzer/)** -\nUnderstand emotions, social tendencies and perceived writing style.\n\n**\n[Visual Recognition](https://www.ibm.com/watson/services/visual-recognition/)** -\nTag, classify and search visual content using machine learning.\n\n[Click here](https://www.ibm.com/watson/developercloud/services-catalog.html)\nfor live demos of each Watson service.\n\n---\n\n### Google Cloud Platform\n\n\n\n- [Download and install Node.js](https://nodejs.org/)\n- [Select or create](https://console.cloud.google.com/project) a Google Cloud\n Platform Console project\n- [Enable billing](https://support.google.com/cloud/answer/6293499#enable-billing)\n for your project (there's a $300 free trial)\n- Install and initialize the\n [Google Cloud SDK](https://cloud.google.com/sdk/docs/quickstarts)\n- Create an `app.yaml` file at the root of your `hackathon-starter` folder\n with the following contents:\n\n ```yaml\n runtime: nodejs\n env: flex\n manual_scaling:\n instances: 1\n ```\n\n- Make sure you've set `MONGODB_URI` in `.env.example`\n- Run the following command to deploy the `hackathon-starter` app:\n\n ```bash\n gcloud app deploy\n ```\n\n- [Monitor your deployed app](https://console.cloud.google.com/appengine) in\n the Cloud Console\n- [View the logs](https://console.cloud.google.com/logs/viewer) for your app\n in the Cloud Console\n\n## Production\n\nIf you are starting with this boilerplate to build an application for prod\ndeployment, or if after your hackathon you would like to get your project\nhardened for production use, see\n[prod-checklist.md](https://github.com/sahat/hackathon-starter/blob/master/prod-checklist.md).\n\n## Changelog\n\nYou can find the changelog for the project in:\n[CHANGELOG.md](https://github.com/sahat/hackathon-starter/blob/master/CHANGELOG.md)\n\n## Contributing\n\nIf something is unclear, confusing, or needs to be refactored, please let me\nknow. Pull requests are always welcome, but due to the opinionated nature of\nthis project, I cannot accept every pull request. Please open an issue before\nsubmitting a pull request. This project uses\n[Airbnb JavaScript Style Guide](https://github.com/airbnb/javascript) with a few\nminor exceptions. If you are submitting a pull request that involves Pug\ntemplates, please make sure you are using _spaces_, not tabs.\n\n## License\n\nThe MIT License (MIT)\n\nCopyright (c) 2014-2020 Sahat Yalkabov\n\nPermission is hereby granted, free of charge, to any person obtaining a copy of\nthis software and associated documentation files (the \"Software\"), to deal in\nthe Software without restriction, including without limitation the rights to\nuse, copy, modify, merge, publish, distribute, sublicense, and/or sell copies of\nthe Software, and to permit persons to whom the Software is furnished to do so,\nsubject to the following conditions:\n\nThe above copyright notice and this permission notice shall be included in all\ncopies or substantial portions of the Software.\n\nTHE SOFTWARE IS PROVIDED \"AS IS\", WITHOUT WARRANTY OF ANY KIND, EXPRESS OR\nIMPLIED, INCLUDING BUT NOT LIMITED TO THE WARRANTIES OF MERCHANTABILITY, FITNESS\nFOR A PARTICULAR PURPOSE AND NONINFRINGEMENT. IN NO EVENT SHALL THE AUTHORS OR\nCOPYRIGHT HOLDERS BE LIABLE FOR ANY CLAIM, DAMAGES OR OTHER LIABILITY, WHETHER\nIN AN ACTION OF CONTRACT, TORT OR OTHERWISE, ARISING FROM, OUT OF OR IN\nCONNECTION WITH THE SOFTWARE OR THE USE OR OTHER DEALINGS IN THE SOFTWARE.\n","readmeFilename":"README.md","bugs":{"url":"https://github.com/sahat/hackathon-starter/issues"},"homepage":"https://github.com/sahat/hackathon-starter#readme","_id":"@atomist/hackathon-starter@6.0.1-branch-atomist-npm-update-master.0","_nodeVersion":"12.20.0","_npmVersion":"6.14.8","dist":{"integrity":"sha512-yxkitSYTHVMgUiSHovWVxy/mn6gsmENFMmTEWKjItwDMAyuKbOAmzswiBIhouy2EueAZCq2ujeDuZQDs5DGZEA==","shasum":"64fb0e29c8b1e2624866bac1471e2abf3f457ce8","tarball":"https://registry.npmjs.org/@atomist/hackathon-starter/-/hackathon-starter-6.0.1-branch-atomist-npm-update-master.0.tgz","fileCount":72,"unpackedSize":665573,"npm-signature":"-----BEGIN PGP SIGNATURE-----\r\nVersion: OpenPGP.js v3.0.13\r\nComment: https://openpgpjs.org\r\n\r\nwsFcBAEBCAAQBQJf0Ik7CRA9TVsSAnZWagAAV4oP/jjxkmjo8UodYOyTcqdH\nt1nPNReBTBWO/M3f8B9l2xRY1GzL2BV9nTsK2qEOEX1jdQ2JUgaboXtYhHYO\n7cwOXqDRCorz65/vKm8d18NyO76t/D9BUIFqUFmPvOu+o7fjo8RHeO++AY+R\nWVka+w4hpLwJnyG14t0Ih+ZnOUT61pO90z+lOwdrcVpP7wSzuoppABsUxTWH\njRXYhZf6r9P5rhg/zsgdQ7SES5Qn7/2ddJ/Gvr6qVeRky6MdahUuR4tQihTb\nekIPwhMO8F4DAkH3LGrsORIzSusr6QQOE+bJz0bXO1uuSxWFsXSElWlc3WNk\n9Z3qFJY/QyJGNe6xwaq/vvdKyg4Uc7Y0Xh1D9ZpJ/Hf2tNmLsALfRyGh5/J3\nWiRYp7WyAFBzNA5joDXdfqEWd5EF1i3Dx8kBs5wxF43aNFJahNNFrdhEpX3Y\nZrXCXa4gHmoj4z2c0iGL4h50TmraxdtWcoSU273mA07WB3QiUOJ5z8yHKBnv\nL9BymrrO9ZGh8Q1o8OJsw/MeLxoRZ1WWS/oEgqlZrKn2q9A9JlHolF6x07sC\niOBVbuNwZrOrMoSoYAUhYiSqRDuDZNwsbaXBWmPndUh+56LwDzM5JSDZBVP3\nDPSpuC/8+mtDiwxPDioiABeF+VJrYuyaFqy6TjgjliHXlQHmUbVTmmNlBanb\nf08e\r\n=1CPS\r\n-----END PGP SIGNATURE-----\r\n","signatures":[{"keyid":"SHA256:jl3bwswu80PjjokCgh0o2w5c2U4LhQAE57gj9cz1kzA","sig":"MEYCIQD9twTuSX/bnDyfxio/duH8YErl0ygcEpOE4bhizQAJLAIhAM0Imx4q6N7GRnZrvS7vAxM0T9s3A6xd+ijaNpUFhJaY"}]},"_npmUser":{"name":"atomist-bot","email":"npm@atomist.com"},"directories":{},"maintainers":[{"name":"slimslenderslacks","email":"slimslenderslacks@gmail.com"},{"name":"cdupuis","email":"cd@atomist.com"},{"name":"ddatomist","email":"david@atomist.com"},{"name":"atomist-bot","email":"npm@atomist.com"}],"_npmOperationalInternal":{"host":"s3://npm-registry-packages","tmp":"tmp/hackathon-starter_6.0.1-branch-atomist-npm-update-master.0_1607502138562_0.10094662653756958"},"_hasShrinkwrap":false},"6.0.1-branch-atomist-prettier-master.3":{"name":"@atomist/hackathon-starter","version":"6.0.1-branch-atomist-prettier-master.3","description":"A boilerplate for Node.js web applications","repository":{"type":"git","url":"git+https://github.com/sahat/hackathon-starter.git"},"license":"MIT","author":{"name":"Sahat Yalkabov"},"contributors":[{"name":"Yashar Fakhari","url":"https://github.com/YasharF"}],"scripts":{"postinstall":"npm rebuild node-sass","start":"node app.js","test":"nyc mocha --timeout=10000 --exit","lint":"eslint \"**/*.js\"","atm:lint:prettier":"prettier --write"},"dependencies":{"@fortawesome/fontawesome-free":"^5.15.1","@ladjs/bootstrap-social":"^7.0.2","@octokit/rest":"^18.0.12","axios":"^0.20.0","bcrypt":"^5.0.0","body-parser":"^1.19.0","bootstrap":"^4.5.3","chalk":"^4.1.0","chart.js":"^2.9.4","cheerio":"^1.0.0-rc.3","compression":"^1.7.4","connect-mongo":"^3.2.0","dotenv":"^8.2.0","errorhandler":"^1.5.1","express":"^4.17.1","express-flash":"^0.0.2","express-handlebars":"^5.2.0","express-session":"^1.17.1","express-status-monitor":"^1.3.3","googleapis":"^61.0.0","instagram-node":"^0.5.8","jquery":"^3.5.1","lastfm":"^0.9.3","lob":"^6.1.1","lodash":"^4.17.20","lusca":"^1.6.1","mailchecker":"^3.3.17","moment":"^2.29.1","mongoose":"^5.11.5","morgan":"^1.10.0","multer":"^1.4.2","node-quickbooks":"^2.0.37","node-sass":"^4.14.1","node-sass-middleware":"^0.11.0","nodemailer":"^6.4.16","passport":"^0.4.1","passport-facebook":"^3.0.0","passport-github2":"^0.1.12","passport-google-oauth":"^2.0.0","passport-instagram":"^1.0.0","passport-linkedin-oauth2":"^2.0.0","passport-local":"^1.0.0","passport-oauth":"^1.0.0","passport-oauth2-refresh":"^2.0.1","passport-openid":"^0.4.0","passport-snapchat":"^1.0.0","passport-twitch-new":"^0.0.2","passport-twitter":"^1.0.4","paypal-rest-sdk":"^1.8.1","popper.js":"^1.16.1","pug":"^3.0.0","stripe":"^8.127.0","tumblr.js":"^3.0.0","twilio":"^3.54.0","twitter-lite":"^0.14.0","validator":"^13.5.1"},"devDependencies":{"chai":"^4.2.0","eslint":"^7.15.0","eslint-config-airbnb-base":"^14.2.1","eslint-plugin-chai-friendly":"^0.6.0","eslint-plugin-import":"^2.22.1","husky":"^4.3.5","lint-staged":"^10.5.3","mocha":"^8.2.1","nyc":"^15.1.0","prettier":"^2.2.1","sinon":"^9.2.1","supertest":"^5.0.0"},"engines":{"node":">=10.22.1","npm":">=6.14.6"},"husky":{"hooks":{"pre-commit":"lint-staged"}},"lint-staged":{"**/*.@(graphql|json|markdown|yaml|yml|md)":"npm run atm:lint:prettier"},"readme":"\nHackathon Starter =======================\n\n[](https://david-dm.org/sahat/hackathon-starter)\n[](https://david-dm.org/sahat/hackathon-starter?type=dev)\n[](https://travis-ci.org/sahat/hackathon-starter)\n[](https://gitter.im/sahat/hackathon-starter?utm_source=badge&utm_medium=badge&utm_campaign=pr-badge&utm_content=badge)\n\n**Live Demo**: https://hackathon-starter.walcony.com\n\nJump to\n[What's new?](https://github.com/sahat/hackathon-starter/blob/master/CHANGELOG.md)\n\nA boilerplate for **Node.js** web applications.\n\nIf you have attended any hackathons in the past, then you know how much time it\ntakes to get a project started: decide on what to build, pick a programming\nlanguage, pick a web framework, pick a CSS framework. A while later, you might\nhave an initial project up on GitHub and only then can other team members start\ncontributing. Or how about doing something as simple as _Sign in with Facebook_\nauthentication? You can spend hours on it if you are not familiar with how OAuth\n2.0 works.\n\nWhen I started this project, my primary focus was on **simplicity** and **ease\nof use**. I also tried to make it as **generic** and **reusable** as possible to\ncover most use cases of hackathon web apps, without being too specific. In the\nworst case, you can use this as a learning guide for your projects, if for\nexample you are only interested in **Sign in with Google** authentication and\nnothing else.\n\n### Testimonials\n\n> [**“Nice! That README alone is already gold!”**](https://www.producthunt.com/tech/hackathon-starter#comment-224732)\n> — Adrian Le Bas\n\n> [**“Awesome. Simply awesome.”**](https://www.producthunt.com/tech/hackathon-starter#comment-224966)
\n> — Steven Rueter\n\n> [**“I'm using it for a year now and many projects, it's an awesome boilerplate and the project is well maintained!”**](https://www.producthunt.com/tech/hackathon-starter#comment-228610)
\n> — Kevin Granger\n\n> **“Small world with Sahat's project. We were using his hackathon starter for\n> our hackathon this past weekend and got some prizes. Really handy repo!”**
\n> — Interview candidate for one of the companies I used to work with.\n\n
Modern Theme
\n\n\n\nFlatly Bootstrap Theme
\n\n\n\nAPI Examples
\n\n\n\n## Table of Contents\n\n- [Features](#features)\n- [Prerequisites](#prerequisites)\n- [Getting Started](#getting-started)\n- [Obtaining API Keys](#obtaining-api-keys)\n- [Project Structure](#project-structure)\n- [List of Packages](#list-of-packages)\n- [Useful Tools and Resources](#useful-tools-and-resources)\n- [Recommended Design Resources](#recommended-design-resources)\n- [Recommended Node.js Libraries](#recommended-nodejs-libraries)\n- [Recommended Client-side Libraries](#recommended-client-side-libraries)\n- [Pro Tips](#pro-tips)\n- [FAQ](#faq)\n- [How It Works](#how-it-works-mini-guides)\n- [Cheatsheets](#cheatsheets)\n - [ES6](#-es6-cheatsheet)\n - [JavaScript Date](#-javascript-date-cheatsheet)\n - [Mongoose Cheatsheet](#mongoose-cheatsheet)\n- [Deployment](#deployment)\n- [Docker](#docker)\n- [Production](#production)\n- [Changelog](#changelog)\n- [Contributing](#contributing)\n- [License](#license)\n\n## Features\n\n- **Local Authentication** using Email and Password\n- **OAuth 1.0a Authentication** via Twitter\n- **OAuth 2.0 Authentication** via Facebook, Google, GitHub, LinkedIn,\n Instagram\n- Flash notifications\n- MVC Project Structure\n- Node.js clusters support\n- Sass stylesheets (auto-compiled via middleware)\n- Bootstrap 4 + Extra Themes\n- Contact Form (powered by Mailgun, Sendgrid or Mandrill)\n- **Account Management**\n- Gravatar\n- Profile Details\n- Change Password\n- Forgot Password\n- Reset Password\n- Link multiple OAuth strategies to one account\n- Delete Account\n- CSRF protection\n- **API Examples**: Facebook, Foursquare, Last.fm, Tumblr, Twitter, Stripe,\n LinkedIn and more.\n\n## Prerequisites\n\n- [MongoDB](https://www.mongodb.com/download-center/community)\n- [Node.js 10+](http://nodejs.org)\n- Command Line Tools\n- **Mac\n OS X:** [Xcode](https://itunes.apple.com/us/app/xcode/id497799835?mt=12) (or\n **OS X 10.9+**: `xcode-select --install`)\n- **Windows:**\n [Visual Studio](https://www.visualstudio.com/products/visual-studio-community-vs)\n OR [Visual Studio Code](https://code.visualstudio.com) +\n [Windows Subsystem for Linux - Ubuntu](https://docs.microsoft.com/en-us/windows/wsl/install-win10)\n- **Ubuntu**\n /\n **Linux\n Mint:** `sudo apt-get install build-essential`\n- **Fedora**:\n `sudo dnf groupinstall \"Development Tools\"`\n- **OpenSUSE:**\n `sudo zypper install --type pattern devel_basis`\n\n**Note:** If you are new to Node or Express, you may find\n[Node.js & Express From Scratch series](https://www.youtube.com/watch?v=Ad2ngx6CT0M&list=PLillGF-RfqbYRpji8t4SxUkMxfowG4Kqp&index=3)\nhelpful for learning the basics of Node and Express. Alternatively, here is\nanother great tutorial for complete beginners -\n[Getting Started With Node.js, Express, MongoDB](http://cwbuecheler.com/web/tutorials/2013/node-express-mongo/).\n\n## Getting Started\n\nThe easiest way to get started is to clone the repository:\n\n```bash\n# Get the latest snapshot\ngit clone https://github.com/sahat/hackathon-starter.git myproject\n\n# Change directory\ncd myproject\n\n# Install NPM dependencies\nnpm install\n\n# Then simply start your app\nnode app.js\n```\n\n**Warning:** If you want to use some API that need https to work (for example\nPinterest or facebook), you will need to download [ngrok](https://ngrok.com/).\nYou must start ngrok after starting the project.\n\n```bash\n# start ngrok to intercept the data exchanged on port 8080\n./ngrok http 8080\n```\n\nNext, you must use the https URL defined by ngrok, for example,\n`https://hackaton.ngrok.io`\n\n**Note:** I highly recommend installing\n[Nodemon](https://github.com/remy/nodemon). It watches for any changes in your\nnode.js app and automatically restarts the server. Once installed, instead of\n`node app.js` use `nodemon app.js`. It will save you a lot of time in the long\nrun, because you won't need to manually restart the server each time you make a\nsmall change in code. To install, run `sudo npm install -g nodemon`.\n\n## Obtaining API Keys\n\nTo use any of the included APIs or OAuth authentication methods, you will need\nto obtain appropriate credentials: Client ID, Client Secret, API Key, or\nUsername & Password. You will need to go through each provider to generate new\ncredentials.\n\n\n\n- Visit\n Google\n reCAPTCHA Admin Console\n- Enter your application's name as the **Label**\n- Chose **reCAPTCHA v2**, **\"I'm not a robot\" Checkbox**\n- Enter _localhost_ as the domain. You can have other domains added in\n addition to _localhost_\n- Accept the terms and submit the form\n- Copy the _Site Key_ and the _Secret key_ into `.env`. These keys will be\n accessible under Settings, reCAPTCHA keys drop down if you need them again\n later.\n\n\n\n
\n\n- Visit\n Google\n Cloud Console\n- Click on the **Create Project** button\n- Enter _Project Name_, then click on **Create** button\n- Then click on _APIs & auth_ in the sidebar and select _API_ tab\n- Click on **Google+ API** under _Social APIs_, then click **Enable API**\n- Click on **Google Drive API** under _G Suite_, then click **Enable API**\n- Click on **Google Sheets API** under _G Suite_, then click **Enable API**\n- Next, under _APIs & auth_ in the sidebar click on _Credentials_ tab\n- Click on **Create new Client ID** button\n- Select _Web Application_ and click on **Configure Consent Screen**\n- Fill out the required fields then click on **Save**\n- In the _Create Client ID_ modal dialog:\n- **Application Type**: Web Application\n- **Authorized Javascript origins**: http://localhost:8080\n- **Authorized redirect URI**: http://localhost:8080/auth/google/callback\n- Click on **Create Client ID** button\n- Copy and paste _Client ID_ and _Client secret_ keys into `.env`\n\n**Note:** When you ready to deploy to production don't forget to add your new\nURL to _Authorized Javascript origins_ and _Authorized redirect URI_, e.g.\n`http://my-awesome-app.herokuapp.com` and\n`http://my-awesome-app.herokuapp.com/auth/google/callback` respectively. The\nsame goes for other providers.\n\n\n\n
\n\n- Visit Snap Kit\n Developer Portal\n- Click on the **+** button to create an app\n- Enter a name for your app\n- Enable the scopes that you will want to use in your app\n- Click on the **Continue** button\n- Find the **Kits** section and make sure that **Login Kit** is enabled\n- Find the **Redirect URLs** section, click the **+ Add** button, and enter\n `http://localhost:8080/auth/snapchat/callback`\n- Find the **Development Environment** section. Click the **Generate** button\n next to the _Confidential OAuth2 Client_ heading within it.\n- Copy and paste the generated _Private Key_ and _OAuth2 Client ID_ keys into\n `.env`\n- **Note:** _OAuth2 Client ID_ is **SNAPCHAT_ID**, _Private Key_ is\n **SNAPCHAT_SECRET** in `.env`\n- To prepare the app for submission, fill out the rest of the required fields:\n _Category_, _Description_, _Privacy Policy Url_, and _App Icon_\n\n**Note:** For production use, don't forget to:\n\n- generate a _Confidential OAuth2 Client_ in the **Production Environment**\n and use the production _Private Key_ and _OAuth2 Client ID_\n- add the production URL to **Redirect URLs** section, e.g.\n `http://my-awesome-app.herokuapp.com/auth/snapchat/callback`\n- submit the app for review and wait for approval\n\n\n\n
\n\n- Visit Facebook\n Developers\n- Click **My Apps**, then select \\*_Add a New App_ from the dropdown menu\n- Enter a new name for your app\n- Click on the **Create App ID** button\n- Find the Facebook Login Product and click on **Facebook Login**\n- Instead of going through their Quickstart, click on **Settings** for your\n app in the top left corner\n- Copy and paste _App ID_ and _App Secret_ keys into `.env`\n- **Note:** _App ID_ is **FACEBOOK_ID**, _App Secret_ is **FACEBOOK_SECRET**\n in `.env`\n- Enter `localhost` under _App Domains_\n- Choose a **Category** that best describes your app\n- Click on **+ Add Platform** and select **Website**\n- Enter `http://localhost:8080` under _Site URL_\n- Click on the _Settings_ tab in the left nav under Facebook Login\n- Enter `http://localhost:8080/auth/facebook/callback` under Valid OAuth\n redirect URIs\n\n**Note:** After a successful sign in with Facebook, a user will be redirected\nback to the home page with appended hash `#_=_` in the URL. It is _not_ a bug.\nSee this\n[Stack Overflow](https://stackoverflow.com/questions/7131909/facebook-callback-appends-to-return-url)\ndiscussion for ways to handle it.\n\n\n\n
\n\n- Go to Account\n Settings\n- Select **Developer settings** from the sidebar\n- Then click on **OAuth Apps** and then on **Register new application**\n- Enter _Application Name_ and _Homepage URL_\n- For _Authorization Callback URL_: http://localhost:8080/auth/github/callback\n- Click **Register application**\n- Now copy and paste _Client ID_ and _Client Secret_ keys into `.env` file\n\n\n\n
\n\n- Sign in at\n https://apps.twitter.com\n- Click **Create a new application**\n- Enter your application name, website and description\n- For **Callback URL**: http://127.0.0.1:8080/auth/twitter/callback\n- Go to **Settings** tab\n- Under _Application Type_ select **Read and Write** access\n- Check the box **Allow this application to be used to Sign in with Twitter**\n- Click **Update this Twitter's applications settings**\n- Copy and paste _Consumer Key_ and _Consumer Secret_ keys into `.env` file\n\n\n\n
\n\n- Sign in at\n LinkedIn Developer\n Network\n- From the account name dropdown menu select **API Keys**\n- _It may ask you to sign in once again_\n- Click **+ Add New Application** button\n- Fill out all the _required_ fields\n- **OAuth 2.0 Redirect URLs**: http://localhost:8080/auth/linkedin/callback\n- **JavaScript API Domains**: http://localhost:8080\n- For **Default Application Permissions** make sure at least the following is\n checked:\n- `r_basicprofile`\n- Finish by clicking **Add Application** button\n- Copy and paste _API Key_ and _Secret Key_ keys into `.env` file\n- _API Key_ is your **clientID**\n- _Secret Key_ is your **clientSecret**\n\n\n\n
\n\n- Sign up or log into your\n dashboard\n- Click on your profile and click on Account Settings\n- Then click on **API Keys**\n- Copy the **Secret Key**. and add this into `.env` file\n\n\n\n
\n\n- Visit PayPal\n Developer\n- Log in to your PayPal account\n- Click **Applications > Create App** in the navigation bar\n- Enter _Application Name_, then click **Create app**\n- Copy and paste _Client ID_ and _Secret_ keys into `.env` file\n- _App ID_ is **client_id**, _App Secret_ is **client_secret**\n- Change **host** to api.paypal.com if you want to test against production and\n use the live credentials\n\n\n\n
\n\n- Go to Foursquare\n for Developers\n- Click on **My Apps** in the top menu\n- Click the **Create A New App** button\n- Enter _App Name_, _Welcome page url_,\n- For **Redirect URI**: http://localhost:8080/auth/foursquare/callback\n- Click **Save Changes**\n- Copy and paste _Client ID_ and _Client Secret_ keys into `.env` file\n\n\n\n
\n\n- Go to\n http://www.tumblr.com/oauth/apps\n- Once signed in, click **+Register application**\n- Fill in all the details\n- For **Default Callback URL**: `http://localhost:8080/auth/tumblr/callback`\n- Click **✔Register**\n- Copy and paste _OAuth consumer key_ and _OAuth consumer secret_ keys into\n `.env` file\n\n\n\n
\n\n- Go to\n http://steamcommunity.com/dev/apikey\n- Sign in with your existing Steam account\n- Enter your _Domain Name_, then and click **Register**\n- Copy and paste _Key_ into `.env` file\n\n\n
\n\n- Visit the\n Twitch\n developer dashboard\n- If prompted, authorize the dashboard to access your twitch account\n- In the Console, click on Register Your Application\n- Enter the name of your application\n- Use OAuth Redirect URLs enter `http://localhost:8080/auth/twitch/callback`\n- Set Category to Website Integration and press the Create button\n- After the applicaiton has been created, click on the Manage button\n- Copy and paste _Client ID_ into `.env`\n- If there is no Client Secret displayed, click on New Secret button and then\n copy and paste the _Client secret_ into `.env`\n\n\n\n
\n\n- Go to\n https://sendgrid.com/user/signup\n- Sign up and **confirm** your account via the _activation email_\n- Then enter your SendGrid _Username_ and _Password_ into `.env` file\n\n\n\n
\n\n- Go to\n http://www.mailgun.com\n- Sign up and add your _Domain Name_\n- From the domain overview, copy and paste the default SMTP _Login_ and\n _Password_ into `.env` file\n\n\n\n
\n\n- Go to\n https://developer.here.com\n- Sign up and create a Freemium project\n- Create JAVASCRIPT/REST credentials. Copy and paste the APP_ID and APP into\n `.env` file.\n- Note that these credentials are available on the client side, and you need\n to create a domain whitelist for your app credentials when you are publicly\n launching the app.\n\n\n\n
\n\n- Go to\n https://www.twilio.com/try-twilio\n- Sign up for an account.\n- Once logged into the dashboard, expand the link 'show api credentials'\n- Copy your Account Sid and Auth Token\n\n\n\n
\n\n- Go to\n https://developer.intuit.com/app/developer/qbo/docs/get-started\n- Use the Sign Up option in the upper right corner of the screen (nav bar) to\n get a free developer account and a sandbox company.\n- Create a new app by going to your Dashboard using the My Apps option in the\n top nav bar or by going to\n https://developer.intuit.com/app/developer/myapps\n- In your App, under Development, Keys & OAuth (right nav), find the Client ID\n and Client Secret for your `.env` file\n\n## Project Structure\n\n| Name | Description |\n| ---------------------------------- | ------------------------------------------------------------ |\n| **config**/passport.js | Passport Local and OAuth strategies, plus login middleware. |\n| **controllers**/api.js | Controller for /api route and all api examples. |\n| **controllers**/contact.js | Controller for contact form. |\n| **controllers**/home.js | Controller for home page (index). |\n| **controllers**/user.js | Controller for user account management. |\n| **models**/User.js | Mongoose schema and model for User. |\n| **public**/ | Static assets (fonts, css, js, img). |\n| **public**/**js**/application.js | Specify client-side JavaScript dependencies. |\n| **public**/**js**/main.js | Place your client-side JavaScript here. |\n| **public**/**css**/main.scss | Main stylesheet for your app. |\n| **public/css/themes**/default.scss | Some Bootstrap overrides to make it look prettier. |\n| **views/account**/ | Templates for _login, password reset, signup, profile_. |\n| **views/api**/ | Templates for API Examples. |\n| **views/partials**/flash.pug | Error, info and success flash notifications. |\n| **views/partials**/header.pug | Navbar partial template. |\n| **views/partials**/footer.pug | Footer partial template. |\n| **views**/layout.pug | Base template. |\n| **views**/home.pug | Home page template. |\n| .dockerignore | Folder and files ignored by docker usage. |\n| .env.example | Your API keys, tokens, passwords and database URI. |\n| .eslintrc | Rules for eslint linter. |\n| .gitignore | Folder and files ignored by git. |\n| .travis.yml | Configuration files for continuous integration. |\n| app.js | The main application file. |\n| docker-compose.yml | Docker compose configuration file. |\n| Dockerfile | Docker configuration file. |\n| package.json | NPM dependencies. |\n| package-lock.json | Contains exact versions of NPM dependencies in package.json. |\n\n**Note:** There is no preference how you name or structure your views. You could\nplace all your templates in a top-level `views` directory without having a\nnested folder structure, if that makes things easier for you. Just don't forget\nto update `extends ../layout` and corresponding `res.render()` paths in\ncontrollers.\n\n## List of Packages\n\n| Package | Description |\n| --------------------------- | ----------------------------------------------------------------------- |\n| @octokit/rest | GitHub API library. |\n| bcrypt | Library for hashing and salting user passwords. |\n| body-parser | Node.js body parsing middleware. |\n| chai | BDD/TDD assertion library. |\n| chalk | Terminal string styling done right. |\n| cheerio | Scrape web pages using jQuery-style syntax. |\n| compression | Node.js compression middleware. |\n| connect-mongo | MongoDB session store for Express. |\n| dotenv | Loads environment variables from .env file. |\n| errorhandler | Development-only error handler middleware. |\n| eslint | Linter JavaScript. |\n| eslint-config-airbnb-base | Configuration eslint by airbnb. |\n| eslint-plugin-chai-friendly | Makes eslint friendly towards Chai.js 'expect' and 'should' statements. |\n| eslint-plugin-import | ESLint plugin with rules that help validate proper imports. |\n| express | Node.js web framework. |\n| express-flash | Provides flash messages for Express. |\n| express-session | Simple session middleware for Express. |\n| express-status-monitor | Reports real-time server metrics for Express. |\n| instagram-node | Instagram API library. |\n| lastfm | Last.fm API library. |\n| lob | Lob API library. |\n| lodash | A utility library for working with arrays, numbers, objects, strings. |\n| lusca | CSRF middleware. |\n| mailchecker | Verifies that an email address is valid and not a disposable address. |\n| mocha | Test framework. |\n| moment | Parse, validate, compute dates and times. |\n| mongoose | MongoDB ODM. |\n| morgan | HTTP request logger middleware for node.js. |\n| multer | Node.js middleware for handling `multipart/form-data`. |\n| node-foursquare | Foursquare API library. |\n| node-sass | Node.js bindings to libsass. |\n| node-sass-middleware | Sass middleware compiler. |\n| nyc | Coverage test. |\n| nodemailer | Node.js library for sending emails. |\n| node-quickbooks | Quickbooks API library. |\n| passport | Simple and elegant authentication library for node.js. |\n| passport-facebook | Sign-in with Facebook plugin. |\n| passport-github | Sign-in with GitHub plugin. |\n| passport-google-oauth | Sign-in with Google plugin. |\n| passport-instagram | Sign-in with Instagram plugin. |\n| passport-linkedin-oauth2 | Sign-in with LinkedIn plugin. |\n| passport-local | Sign-in with Username and Password plugin. |\n| passport-openid | Sign-in with OpenId plugin. |\n| passport-oauth | Allows you to set up your own OAuth 1.0a and OAuth 2.0 strategies. |\n| passport-oauth2-refresh | A library to refresh OAuth 2.0 access tokens using refresh tokens. |\n| passport-snapchat | Sign-in with Snapchat plugin. |\n| passport-twitter | Sign-in with Twitter plugin. |\n| passport-twitch-new | Sign-in with Twitch plugin. |\n| paypal-rest-sdk | PayPal APIs library. |\n| pug | Template engine for Express. |\n| sinon | Test spies, stubs and mocks for JavaScript. |\n| stripe | Offical Stripe API library. |\n| supertest | HTTP assertion library. |\n| tumblr.js | Tumblr API library. |\n| twilio | Twilio API library. |\n| twitter-lite | Twitter API library. |\n| validator | A library of string validators and sanitizers. |\n\n## Useful Tools and Resources\n\n- [JavaScripting](http://www.javascripting.com/) - The Database of JavaScript\n Libraries\n- [JS Recipes](http://sahatyalkabov.com/jsrecipes/) - JavaScript tutorials for\n backend and frontend development.\n- [HTML to Pug converter](https://html-to-pug.com/) - HTML to PUG is a free\n online converter helping you to convert HTML files to pug syntax in\n real-time.\n- [JavascriptOO](http://www.javascriptoo.com/) - A directory of JavaScript\n libraries with examples, CDN links, statistics, and videos.\n- [Favicon Generator](http://realfavicongenerator.net/) - Generate favicons\n for PC, Android, iOS, Windows 8.\n\n## Recommended Design Resources\n\n- [Code Guide](http://codeguide.co/) - Standards for developing flexible,\n durable, and sustainable HTML and CSS.\n- [Bootsnipp](http://bootsnipp.com/) - Code snippets for Bootstrap.\n- [Bootstrap Zero](https://www.bootstrapzero.com) - Free Bootstrap templates\n themes.\n- [Google Bootstrap](http://todc.github.io/todc-bootstrap/) - Google-styled\n theme for Bootstrap.\n- [Font Awesome Icons](http://fortawesome.github.io/Font-Awesome/icons/) -\n It's already part of the Hackathon Starter, so use this page as a reference.\n- [Colors](http://clrs.cc) - A nicer color palette for the web.\n- [Creative Button Styles](http://tympanus.net/Development/CreativeButtons/) -\n awesome button styles.\n- [Creative Link Effects](http://tympanus.net/Development/CreativeLinkEffects/) -\n Beautiful link effects in CSS.\n- [Medium Scroll Effect](http://codepen.io/andreasstorm/pen/pyjEh) - Fade\n in/out header background image as you scroll.\n- [GeoPattern](https://github.com/btmills/geopattern) - SVG background pattern\n generator.\n- [Trianglify](https://github.com/qrohlf/trianglify) - SVG low-poly background\n pattern generator.\n\n## Recommended Node.js Libraries\n\n- [Nodemon](https://github.com/remy/nodemon) - Automatically restart Node.js\n server on code changes.\n- [geoip-lite](https://github.com/bluesmoon/node-geoip) - Geolocation\n coordinates from IP address.\n- [Filesize.js](http://filesizejs.com/) - Pretty file sizes, e.g.\n `filesize(265318); // \"265.32 kB\"`.\n- [Numeral.js](http://numeraljs.com) - Library for formatting and manipulating\n numbers.\n- [Node Inspector](https://github.com/node-inspector/node-inspector) - Node.js\n debugger based on Chrome Developer Tools.\n- [node-taglib](https://github.com/nikhilm/node-taglib) - Library for reading\n the meta-data of several popular audio formats.\n- [sharp](https://github.com/lovell/sharp) - Node.js module for resizing JPEG,\n PNG, WebP and TIFF images.\n\n## Recommended Client-side Libraries\n\n- [Framework7](http://www.idangero.us/framework7/) - Full Featured HTML\n Framework For Building iOS7 Apps.\n- [InstantClick](http://instantclick.io) - Makes your pages load instantly by\n pre-loading them on mouse hover.\n- [NProgress.js](https://github.com/rstacruz/nprogress) - Slim progress bars\n like on YouTube and Medium.\n- [Hover](https://github.com/IanLunn/Hover) - Awesome CSS3 animations on mouse\n hover.\n- [Magnific Popup](http://dimsemenov.com/plugins/magnific-popup/) - Responsive\n jQuery Lightbox Plugin.\n- [jQuery Raty](http://wbotelhos.com/raty/) - Star Rating Plugin.\n- [Headroom.js](http://wicky.nillia.ms/headroom.js/) - Hide your header until\n you need it.\n- [X-editable](http://vitalets.github.io/x-editable/) - Edit form elements\n inline.\n- [Offline.js](http://github.hubspot.com/offline/docs/welcome/) - Detect when\n user's internet connection goes offline.\n- [Alertify.js](http://fabien-d.github.io/alertify.js/) - Sweet looking alerts\n and browser dialogs.\n- [selectize.js](http://selectize.github.io/selectize.js) - Styleable select\n elements and input tags.\n- [drop.js](http://github.hubspot.com/drop/docs/welcome/) - Powerful\n Javascript and CSS library for creating dropdowns and other floating\n displays.\n- [scrollReveal.js](https://github.com/jlmakes/scrollReveal.js) - Declarative\n on-scroll reveal animations.\n\n## Pro Tips\n\n- Use [async.parallel()](https://github.com/caolan/async#parallel) when you\n need to run multiple asynchronous tasks, and then render a page, but only\n when all tasks are completed. For example, you might want to scrape three\n different websites for some data and render the results in a template after\n all three websites have been scraped.\n- Need to find a specific object inside an Array? Use\n [\\_.find](http://lodash.com/docs#find) function from Lodash. For example,\n this is how you would retrieve a Twitter token from database:\n `var token = _.find(req.user.tokens, { kind: 'twitter' });`, where 1st\n parameter is an array, and a 2nd parameter is an object to search for.\n\n## FAQ\n\n### Why do I get `403 Error: Forbidden` when submitting a form?\n\nYou need to add the following hidden input element to your form. This has been\nadded in the\n[pull request #40](https://github.com/sahat/hackathon-starter/pull/40) as part\nof the CSRF protection.\n\n```\ninput(type='hidden', name='_csrf', value=_csrf)\n```\n\n**Note:** It is now possible to whitelist certain URLs. In other words you can\nspecify a list of routes that should bypass CSRF verification check.\n\n**Note 2:** To whitelist dynamic URLs use regular expression tests inside the\nCSRF middleware to see if `req.originalUrl` matches your desired pattern.\n\n### I am getting MongoDB Connection Error, how do I fix it?\n\nThat's a custom error message defined in `app.js` to indicate that there was a\nproblem connecting to MongoDB:\n\n```js\nmongoose.connection.on(\"error\", (err) => {\n console.error(err);\n console.log(\n \"%s MongoDB connection error. Please make sure MongoDB is running.\",\n chalk.red(\"✗\")\n );\n process.exit();\n});\n```\n\nYou need to have a MongoDB server running before launching `app.js`. You can\ndownload MongoDB [here](https://www.mongodb.com/download-center/community), or\ninstall it via a package manager.\n\nWindows users, read\n[Install MongoDB on Windows](https://docs.mongodb.org/manual/tutorial/install-mongodb-on-windows/).\n\n**Tip:** If you are always connected to the internet, you could just use\n[MongoDB Atlas](https://www.mongodb.com/cloud/atlas) or\n[Compose](https://www.compose.io/) instead of downloading and installing MongoDB\nlocally. You will only need to update database credentials in `.env` file.\n\n### I get an error when I deploy my app, why?\n\nChances are you haven't changed the _Database URI_ in `.env`. If `MONGODB` is\nset to `localhost`, it will only work on your machine as long as MongoDB is\nrunning. When you deploy to Heroku, OpenShift or some other provider, you will\nnot have MongoDB running on `localhost`. You need to create an account with\n[MongoDB Atlas](https://www.mongodb.com/cloud/atlas) or\n[Compose](https://www.compose.io/), then create a free tier database. See\n[Deployment](#deployment) for more information on how to setup an account and a\nnew database step-by-step with MongoDB Atlas.\n\n### Why Pug (Jade) instead of Handlebars?\n\nWhen I first started this project I didn't have any experience with Handlebars.\nSince then I have worked on Ember.js apps and got myself familiar with the\nHandlebars syntax. While it is true Handlebars is easier, because it looks like\ngood old HTML, I have no regrets picking Jade over Handlebars. First off, it's\nthe default template engine in Express, so someone who has built Express apps in\nthe past already knows it. Secondly, I find `extends` and `block` to be\nindispensable, which as far as I know, Handlebars does not have out of the box.\nAnd lastly, subjectively speaking, Jade looks much cleaner and shorter than\nHandlebars, or any non-HAML style for that matter.\n\n### Why do you have all routes defined in app.js?\n\nFor the sake of simplicity. While there might be a better approach, such as\npassing `app` context to each controller as outlined in this\n[blog](http://timstermatic.github.io/blog/2013/08/17/a-simple-mvc-framework-with-node-and-express/),\nI find such style to be confusing for beginners. It took me a long time to grasp\nthe concept of `exports` and `module.exports`, let alone having a global `app`\nreference in other files. That to me is backward thinking. The `app.js` is the\n\"heart of the app\", it should be the one referencing models, routes,\ncontrollers, etc. When working solo on small projects, I prefer to have\neverything inside `app.js` as is the case with\n[this](<(https://github.com/sahat/ember-sass-express-starter/blob/master/app.js)>)\nREST API server.\n\n### How do I switch SendGrid for another email delivery service, like Mailgun or SparkPost?\n\nInside the `nodemailer.createTransport` method arguments, change the service\nfrom `'Sendgrid'` to some other email service. Also, be sure to update both\nusername and password below that. See the\n[list of all supported services](https://github.com/nodemailer/nodemailer-wellknown#supported-services)\nby Nodemailer.\n\n## How It Works (mini guides)\n\nThis section is intended for giving you a detailed explanation of how a\nparticular functionality works. Maybe you are just curious about how it works,\nor perhaps you are lost and confused while reading the code, I hope it provides\nsome guidance to you.\n\n### Custom HTML and CSS Design 101\n\n[HTML5 UP](http://html5up.net/) has many beautiful templates that you can\ndownload for free.\n\nWhen you download the ZIP file, it will come with _index.html_, _images_, _css_\nand _js_ folders. So, how do you integrate it with Hackathon Starter? Hackathon\nStarter uses Bootstrap CSS framework, but these templates do not. Trying to use\nboth CSS files at the same time will likely result in undesired effects.\n\n**Note:** Using the custom templates approach, you should understand that you\ncannot reuse any of the views I have created: layout, home page, api browser,\nlogin, signup, account management, contact. Those views were built using\nBootstrap grid and styles. You will have to manually update the grid using a\ndifferent syntax provided in the template. **Having said that, you can mix and\nmatch if you want to do so: Use Bootstrap for main app interface, and a custom\ntemplate for a landing page.**\n\nLet's start from the beginning. For this example I will use\n[Escape Velocity](http://html5up.net/escape-velocity/) template:\n\n\n**Note:** For the sake of simplicity I will only consider `index.html`, and skip\n`left-sidebar.html`, `no-sidebar.html`, `right-sidebar.html`.\n\nMove all JavaScript files from `html5up-escape-velocity/js` to `public/js`. Then\nmove all CSS files from `html5up-escape-velocity/css` to `public/css`. And\nfinally, move all images from `html5up-escape-velocity/images` to\n`public/images`. You could move it to the existing **img** folder, but that\nwould require manually changing every `img` reference. Grab the contents of\n`index.html` and paste it into [HTML To Pug](https://html-to-pug.com/).\n\n**Note:** Do not forget to update all the CSS and JS paths accordingly.\n\nCreate a new file `escape-velocity.pug` and paste the Pug markup in `views`\nfolder. Whenever you see the code `res.render('account/login')` - that means it\nwill search for `views/account/login.pug` file.\n\nLet's see how it looks. Create a new controller **escapeVelocity** inside\n`controllers/home.js`:\n\n```js\nexports.escapeVelocity = (req, res) => {\n res.render(\"escape-velocity\", {\n title: \"Landing Page\",\n });\n};\n```\n\nAnd then create a route in `app.js`. I placed it right after the index\ncontroller:\n\n```js\napp.get(\"/escape-velocity\", homeController.escapeVelocity);\n```\n\nRestart the server (if you are not using **nodemon**); then you should see the\nnew template at\n[http://localhost:8080/escape-velocity](http://localhost:8080/escape-velocity).\n\nI will stop right here, but if you would like to use this template as more than\njust a single page, take a look at how these Pug templates work: `layout.pug` -\nbase template, `index.pug` - home page, `partials/header.pug` - Bootstrap\nnavbar, `partials/footer.pug` - sticky footer. You will have to manually break\nit apart into smaller pieces. Figure out which part of the template you want to\nkeep the same on all pages - that's your new `layout.pug`. Then, each page that\nchanges, be it `index.pug`, `about.pug`, `contact.pug` will be embedded in your\nnew `layout.pug` via `block content`. Use existing templates as a reference.\n\nThis is a rather lengthy process, and templates you get from elsewhere might\nhave yet another grid system. That's why I chose _Bootstrap_ for the Hackathon\nStarter. Many people are already familiar with _Bootstrap_, plus it's easy to\nget started with it if you have never used _Bootstrap_. You can also buy many\nbeautifully designed _Bootstrap_ themes at\n[Themeforest](http://themeforest.net/), and use them as a drop-in replacement\nfor Hackathon Starter. However, if you would like to go with a completely custom\nHTML/CSS design, this should help you to get started!\n\n\n\n### How do flash messages work in this project?\n\nFlash messages allow you to display a message at the end of the request and\naccess it on next request and only next request. For instance, on a failed login\nattempt, you would display an alert with some error message, but as soon as you\nrefresh that page or visit a different page and come back to the login page,\nthat error message will be gone. It is only displayed once. This project uses\n_express-flash_ module for flash messages. And that module is built on top of\n_connect-flash_, which is what I used in this project initially. With\n_express-flash_ you don't have to explicitly send a flash message to every view\ninside `res.render()`. All flash messages are available in your views via\n`messages` object by default, thanks to _express-flash_.\n\nFlash messages have a two-step process. You use\n`req.flash('errors', { msg: 'Error messages goes here' }` to create a flash\nmessage in your controllers, and then display them in your views:\n\n```pug\nif messages.errors\n .alert.alert-danger.fade.in\n for error in messages.errors\n div= error.msg\n```\n\nIn the first step, `'errors'` is the name of a flash message, which should match\nthe name of the property on `messages` object in your views. You place alert\nmessages inside `if message.errors` because you don't want to show them flash\nmessages are present. The reason why you pass an error like\n`{ msg: 'Error message goes here' }` instead of just a string -\n`'Error message goes here'`, is for the sake of consistency. To clarify that,\n_express-validator_ module which is used for validating and sanitizing user's\ninput, returns all errors as an array of objects, where each object has a `msg`\nproperty with a message why an error has occurred. Here is a more general\nexample of what express-validator returns when there are errors present:\n\n```js\n[\n { param: \"name\", msg: \"Name is required\", value: \"
\n\n### How do I create a new page?\n\nA more correct way to say this would be \"How do I create a new route?\" The main\nfile `app.js` contains all the routes. Each route has a callback function\nassociated with it. Sometimes you will see three or more arguments for a route.\nIn a case like that, the first argument is still a URL string, while middle\narguments are what's called middleware. Think of middleware as a door. If this\ndoor prevents you from continuing forward, you won't get to your callback\nfunction. One such example is a route that requires authentication.\n\n```js\napp.get(\"/account\", passportConfig.isAuthenticated, userController.getAccount);\n```\n\nIt always goes from left to right. A user visits `/account` page. Then\n`isAuthenticated` middleware checks if you are authenticated:\n\n```js\nexports.isAuthenticated = (req, res, next) => {\n if (req.isAuthenticated()) {\n return next();\n }\n res.redirect(\"/login\");\n};\n```\n\nIf you are authenticated, you let this visitor pass through your \"door\" by\ncalling `return next();`. It then proceeds to the next middleware until it\nreaches the last argument, which is a callback function that typically renders a\ntemplate on `GET` requests or redirects on `POST` requests. In this case, if you\nare authenticated, you will be redirected to the _Account Management_ page;\notherwise, you will be redirected to the _Login_ page.\n\n```js\nexports.getAccount = (req, res) => {\n res.render(\"account/profile\", {\n title: \"Account Management\",\n });\n};\n```\n\nExpress.js has `app.get`, `app.post`, `app.put`, `app.delete`, but for the most\npart, you will only use the first two HTTP verbs, unless you are building a\nRESTful API. If you just want to display a page, then use `GET`, if you are\nsubmitting a form, sending a file then use `POST`.\n\nHere is a typical workflow for adding new routes to your application. Let's say\nwe are building a page that lists all books from the database.\n\n**Step 1.** Start by defining a route.\n\n```js\napp.get(\"/books\", bookController.getBooks);\n```\n\n---\n\n**Note:** As of Express 4.x you can define your routes like so:\n\n```js\napp.route(\"/books\")\n .get(bookController.getBooks)\n .post(bookController.createBooks)\n .put(bookController.updateBooks)\n .delete(bookController.deleteBooks);\n```\n\nAnd here is how a route would look if it required an _authentication_ and an\n_authorization_ middleware:\n\n```js\napp.route(\"/api/twitter\")\n .all(passportConfig.isAuthenticated)\n .all(passportConfig.isAuthorized)\n .get(apiController.getTwitter)\n .post(apiController.postTwitter);\n```\n\nUse whichever style that makes sense to you. Either one is acceptable. I think\nthat chaining HTTP verbs on `app.route` is a very clean and elegant approach,\nbut on the other hand, I can no longer see all my routes at a glance when you\nhave one route per line.\n\n**Step 2.** Create a new schema and a model `Book.js` inside the _models_\ndirectory.\n\n```js\nconst mongoose = require(\"mongoose\");\n\nconst bookSchema = new mongoose.Schema({\n name: String,\n});\n\nconst Book = mongoose.model(\"Book\", bookSchema);\nmodule.exports = Book;\n```\n\n**Step 3.** Create a new controller file called `book.js` inside the\n_controllers_ directory.\n\n```js\n/**\n * GET /books\n * List all books.\n */\nconst Book = require(\"../models/Book.js\");\n\nexports.getBooks = (req, res) => {\n Book.find((err, docs) => {\n res.render(\"books\", { books: docs });\n });\n};\n```\n\n**Step 4.** Import that controller in `app.js`.\n\n```js\nconst bookController = require(\"./controllers/book\");\n```\n\n**Step 5.** Create `books.pug` template.\n\n```pug\nextends layout\n\nblock content\n .page-header\n h3 All Books\n\n ul\n for book in books\n li= book.name\n```\n\nThat's it! I will say that you could have combined Step 1, 2, 3 as following:\n\n```js\napp.get(\"/books\", (req, res) => {\n Book.find((err, docs) => {\n res.render(\"books\", { books: docs });\n });\n});\n```\n\nSure, it's simpler, but as soon as you pass 1000 lines of code in `app.js` it\nbecomes a little challenging to navigate the file. I mean, the whole point of\nthis boilerplate project was to separate concerns, so you could work with your\nteammates without running into _MERGE CONFLICTS_. Imagine you have four\ndevelopers working on a single `app.js`, I promise you it won't be fun resolving\nmerge conflicts all the time. If you are the only developer, then it's okay. But\nas I said, once it gets up to a certain LoC size, it becomes difficult to\nmaintain everything in a single file.\n\nThat's all there is to it. Express.js is super simple to use. Most of the time\nyou will be dealing with other APIs to do the real work:\n[Mongoose](http://mongoosejs.com/docs/guide.html) for querying database,\nsocket.io for sending and receiving messages over websockets, sending emails via\n[Nodemailer](http://nodemailer.com/), form validation using\n[express-validator](https://github.com/ctavan/express-validator) library,\nparsing websites using [Cheerio](https://github.com/cheeriojs/cheerio), etc.\n\n
\n\n### How do I use Socket.io with Hackathon Starter?\n\n[Dan Stroot](https://github.com/dstroot) submitted an excellent\n[pull request](https://github.com/dstroot/hackathon-starter/commit/0a632def1ce8da446709d92812423d337c977d75)\nthat adds a real-time dashboard with socket.io. And as much as I'd like to add\nit to the project, I think it violates one of the main principles of the\nHackathon Starter:\n\n> When I started this project, my primary focus was on simplicity and ease of\n> use. I also tried to make it as generic and reusable as possible to cover most\n> use cases of hackathon web apps, **without being too specific**.\n\nWhen I need to use socket.io, I **really** need it, but most of the time - I\ndon't. But more importantly, websockets support is still experimental on most\nhosting providers. As of October 2013, Heroku supports websockets, but not until\nyou opt-in by running this command:\n\n```js\nheroku labs:enable websockets -a myapp\n```\n\nAnd what if you are deploying to OpenShift? They do support websockets, but it\nis currently in a preview state. So, for OpenShift you would need to change the\nsocket.io connect URI to the following:\n\n```js\nconst socket = io.connect(\"http://yoursite-namespace.rhcloud.com:8000\");\n```\n\nWait, why is it on port 8000? Who knows, and if I didn't run across this\n[blog post](http://velin-georgiev-blog.appspot.com/blog/set-up-nodejs-express-socketio-application-using-websockets-on-openshift-by-red-hat/)\nI wouldn't even know I had to use port 8000.\n\nI am really glad that Heroku and OpenShift at least have a websockets support,\nbecause many other PaaS providers still do not support it. Due to the\naforementioned issues with websockets, I cannot include socket.io as part of the\nHackathon Starter. _For now..._ If you need to use socket.io in your app, please\ncontinue reading.\n\nFirst, you need to install socket.io:\n\n```js\nnpm install socket.io\n```\n\nReplace `const app = express();` with the following code:\n\n```js\nconst app = express();\nconst server = require(\"http\").Server(app);\nconst io = require(\"socket.io\")(server);\n```\n\nI like to have the following code organization in `app.js` (from top to bottom):\nmodule dependencies, import controllers, import configs, connect to database,\nexpress configuration, routes, start the server, socket.io stuff. That way I\nalways know where to look for things.\n\nAdd the following code at the end of `app.js`:\n\n```js\nio.on(\"connection\", (socket) => {\n socket.emit(\"greet\", { hello: \"Hey there browser!\" });\n socket.on(\"respond\", (data) => {\n console.log(data);\n });\n socket.on(\"disconnect\", () => {\n console.log(\"Socket disconnected\");\n });\n});\n```\n\nOne last thing left to change:\n\n```js\napp.listen(app.get('port'), () => {\n```\n\nto\n\n```js\nserver.listen(app.get('port'), () => {\n```\n\nAt this point, we are done with the back-end.\n\nYou now have a choice - to include your JavaScript code in Pug templates or have\nall your client-side JavaScript in a separate file - in `main.js`. I admit, when\nI first started with Node.js and JavaScript in general, I placed all JavaScript\ncode inside templates because I have access to template variables passed in from\nExpress right then and there. It's the easiest thing you can do, but also the\nleast efficient and harder to maintain. Since then I almost never include inline\nJavaScript inside templates anymore.\n\nBut it's also understandable if you want to take the easier road. Most of the\ntime you don't even care about performance during hackathons, you just want to\n[_\"get shit done\"_](https://www.startupvitamins.com/media/products/13/aaron_levie_poster_black.jpg)\nbefore the time runs out. Well, either way, use whichever approach makes more\nsense to you. At the end of the day, it's **what** you build that matters, not\n**how** you build it.\n\nIf you want to stick all your JavaScript inside templates, then in\n`layout.pug` - your main template file, add this to `head` block.\n\n```pug\nscript(src='/socket.io/socket.io.js')\nscript.\n let socket = io.connect(window.location.href);\n socket.on('greet', function (data) {\n console.log(data);\n socket.emit('respond', { message: 'Hey there, server!' });\n });\n```\n\n**Note:** Notice the path of the `socket.io.js`, you don't actually have to have\n`socket.io.js` file anywhere in your project; it will be generated automatically\nat runtime.\n\nIf you want to have JavaScript code separate from templates, move that inline\nscript code into `main.js`, inside the `$(document).ready()` function:\n\n```js\n$(document).ready(function () {\n // Place JavaScript code here...\n let socket = io.connect(window.location.href);\n socket.on(\"greet\", function (data) {\n console.log(data);\n socket.emit(\"respond\", { message: \"Hey there, server!\" });\n });\n});\n```\n\nAnd we are done!\n\n## Cheatsheets\n\n###
ES6 Cheatsheet\n\n#### Declarations\n\nDeclares a read-only named constant.\n\n```js\nconst name = \"yourName\";\n```\n\nDeclares a block scope local variable.\n\n```js\nlet index = 0;\n```\n\n#### Template Strings\n\nUsing the **\\`${}\\`** syntax, strings can embed expressions.\n\n```js\nconst name = \"Oggy\";\nconst age = 3;\n\nconsole.log(`My cat is named ${name} and is ${age} years old.`);\n```\n\n#### Modules\n\nTo import functions, objects or primitives exported from an external module.\nThese are the most common types of importing.\n\n```js\nconst name = require(\"module-name\");\n```\n\n```js\nconst { foo, bar } = require(\"module-name\");\n```\n\nTo export functions, objects or primitives from a given file or module.\n\n```js\nmodule.exports = { myFunction };\n```\n\n```js\nmodule.exports.name = \"yourName\";\n```\n\n```js\nmodule.exports = myFunctionOrClass;\n```\n\n#### Spread Operator\n\nThe spread operator allows an expression to be expanded in places where multiple\narguments (for function calls) or multiple elements (for array literals) are\nexpected.\n\n```js\nmyFunction(...iterableObject);\n```\n\n```jsx\n JavaScript Date Cheatsheet\n\n#### Unix Timestamp (seconds)\n\n```js\nMath.floor(Date.now() / 1000);\n```\n\n```MomentJS\nmoment().unix();\n```\n\n#### Add 30 minutes to a Date object\n\n```js\nvar now = new Date();\nnow.setMinutes(now.getMinutes() + 30);\n```\n\n```MomentJS\nmoment().add(30, 'minutes');\n```\n\n#### Date Formatting\n\n```js\n// DD-MM-YYYY\nvar now = new Date();\n\nvar DD = now.getDate();\nvar MM = now.getMonth() + 1;\nvar YYYY = now.getFullYear();\n\nif (DD < 10) {\n DD = \"0\" + DD;\n}\n\nif (MM < 10) {\n MM = \"0\" + MM;\n}\n\nconsole.log(MM + \"-\" + DD + \"-\" + YYYY); // 03-30-2016\n```\n\n```MomentJS\nconsole.log(moment(new Date(), 'MM-DD-YYYY'));\n```\n\n```js\n// hh:mm (12 hour time with am/pm)\nvar now = new Date();\nvar hours = now.getHours();\nvar minutes = now.getMinutes();\nvar amPm = hours >= 12 ? \"pm\" : \"am\";\n\nhours = hours % 12;\nhours = hours ? hours : 12;\nminutes = minutes < 10 ? \"0\" + minutes : minutes;\n\nconsole.log(hours + \":\" + minutes + \" \" + amPm); // 1:43 am\n```\n\n```MomentJS\nconsole.log(moment(new Date(), 'hh:mm A'));\n```\n\n#### Next week Date object\n\n```js\nvar today = new Date();\nvar nextWeek = new Date(today.getTime() + 7 * 24 * 60 * 60 * 1000);\n```\n\n```MomentJS\nmoment().add(7, 'days');\n```\n\n#### Yesterday Date object\n\n```js\nvar today = new Date();\nvar yesterday = date.setDate(date.getDate() - 1);\n```\n\n```MomentJS\nmoment().add(-1, 'days');\n```\n\n:top: [**back to top**](#table-of-contents)\n\n### Mongoose Cheatsheet\n\n#### Find all users:\n\n```js\nUser.find((err, users) => {\n console.log(users);\n});\n```\n\n#### Find a user by email:\n\n```js\nlet userEmail = \"example@gmail.com\";\nUser.findOne({ email: userEmail }, (err, user) => {\n console.log(user);\n});\n```\n\n#### Find 5 most recent user accounts:\n\n```js\nUser.find()\n .sort({ _id: -1 })\n .limit(5)\n .exec((err, users) => {\n console.log(users);\n });\n```\n\n#### Get the total count of a field from all documents:\n\nLet's suppose that each user has a `votes` field and you would like to count the\ntotal number of votes in your database across all users. One very inefficient\nway would be to loop through each document and manually accumulate the count. Or\nyou could use\n[MongoDB Aggregation Framework](https://docs.mongodb.org/manual/core/aggregation-introduction/)\ninstead:\n\n```js\nUser.aggregate(\n { $group: { _id: null, total: { $sum: \"$votes\" } } },\n (err, votesCount) => {\n console.log(votesCount.total);\n }\n);\n```\n\n:top: [**back to top**](#table-of-contents)\n\n## Docker\n\nYou will need docker and docker-compose installed to build the application.\n\n- [Docker installation](https://docs.docker.com/engine/installation/)\n\n- [Common problems setting up docker](https://docs.docker.com/toolbox/faqs/troubleshoot/)\n\nAfter installing docker, start the application with the following commands :\n\n```\n# To build the project for the first time or when you add dependencies\ndocker-compose build web\n\n# To start the application (or to restart after making changes to the source code)\ndocker-compose up web\n\n```\n\nTo view the app, find your docker IP address + port 8080 ( this will typically\nbe http://localhost:8080/ ). To use a port other than 8080, you would need to\nmodify the port in app.js, Dockerfile, and docker-compose.yml.\n\n## Deployment\n\nOnce you are ready to deploy your app, you will need to create an account with a\ncloud platform to host it. These are not the only choices, but they are my top\npicks. From my experience, the easiest way to get started is with **Heroku**. It\nwill automatically restart your Node.js process when it crashes, has\nzero-downtime deployments and supports custom domains on free accounts.\nAdditionally, you can create an account with **MongoDB Atlas** and then pick one\nof the _4_ providers below. Again, there are plenty of other choices, and you\nare not limited to just the ones listed below.\n\n### Deployment to Heroku\n\n\n\n- Download and install [Heroku Toolbelt](https://toolbelt.heroku.com/)\n- In a terminal, run `heroku login` and enter your Heroku credentials\n- From _your app_ directory run `heroku create`\n- Use the command `heroku config:set KEY=val` to set the different environment\n variables (KEY=val) for your application (i.e.\n `heroku config:set BASE_URL=[heroku App Name].herokuapp.com` or\n `heroku config:set MONGODB_URI=mongodb://dbuser:\n\n- Go to\n [https://www.mongodb.com/cloud/atlas](https://www.mongodb.com/cloud/atlas)\n- Click the green **Get started free** button\n- Fill in your information then hit **Get started free**\n- You will be redirected to Create New Cluster page.\n- Select a **Cloud Provider and Region** (such as AWS and a free tier region)\n- Select cluster Tier to **Free Shared Clusters**\n- Give Cluster a name (default: Cluster0)\n- Click on green **:zap:Create Cluster button**\n- Now, to access your database you need to create a DB user. To create a new\n MongoDB user, from the **Clusters view**, select the **Security tab**\n- Under the **MongoDB Users** tab, click on **+Add New User**\n- Fill in a username and password and give it either **Atlas Admin** User\n Privilege\n- Next, you will need to create an IP address whitelist and obtain the\n connection URI. In the Clusters view, under the cluster details (i.e.\n SANDBOX - Cluster0), click on the **CONNECT** button.\n- Under section **(1) Check the IP Whitelist**, click on **ALLOW ACCESS FROM\n ANYWHERE**. The form will add a field with `0.0.0.0/0`. Click **SAVE** to\n save the `0.0.0.0/0` whitelist.\n- Under section **(2) Choose a connection method**, click on **Connect Your\n Application**\n- In the new screen, select **Node.js** as Driver and version **2.2.12 or\n later**. _*WARNING*_: Do not pick 3.0 or later since connect-mongo can't\n handle mongodb+srv:// connection strings.\n- Finally, copy the URI connection string and replace the URI in MONGODB_URI\n of `.env.example` with this URI string. Make sure to replace the \n**NOTE** *These instructions might be out of date due to changes in OpenShift. Heroku is currently a good free alternative. If you the new process, please feel free to help us update this page*\n\n- First, install this Ruby gem: `sudo gem install rhc` :gem:\n- Run `rhc login` and enter your OpenShift credentials\n- From your app directory run `rhc app create MyApp nodejs-0.10`\n- **Note:** _MyApp_ is the name of your app (no spaces)\n- Once that is done, you will be provided with **URL**, **SSH** and **Git\n Remote** links\n- Visit provided **URL**, and you should see the _Welcome to your Node.js\n application on OpenShift_ page\n- Copy and paste **Git Remote** into\n `git remote add openshift YOUR_GIT_REMOTE`\n- Before you push your app, you need to do a few modifications to your code\n\nAdd these two lines to `app.js`, just place them anywhere before `app.listen()`:\n\n```js\nvar IP_ADDRESS = process.env.OPENSHIFT_NODEJS_IP || \"127.0.0.1\";\nvar PORT = process.env.OPENSHIFT_NODEJS_PORT || 8080;\n```\n\nThen change `app.listen()` to:\n\n```js\napp.listen(PORT, IP_ADDRESS, () => {\n console.log(\n `Express server listening on port ${PORT} in ${app.settings.env} mode`\n );\n});\n```\n\nAdd this to `package.json`, after _name_ and _version_. This is necessary\nbecause, by default, OpenShift looks for `server.js` file. And by specifying\n`supervisor app.js` it will automatically restart the server when node.js\nprocess crashes.\n\n```js\n\"main\": \"app.js\",\n\"scripts\": {\n \"start\": \"supervisor app.js\"\n},\n```\n\n- Finally, you can now push your code to OpenShift by running\n `git push -f openshift master`\n- **Note:** The first time you run this command, you have to pass `-f` (force)\n flag because OpenShift creates a dummy server with the welcome page when you\n create a new Node.js app. Passing `-f` flag will override everything with\n your _Hackathon Starter_ project repository. **Do not** run `git pull` as it\n will create unnecessary merge conflicts.\n- And you are done!\n\n---\n\n### Azure\n\n\n**NOTE** *Beyond the initial 12 month trial of Azure, the platform does not seem to offer a free tier for hosting NodeJS apps. If you are looking for a free tier service to host your app, Heroku might be a better choice at this point*\n\n- Login to [Windows Azure Management Portal](https://manage.windowsazure.com/)\n- Click the **+ NEW** button on the bottom left of the portal\n- Click **COMPUTE**, then **WEB APP**, then **QUICK CREATE**\n- Enter a name for **URL** and select the datacenter **REGION** for your web\n site\n- Click on **CREATE WEB APP** button\n- Once the web site status changes to _Running_, click on the name of the web\n site to access the Dashboard\n- At the bottom right of the Quickstart page, select **Set up a deployment\n from source control**\n- Select **Local Git repository** from the list, and then click the arrow\n- To enable Git publishing, Azure will ask you to create a user name and\n password\n- Once the Git repository is ready, you will be presented with a **GIT URL**\n- Inside your _Hackathon Starter_ directory, run\n `git remote add azure [Azure Git URL]`\n- To push your changes run `git push azure master`\n- **Note:** _You will be prompted for the password you created earlier_\n- On **Deployments** tab of your Windows Azure Web App, you will see the\n deployment history\n\n---\n\n## IBM Bluemix Cloud Platform\n\n**NOTE** _At this point it appears that Bluemix's free tier to host NodeJS apps\nis limited to 30 days. If you are looking for a free tier service to host your\napp, Heroku might be a better choice at this point_\n\n1. Create a Bluemix Account\n\n [Sign up](https://console.ng.bluemix.net/registration/?target=%2Fdashboard%2Fapps)\n for Bluemix, or use an existing account.\n\n1. Download and install the\n [Cloud Foundry CLI](https://github.com/cloudfoundry/cli) to push your\n applications to Bluemix.\n\n1. Create a `manifest.yml` file in the root of your application.\n\n```\napplications:\n- name: \n[Conversation](https://www.ibm.com/watson/services/conversation/)** - Quickly\nbuild and deploy chatbots and virtual agents across a variety of channels,\nincluding mobile devices, messaging platforms, and even robots.\n\n**\n[Discovery](https://www.ibm.com/watson/services/discovery/)** - Unlock hidden\nvalue in data to find answers, monitor trends and surface patterns with the\nworld’s most advanced cloud-native insight engine.\n\n**\n[Language Translator](https://www.ibm.com/watson/services/language-translator/)** -\nTranslate text from one language to another.\n\n**\n[Natural Language Classifier](https://www.ibm.com/watson/services/natural-language-classifier/)** -\nInterpret and classify natural language with confidence.\n\n**\n[Natural Language Understanding](https://www.ibm.com/watson/services/natural-language-understanding/)** -\nAnalyze text to extract meta-data from content such as concepts, entities,\nkeywords and more.\n\n**\n[Personality Insights](https://www.ibm.com/watson/services/personality-insights/)** -\nPredict personality characteristics, needs and values through written text.\n\n**\n[Speech to Text](https://www.ibm.com/watson/services/speech-to-text/)** -\nConvert audio and voice into written text for quick understanding of content.\n\n**\n[Text to Speech](https://www.ibm.com/watson/services/text-to-speech/)** -\nConvert written text into natural sounding audio in a variety of languages and\nvoices.\n\n**\n[Tone Analyzer](https://www.ibm.com/watson/services/tone-analyzer/)** -\nUnderstand emotions, social tendencies and perceived writing style.\n\n**\n[Visual Recognition](https://www.ibm.com/watson/services/visual-recognition/)** -\nTag, classify and search visual content using machine learning.\n\n[Click here](https://www.ibm.com/watson/developercloud/services-catalog.html)\nfor live demos of each Watson service.\n\n---\n\n### Google Cloud Platform\n\n\n\n- [Download and install Node.js](https://nodejs.org/)\n- [Select or create](https://console.cloud.google.com/project) a Google Cloud\n Platform Console project\n- [Enable billing](https://support.google.com/cloud/answer/6293499#enable-billing)\n for your project (there's a $300 free trial)\n- Install and initialize the\n [Google Cloud SDK](https://cloud.google.com/sdk/docs/quickstarts)\n- Create an `app.yaml` file at the root of your `hackathon-starter` folder\n with the following contents:\n\n ```yaml\n runtime: nodejs\n env: flex\n manual_scaling:\n instances: 1\n ```\n\n- Make sure you've set `MONGODB_URI` in `.env.example`\n- Run the following command to deploy the `hackathon-starter` app:\n\n ```bash\n gcloud app deploy\n ```\n\n- [Monitor your deployed app](https://console.cloud.google.com/appengine) in\n the Cloud Console\n- [View the logs](https://console.cloud.google.com/logs/viewer) for your app\n in the Cloud Console\n\n## Production\n\nIf you are starting with this boilerplate to build an application for prod\ndeployment, or if after your hackathon you would like to get your project\nhardened for production use, see\n[prod-checklist.md](https://github.com/sahat/hackathon-starter/blob/master/prod-checklist.md).\n\n## Changelog\n\nYou can find the changelog for the project in:\n[CHANGELOG.md](https://github.com/sahat/hackathon-starter/blob/master/CHANGELOG.md)\n\n## Contributing\n\nIf something is unclear, confusing, or needs to be refactored, please let me\nknow. Pull requests are always welcome, but due to the opinionated nature of\nthis project, I cannot accept every pull request. Please open an issue before\nsubmitting a pull request. This project uses\n[Airbnb JavaScript Style Guide](https://github.com/airbnb/javascript) with a few\nminor exceptions. If you are submitting a pull request that involves Pug\ntemplates, please make sure you are using _spaces_, not tabs.\n\n## License\n\nThe MIT License (MIT)\n\nCopyright (c) 2014-2020 Sahat Yalkabov\n\nPermission is hereby granted, free of charge, to any person obtaining a copy of\nthis software and associated documentation files (the \"Software\"), to deal in\nthe Software without restriction, including without limitation the rights to\nuse, copy, modify, merge, publish, distribute, sublicense, and/or sell copies of\nthe Software, and to permit persons to whom the Software is furnished to do so,\nsubject to the following conditions:\n\nThe above copyright notice and this permission notice shall be included in all\ncopies or substantial portions of the Software.\n\nTHE SOFTWARE IS PROVIDED \"AS IS\", WITHOUT WARRANTY OF ANY KIND, EXPRESS OR\nIMPLIED, INCLUDING BUT NOT LIMITED TO THE WARRANTIES OF MERCHANTABILITY, FITNESS\nFOR A PARTICULAR PURPOSE AND NONINFRINGEMENT. IN NO EVENT SHALL THE AUTHORS OR\nCOPYRIGHT HOLDERS BE LIABLE FOR ANY CLAIM, DAMAGES OR OTHER LIABILITY, WHETHER\nIN AN ACTION OF CONTRACT, TORT OR OTHERWISE, ARISING FROM, OUT OF OR IN\nCONNECTION WITH THE SOFTWARE OR THE USE OR OTHER DEALINGS IN THE SOFTWARE.\n","readmeFilename":"README.md","gitHead":"998732b77ac800272a91b3ada024191b5f3d6766","bugs":{"url":"https://github.com/sahat/hackathon-starter/issues"},"homepage":"https://github.com/sahat/hackathon-starter#readme","_id":"@atomist/hackathon-starter@6.0.1-branch-atomist-prettier-master.3","_nodeVersion":"12.20.0","_npmVersion":"6.14.8","dist":{"integrity":"sha512-4JHicf2gYHXXe3U66o/zfXVfmK3HXM+Kxr8GwieKCFmPc8Zxwz4mXUhFhzoC4tG3+gWKLIFcnB+yoM5QDcJVxQ==","shasum":"82d9538d37afee4651d102a5b2ee79bdb5364a36","tarball":"https://registry.npmjs.org/@atomist/hackathon-starter/-/hackathon-starter-6.0.1-branch-atomist-prettier-master.3.tgz","fileCount":72,"unpackedSize":664346,"npm-signature":"-----BEGIN PGP SIGNATURE-----\r\nVersion: OpenPGP.js v3.0.13\r\nComment: https://openpgpjs.org\r\n\r\nwsFcBAEBCAAQBQJf0IlWCRA9TVsSAnZWagAAm7AP/3qNlu6BGdTIpN3gJQCC\n5lvOHFFArL0/x65+u9d3j0vnSlHg1vSnRA+J4aSdI+L3Y8CiigUdSJLu5Tmn\nupgKnMK204IiOluhHo0dKRRA4Z/m9UFzRbTjh0yNYqFLCos1AQJic83e9svM\naNlYNMFzJRz3mZiOlhVC3Qdrj7mvhzOIU6IM5q8ciwf6Kncy7ZT9FsPsQcFb\ntY+gVsj4op4t5RwoyspwvV3ntIwFDwvBq1GM1Lw9e8sZnUCP/LqQzRRrd083\nwg8kZdhz7ssOEOq3KzXqrjXMpwAyP8/2v+w9eXw5JhJZ9SiRzgVJGH9fyvqX\nW7BnJdjoxP4zyju+sXYV+qpEG/rbXh03mQCeHN9s64ga/L+uPxNdnDqZh8bz\n5x/A1ApmhObeqhxPhkiCOGjU3CLn1UeAASIASpxxnyZBrBfZ+ckcQ+TkboNL\nnE6ykUBWLqwB/woKYh/b46N+HeFcSuVxww4niJy+I5Sx4pM6UxiLsotyUKjY\nlMESLSMAlgjXQ/3MI0eabubj8yLiAjK5+kt1M7sDjRwbHuSZ4/F8AGFjmKbX\n077m7PcN5GPDSmJgAhSXrooAzq5LrQXrXeX5jv/fOVn8gu40xjBd1wdoTf0i\nSA3QCvACFZc7RNnkfO1fCDEsSLFk2jsQA51vawiYsNmBeRmoqylBHHwIkW8w\nmYxr\r\n=0FQN\r\n-----END PGP SIGNATURE-----\r\n","signatures":[{"keyid":"SHA256:jl3bwswu80PjjokCgh0o2w5c2U4LhQAE57gj9cz1kzA","sig":"MEYCIQCJ0kEIQgXxg4PmB1N0TBPlmKzsUuwsf+6e7sgVbFWU/QIhANTCosEsajp2rTour3PCP6vVRhxOti1KO/38+liv1I5Y"}]},"_npmUser":{"name":"atomist-bot","email":"npm@atomist.com"},"directories":{},"maintainers":[{"name":"slimslenderslacks","email":"slimslenderslacks@gmail.com"},{"name":"cdupuis","email":"cd@atomist.com"},{"name":"ddatomist","email":"david@atomist.com"},{"name":"atomist-bot","email":"npm@atomist.com"}],"_npmOperationalInternal":{"host":"s3://npm-registry-packages","tmp":"tmp/hackathon-starter_6.0.1-branch-atomist-prettier-master.3_1607502166292_0.650574671988162"},"_hasShrinkwrap":false},"6.0.1-master.10":{"name":"@atomist/hackathon-starter","version":"6.0.1-master.10","description":"A boilerplate for Node.js web applications","repository":{"type":"git","url":"git+https://github.com/sahat/hackathon-starter.git"},"license":"MIT","author":{"name":"Sahat Yalkabov"},"contributors":[{"name":"Yashar Fakhari","url":"https://github.com/YasharF"}],"scripts":{"postinstall":"npm rebuild node-sass","start":"node app.js","test":"nyc mocha --timeout=10000 --exit","lint":"eslint \"**/*.js\"","atm:lint:prettier":"prettier --write"},"dependencies":{"@fortawesome/fontawesome-free":"^5.15.1","@ladjs/bootstrap-social":"^7.0.2","@octokit/rest":"^18.0.12","axios":"^0.20.0","bcrypt":"^5.0.0","body-parser":"^1.19.0","bootstrap":"^4.5.3","chalk":"^4.1.0","chart.js":"^2.9.4","cheerio":"^1.0.0-rc.3","compression":"^1.7.4","connect-mongo":"^3.2.0","dotenv":"^8.2.0","errorhandler":"^1.5.1","express":"^4.17.1","express-flash":"^0.0.2","express-handlebars":"^5.2.0","express-session":"^1.17.1","express-status-monitor":"^1.3.3","googleapis":"^61.0.0","instagram-node":"^0.5.8","jquery":"^3.5.1","lastfm":"^0.9.3","lob":"^6.1.1","lodash":"^4.17.20","lusca":"^1.6.1","mailchecker":"^3.3.17","moment":"^2.29.1","mongoose":"^5.11.5","morgan":"^1.10.0","multer":"^1.4.2","node-quickbooks":"^2.0.37","node-sass":"^4.14.1","node-sass-middleware":"^0.11.0","nodemailer":"^6.4.16","passport":"^0.4.1","passport-facebook":"^3.0.0","passport-github2":"^0.1.12","passport-google-oauth":"^2.0.0","passport-instagram":"^1.0.0","passport-linkedin-oauth2":"^2.0.0","passport-local":"^1.0.0","passport-oauth":"^1.0.0","passport-oauth2-refresh":"^2.0.1","passport-openid":"^0.4.0","passport-snapchat":"^1.0.0","passport-twitch-new":"^0.0.2","passport-twitter":"^1.0.4","paypal-rest-sdk":"^1.8.1","popper.js":"^1.16.1","pug":"^3.0.0","stripe":"^8.127.0","tumblr.js":"^3.0.0","twilio":"^3.54.0","twitter-lite":"^0.14.0","validator":"^13.5.1"},"devDependencies":{"chai":"^4.2.0","eslint":"^7.15.0","eslint-config-airbnb-base":"^14.2.1","eslint-plugin-chai-friendly":"^0.6.0","eslint-plugin-import":"^2.22.1","husky":"^4.3.5","lint-staged":"^10.5.3","mocha":"^8.2.1","nyc":"^15.1.0","prettier":"^2.2.1","sinon":"^9.2.1","supertest":"^5.0.0"},"engines":{"node":">=10.22.1","npm":">=6.14.6"},"husky":{"hooks":{"pre-commit":"lint-staged"}},"lint-staged":{"**/*.@(graphql|json|markdown|yaml|yml|md)":"npm run atm:lint:prettier"},"gitHead":"998732b77ac800272a91b3ada024191b5f3d6766","readme":"\nHackathon Starter =======================\n\n[](https://david-dm.org/sahat/hackathon-starter)\n[](https://david-dm.org/sahat/hackathon-starter?type=dev)\n[](https://travis-ci.org/sahat/hackathon-starter)\n[](https://gitter.im/sahat/hackathon-starter?utm_source=badge&utm_medium=badge&utm_campaign=pr-badge&utm_content=badge)\n\n**Live Demo**: https://hackathon-starter.walcony.com\n\nJump to\n[What's new?](https://github.com/sahat/hackathon-starter/blob/master/CHANGELOG.md)\n\nA boilerplate for **Node.js** web applications.\n\nIf you have attended any hackathons in the past, then you know how much time it\ntakes to get a project started: decide on what to build, pick a programming\nlanguage, pick a web framework, pick a CSS framework. A while later, you might\nhave an initial project up on GitHub and only then can other team members start\ncontributing. Or how about doing something as simple as _Sign in with Facebook_\nauthentication? You can spend hours on it if you are not familiar with how OAuth\n2.0 works.\n\nWhen I started this project, my primary focus was on **simplicity** and **ease\nof use**. I also tried to make it as **generic** and **reusable** as possible to\ncover most use cases of hackathon web apps, without being too specific. In the\nworst case, you can use this as a learning guide for your projects, if for\nexample you are only interested in **Sign in with Google** authentication and\nnothing else.\n\n### Testimonials\n\n> [**“Nice! That README alone is already gold!”**](https://www.producthunt.com/tech/hackathon-starter#comment-224732)\n> — Adrian Le Bas\n\n> [**“Awesome. Simply awesome.”**](https://www.producthunt.com/tech/hackathon-starter#comment-224966)
\n> — Steven Rueter\n\n> [**“I'm using it for a year now and many projects, it's an awesome boilerplate and the project is well maintained!”**](https://www.producthunt.com/tech/hackathon-starter#comment-228610)
\n> — Kevin Granger\n\n> **“Small world with Sahat's project. We were using his hackathon starter for\n> our hackathon this past weekend and got some prizes. Really handy repo!”**
\n> — Interview candidate for one of the companies I used to work with.\n\n
Modern Theme
\n\n\n\nFlatly Bootstrap Theme
\n\n\n\nAPI Examples
\n\n\n\n## Table of Contents\n\n- [Features](#features)\n- [Prerequisites](#prerequisites)\n- [Getting Started](#getting-started)\n- [Obtaining API Keys](#obtaining-api-keys)\n- [Project Structure](#project-structure)\n- [List of Packages](#list-of-packages)\n- [Useful Tools and Resources](#useful-tools-and-resources)\n- [Recommended Design Resources](#recommended-design-resources)\n- [Recommended Node.js Libraries](#recommended-nodejs-libraries)\n- [Recommended Client-side Libraries](#recommended-client-side-libraries)\n- [Pro Tips](#pro-tips)\n- [FAQ](#faq)\n- [How It Works](#how-it-works-mini-guides)\n- [Cheatsheets](#cheatsheets)\n - [ES6](#-es6-cheatsheet)\n - [JavaScript Date](#-javascript-date-cheatsheet)\n - [Mongoose Cheatsheet](#mongoose-cheatsheet)\n- [Deployment](#deployment)\n- [Docker](#docker)\n- [Production](#production)\n- [Changelog](#changelog)\n- [Contributing](#contributing)\n- [License](#license)\n\n## Features\n\n- **Local Authentication** using Email and Password\n- **OAuth 1.0a Authentication** via Twitter\n- **OAuth 2.0 Authentication** via Facebook, Google, GitHub, LinkedIn,\n Instagram\n- Flash notifications\n- MVC Project Structure\n- Node.js clusters support\n- Sass stylesheets (auto-compiled via middleware)\n- Bootstrap 4 + Extra Themes\n- Contact Form (powered by Mailgun, Sendgrid or Mandrill)\n- **Account Management**\n- Gravatar\n- Profile Details\n- Change Password\n- Forgot Password\n- Reset Password\n- Link multiple OAuth strategies to one account\n- Delete Account\n- CSRF protection\n- **API Examples**: Facebook, Foursquare, Last.fm, Tumblr, Twitter, Stripe,\n LinkedIn and more.\n\n## Prerequisites\n\n- [MongoDB](https://www.mongodb.com/download-center/community)\n- [Node.js 10+](http://nodejs.org)\n- Command Line Tools\n- **Mac\n OS X:** [Xcode](https://itunes.apple.com/us/app/xcode/id497799835?mt=12) (or\n **OS X 10.9+**: `xcode-select --install`)\n- **Windows:**\n [Visual Studio](https://www.visualstudio.com/products/visual-studio-community-vs)\n OR [Visual Studio Code](https://code.visualstudio.com) +\n [Windows Subsystem for Linux - Ubuntu](https://docs.microsoft.com/en-us/windows/wsl/install-win10)\n- **Ubuntu**\n /\n **Linux\n Mint:** `sudo apt-get install build-essential`\n- **Fedora**:\n `sudo dnf groupinstall \"Development Tools\"`\n- **OpenSUSE:**\n `sudo zypper install --type pattern devel_basis`\n\n**Note:** If you are new to Node or Express, you may find\n[Node.js & Express From Scratch series](https://www.youtube.com/watch?v=Ad2ngx6CT0M&list=PLillGF-RfqbYRpji8t4SxUkMxfowG4Kqp&index=3)\nhelpful for learning the basics of Node and Express. Alternatively, here is\nanother great tutorial for complete beginners -\n[Getting Started With Node.js, Express, MongoDB](http://cwbuecheler.com/web/tutorials/2013/node-express-mongo/).\n\n## Getting Started\n\nThe easiest way to get started is to clone the repository:\n\n```bash\n# Get the latest snapshot\ngit clone https://github.com/sahat/hackathon-starter.git myproject\n\n# Change directory\ncd myproject\n\n# Install NPM dependencies\nnpm install\n\n# Then simply start your app\nnode app.js\n```\n\n**Warning:** If you want to use some API that need https to work (for example\nPinterest or facebook), you will need to download [ngrok](https://ngrok.com/).\nYou must start ngrok after starting the project.\n\n```bash\n# start ngrok to intercept the data exchanged on port 8080\n./ngrok http 8080\n```\n\nNext, you must use the https URL defined by ngrok, for example,\n`https://hackaton.ngrok.io`\n\n**Note:** I highly recommend installing\n[Nodemon](https://github.com/remy/nodemon). It watches for any changes in your\nnode.js app and automatically restarts the server. Once installed, instead of\n`node app.js` use `nodemon app.js`. It will save you a lot of time in the long\nrun, because you won't need to manually restart the server each time you make a\nsmall change in code. To install, run `sudo npm install -g nodemon`.\n\n## Obtaining API Keys\n\nTo use any of the included APIs or OAuth authentication methods, you will need\nto obtain appropriate credentials: Client ID, Client Secret, API Key, or\nUsername & Password. You will need to go through each provider to generate new\ncredentials.\n\n\n\n- Visit\n Google\n reCAPTCHA Admin Console\n- Enter your application's name as the **Label**\n- Chose **reCAPTCHA v2**, **\"I'm not a robot\" Checkbox**\n- Enter _localhost_ as the domain. You can have other domains added in\n addition to _localhost_\n- Accept the terms and submit the form\n- Copy the _Site Key_ and the _Secret key_ into `.env`. These keys will be\n accessible under Settings, reCAPTCHA keys drop down if you need them again\n later.\n\n\n\n
\n\n- Visit\n Google\n Cloud Console\n- Click on the **Create Project** button\n- Enter _Project Name_, then click on **Create** button\n- Then click on _APIs & auth_ in the sidebar and select _API_ tab\n- Click on **Google+ API** under _Social APIs_, then click **Enable API**\n- Click on **Google Drive API** under _G Suite_, then click **Enable API**\n- Click on **Google Sheets API** under _G Suite_, then click **Enable API**\n- Next, under _APIs & auth_ in the sidebar click on _Credentials_ tab\n- Click on **Create new Client ID** button\n- Select _Web Application_ and click on **Configure Consent Screen**\n- Fill out the required fields then click on **Save**\n- In the _Create Client ID_ modal dialog:\n- **Application Type**: Web Application\n- **Authorized Javascript origins**: http://localhost:8080\n- **Authorized redirect URI**: http://localhost:8080/auth/google/callback\n- Click on **Create Client ID** button\n- Copy and paste _Client ID_ and _Client secret_ keys into `.env`\n\n**Note:** When you ready to deploy to production don't forget to add your new\nURL to _Authorized Javascript origins_ and _Authorized redirect URI_, e.g.\n`http://my-awesome-app.herokuapp.com` and\n`http://my-awesome-app.herokuapp.com/auth/google/callback` respectively. The\nsame goes for other providers.\n\n\n\n
\n\n- Visit Snap Kit\n Developer Portal\n- Click on the **+** button to create an app\n- Enter a name for your app\n- Enable the scopes that you will want to use in your app\n- Click on the **Continue** button\n- Find the **Kits** section and make sure that **Login Kit** is enabled\n- Find the **Redirect URLs** section, click the **+ Add** button, and enter\n `http://localhost:8080/auth/snapchat/callback`\n- Find the **Development Environment** section. Click the **Generate** button\n next to the _Confidential OAuth2 Client_ heading within it.\n- Copy and paste the generated _Private Key_ and _OAuth2 Client ID_ keys into\n `.env`\n- **Note:** _OAuth2 Client ID_ is **SNAPCHAT_ID**, _Private Key_ is\n **SNAPCHAT_SECRET** in `.env`\n- To prepare the app for submission, fill out the rest of the required fields:\n _Category_, _Description_, _Privacy Policy Url_, and _App Icon_\n\n**Note:** For production use, don't forget to:\n\n- generate a _Confidential OAuth2 Client_ in the **Production Environment**\n and use the production _Private Key_ and _OAuth2 Client ID_\n- add the production URL to **Redirect URLs** section, e.g.\n `http://my-awesome-app.herokuapp.com/auth/snapchat/callback`\n- submit the app for review and wait for approval\n\n\n\n
\n\n- Visit Facebook\n Developers\n- Click **My Apps**, then select \\*_Add a New App_ from the dropdown menu\n- Enter a new name for your app\n- Click on the **Create App ID** button\n- Find the Facebook Login Product and click on **Facebook Login**\n- Instead of going through their Quickstart, click on **Settings** for your\n app in the top left corner\n- Copy and paste _App ID_ and _App Secret_ keys into `.env`\n- **Note:** _App ID_ is **FACEBOOK_ID**, _App Secret_ is **FACEBOOK_SECRET**\n in `.env`\n- Enter `localhost` under _App Domains_\n- Choose a **Category** that best describes your app\n- Click on **+ Add Platform** and select **Website**\n- Enter `http://localhost:8080` under _Site URL_\n- Click on the _Settings_ tab in the left nav under Facebook Login\n- Enter `http://localhost:8080/auth/facebook/callback` under Valid OAuth\n redirect URIs\n\n**Note:** After a successful sign in with Facebook, a user will be redirected\nback to the home page with appended hash `#_=_` in the URL. It is _not_ a bug.\nSee this\n[Stack Overflow](https://stackoverflow.com/questions/7131909/facebook-callback-appends-to-return-url)\ndiscussion for ways to handle it.\n\n\n\n
\n\n- Go to Account\n Settings\n- Select **Developer settings** from the sidebar\n- Then click on **OAuth Apps** and then on **Register new application**\n- Enter _Application Name_ and _Homepage URL_\n- For _Authorization Callback URL_: http://localhost:8080/auth/github/callback\n- Click **Register application**\n- Now copy and paste _Client ID_ and _Client Secret_ keys into `.env` file\n\n\n\n
\n\n- Sign in at\n https://apps.twitter.com\n- Click **Create a new application**\n- Enter your application name, website and description\n- For **Callback URL**: http://127.0.0.1:8080/auth/twitter/callback\n- Go to **Settings** tab\n- Under _Application Type_ select **Read and Write** access\n- Check the box **Allow this application to be used to Sign in with Twitter**\n- Click **Update this Twitter's applications settings**\n- Copy and paste _Consumer Key_ and _Consumer Secret_ keys into `.env` file\n\n\n\n
\n\n- Sign in at\n LinkedIn Developer\n Network\n- From the account name dropdown menu select **API Keys**\n- _It may ask you to sign in once again_\n- Click **+ Add New Application** button\n- Fill out all the _required_ fields\n- **OAuth 2.0 Redirect URLs**: http://localhost:8080/auth/linkedin/callback\n- **JavaScript API Domains**: http://localhost:8080\n- For **Default Application Permissions** make sure at least the following is\n checked:\n- `r_basicprofile`\n- Finish by clicking **Add Application** button\n- Copy and paste _API Key_ and _Secret Key_ keys into `.env` file\n- _API Key_ is your **clientID**\n- _Secret Key_ is your **clientSecret**\n\n\n\n
\n\n- Sign up or log into your\n dashboard\n- Click on your profile and click on Account Settings\n- Then click on **API Keys**\n- Copy the **Secret Key**. and add this into `.env` file\n\n\n\n
\n\n- Visit PayPal\n Developer\n- Log in to your PayPal account\n- Click **Applications > Create App** in the navigation bar\n- Enter _Application Name_, then click **Create app**\n- Copy and paste _Client ID_ and _Secret_ keys into `.env` file\n- _App ID_ is **client_id**, _App Secret_ is **client_secret**\n- Change **host** to api.paypal.com if you want to test against production and\n use the live credentials\n\n\n\n
\n\n- Go to Foursquare\n for Developers\n- Click on **My Apps** in the top menu\n- Click the **Create A New App** button\n- Enter _App Name_, _Welcome page url_,\n- For **Redirect URI**: http://localhost:8080/auth/foursquare/callback\n- Click **Save Changes**\n- Copy and paste _Client ID_ and _Client Secret_ keys into `.env` file\n\n\n\n
\n\n- Go to\n http://www.tumblr.com/oauth/apps\n- Once signed in, click **+Register application**\n- Fill in all the details\n- For **Default Callback URL**: `http://localhost:8080/auth/tumblr/callback`\n- Click **✔Register**\n- Copy and paste _OAuth consumer key_ and _OAuth consumer secret_ keys into\n `.env` file\n\n\n\n
\n\n- Go to\n http://steamcommunity.com/dev/apikey\n- Sign in with your existing Steam account\n- Enter your _Domain Name_, then and click **Register**\n- Copy and paste _Key_ into `.env` file\n\n\n
\n\n- Visit the\n Twitch\n developer dashboard\n- If prompted, authorize the dashboard to access your twitch account\n- In the Console, click on Register Your Application\n- Enter the name of your application\n- Use OAuth Redirect URLs enter `http://localhost:8080/auth/twitch/callback`\n- Set Category to Website Integration and press the Create button\n- After the applicaiton has been created, click on the Manage button\n- Copy and paste _Client ID_ into `.env`\n- If there is no Client Secret displayed, click on New Secret button and then\n copy and paste the _Client secret_ into `.env`\n\n\n\n
\n\n- Go to\n https://sendgrid.com/user/signup\n- Sign up and **confirm** your account via the _activation email_\n- Then enter your SendGrid _Username_ and _Password_ into `.env` file\n\n\n\n
\n\n- Go to\n http://www.mailgun.com\n- Sign up and add your _Domain Name_\n- From the domain overview, copy and paste the default SMTP _Login_ and\n _Password_ into `.env` file\n\n\n\n
\n\n- Go to\n https://developer.here.com\n- Sign up and create a Freemium project\n- Create JAVASCRIPT/REST credentials. Copy and paste the APP_ID and APP into\n `.env` file.\n- Note that these credentials are available on the client side, and you need\n to create a domain whitelist for your app credentials when you are publicly\n launching the app.\n\n\n\n
\n\n- Go to\n https://www.twilio.com/try-twilio\n- Sign up for an account.\n- Once logged into the dashboard, expand the link 'show api credentials'\n- Copy your Account Sid and Auth Token\n\n\n\n
\n\n- Go to\n https://developer.intuit.com/app/developer/qbo/docs/get-started\n- Use the Sign Up option in the upper right corner of the screen (nav bar) to\n get a free developer account and a sandbox company.\n- Create a new app by going to your Dashboard using the My Apps option in the\n top nav bar or by going to\n https://developer.intuit.com/app/developer/myapps\n- In your App, under Development, Keys & OAuth (right nav), find the Client ID\n and Client Secret for your `.env` file\n\n## Project Structure\n\n| Name | Description |\n| ---------------------------------- | ------------------------------------------------------------ |\n| **config**/passport.js | Passport Local and OAuth strategies, plus login middleware. |\n| **controllers**/api.js | Controller for /api route and all api examples. |\n| **controllers**/contact.js | Controller for contact form. |\n| **controllers**/home.js | Controller for home page (index). |\n| **controllers**/user.js | Controller for user account management. |\n| **models**/User.js | Mongoose schema and model for User. |\n| **public**/ | Static assets (fonts, css, js, img). |\n| **public**/**js**/application.js | Specify client-side JavaScript dependencies. |\n| **public**/**js**/main.js | Place your client-side JavaScript here. |\n| **public**/**css**/main.scss | Main stylesheet for your app. |\n| **public/css/themes**/default.scss | Some Bootstrap overrides to make it look prettier. |\n| **views/account**/ | Templates for _login, password reset, signup, profile_. |\n| **views/api**/ | Templates for API Examples. |\n| **views/partials**/flash.pug | Error, info and success flash notifications. |\n| **views/partials**/header.pug | Navbar partial template. |\n| **views/partials**/footer.pug | Footer partial template. |\n| **views**/layout.pug | Base template. |\n| **views**/home.pug | Home page template. |\n| .dockerignore | Folder and files ignored by docker usage. |\n| .env.example | Your API keys, tokens, passwords and database URI. |\n| .eslintrc | Rules for eslint linter. |\n| .gitignore | Folder and files ignored by git. |\n| .travis.yml | Configuration files for continuous integration. |\n| app.js | The main application file. |\n| docker-compose.yml | Docker compose configuration file. |\n| Dockerfile | Docker configuration file. |\n| package.json | NPM dependencies. |\n| package-lock.json | Contains exact versions of NPM dependencies in package.json. |\n\n**Note:** There is no preference how you name or structure your views. You could\nplace all your templates in a top-level `views` directory without having a\nnested folder structure, if that makes things easier for you. Just don't forget\nto update `extends ../layout` and corresponding `res.render()` paths in\ncontrollers.\n\n## List of Packages\n\n| Package | Description |\n| --------------------------- | ----------------------------------------------------------------------- |\n| @octokit/rest | GitHub API library. |\n| bcrypt | Library for hashing and salting user passwords. |\n| body-parser | Node.js body parsing middleware. |\n| chai | BDD/TDD assertion library. |\n| chalk | Terminal string styling done right. |\n| cheerio | Scrape web pages using jQuery-style syntax. |\n| compression | Node.js compression middleware. |\n| connect-mongo | MongoDB session store for Express. |\n| dotenv | Loads environment variables from .env file. |\n| errorhandler | Development-only error handler middleware. |\n| eslint | Linter JavaScript. |\n| eslint-config-airbnb-base | Configuration eslint by airbnb. |\n| eslint-plugin-chai-friendly | Makes eslint friendly towards Chai.js 'expect' and 'should' statements. |\n| eslint-plugin-import | ESLint plugin with rules that help validate proper imports. |\n| express | Node.js web framework. |\n| express-flash | Provides flash messages for Express. |\n| express-session | Simple session middleware for Express. |\n| express-status-monitor | Reports real-time server metrics for Express. |\n| instagram-node | Instagram API library. |\n| lastfm | Last.fm API library. |\n| lob | Lob API library. |\n| lodash | A utility library for working with arrays, numbers, objects, strings. |\n| lusca | CSRF middleware. |\n| mailchecker | Verifies that an email address is valid and not a disposable address. |\n| mocha | Test framework. |\n| moment | Parse, validate, compute dates and times. |\n| mongoose | MongoDB ODM. |\n| morgan | HTTP request logger middleware for node.js. |\n| multer | Node.js middleware for handling `multipart/form-data`. |\n| node-foursquare | Foursquare API library. |\n| node-sass | Node.js bindings to libsass. |\n| node-sass-middleware | Sass middleware compiler. |\n| nyc | Coverage test. |\n| nodemailer | Node.js library for sending emails. |\n| node-quickbooks | Quickbooks API library. |\n| passport | Simple and elegant authentication library for node.js. |\n| passport-facebook | Sign-in with Facebook plugin. |\n| passport-github | Sign-in with GitHub plugin. |\n| passport-google-oauth | Sign-in with Google plugin. |\n| passport-instagram | Sign-in with Instagram plugin. |\n| passport-linkedin-oauth2 | Sign-in with LinkedIn plugin. |\n| passport-local | Sign-in with Username and Password plugin. |\n| passport-openid | Sign-in with OpenId plugin. |\n| passport-oauth | Allows you to set up your own OAuth 1.0a and OAuth 2.0 strategies. |\n| passport-oauth2-refresh | A library to refresh OAuth 2.0 access tokens using refresh tokens. |\n| passport-snapchat | Sign-in with Snapchat plugin. |\n| passport-twitter | Sign-in with Twitter plugin. |\n| passport-twitch-new | Sign-in with Twitch plugin. |\n| paypal-rest-sdk | PayPal APIs library. |\n| pug | Template engine for Express. |\n| sinon | Test spies, stubs and mocks for JavaScript. |\n| stripe | Offical Stripe API library. |\n| supertest | HTTP assertion library. |\n| tumblr.js | Tumblr API library. |\n| twilio | Twilio API library. |\n| twitter-lite | Twitter API library. |\n| validator | A library of string validators and sanitizers. |\n\n## Useful Tools and Resources\n\n- [JavaScripting](http://www.javascripting.com/) - The Database of JavaScript\n Libraries\n- [JS Recipes](http://sahatyalkabov.com/jsrecipes/) - JavaScript tutorials for\n backend and frontend development.\n- [HTML to Pug converter](https://html-to-pug.com/) - HTML to PUG is a free\n online converter helping you to convert HTML files to pug syntax in\n real-time.\n- [JavascriptOO](http://www.javascriptoo.com/) - A directory of JavaScript\n libraries with examples, CDN links, statistics, and videos.\n- [Favicon Generator](http://realfavicongenerator.net/) - Generate favicons\n for PC, Android, iOS, Windows 8.\n\n## Recommended Design Resources\n\n- [Code Guide](http://codeguide.co/) - Standards for developing flexible,\n durable, and sustainable HTML and CSS.\n- [Bootsnipp](http://bootsnipp.com/) - Code snippets for Bootstrap.\n- [Bootstrap Zero](https://www.bootstrapzero.com) - Free Bootstrap templates\n themes.\n- [Google Bootstrap](http://todc.github.io/todc-bootstrap/) - Google-styled\n theme for Bootstrap.\n- [Font Awesome Icons](http://fortawesome.github.io/Font-Awesome/icons/) -\n It's already part of the Hackathon Starter, so use this page as a reference.\n- [Colors](http://clrs.cc) - A nicer color palette for the web.\n- [Creative Button Styles](http://tympanus.net/Development/CreativeButtons/) -\n awesome button styles.\n- [Creative Link Effects](http://tympanus.net/Development/CreativeLinkEffects/) -\n Beautiful link effects in CSS.\n- [Medium Scroll Effect](http://codepen.io/andreasstorm/pen/pyjEh) - Fade\n in/out header background image as you scroll.\n- [GeoPattern](https://github.com/btmills/geopattern) - SVG background pattern\n generator.\n- [Trianglify](https://github.com/qrohlf/trianglify) - SVG low-poly background\n pattern generator.\n\n## Recommended Node.js Libraries\n\n- [Nodemon](https://github.com/remy/nodemon) - Automatically restart Node.js\n server on code changes.\n- [geoip-lite](https://github.com/bluesmoon/node-geoip) - Geolocation\n coordinates from IP address.\n- [Filesize.js](http://filesizejs.com/) - Pretty file sizes, e.g.\n `filesize(265318); // \"265.32 kB\"`.\n- [Numeral.js](http://numeraljs.com) - Library for formatting and manipulating\n numbers.\n- [Node Inspector](https://github.com/node-inspector/node-inspector) - Node.js\n debugger based on Chrome Developer Tools.\n- [node-taglib](https://github.com/nikhilm/node-taglib) - Library for reading\n the meta-data of several popular audio formats.\n- [sharp](https://github.com/lovell/sharp) - Node.js module for resizing JPEG,\n PNG, WebP and TIFF images.\n\n## Recommended Client-side Libraries\n\n- [Framework7](http://www.idangero.us/framework7/) - Full Featured HTML\n Framework For Building iOS7 Apps.\n- [InstantClick](http://instantclick.io) - Makes your pages load instantly by\n pre-loading them on mouse hover.\n- [NProgress.js](https://github.com/rstacruz/nprogress) - Slim progress bars\n like on YouTube and Medium.\n- [Hover](https://github.com/IanLunn/Hover) - Awesome CSS3 animations on mouse\n hover.\n- [Magnific Popup](http://dimsemenov.com/plugins/magnific-popup/) - Responsive\n jQuery Lightbox Plugin.\n- [jQuery Raty](http://wbotelhos.com/raty/) - Star Rating Plugin.\n- [Headroom.js](http://wicky.nillia.ms/headroom.js/) - Hide your header until\n you need it.\n- [X-editable](http://vitalets.github.io/x-editable/) - Edit form elements\n inline.\n- [Offline.js](http://github.hubspot.com/offline/docs/welcome/) - Detect when\n user's internet connection goes offline.\n- [Alertify.js](http://fabien-d.github.io/alertify.js/) - Sweet looking alerts\n and browser dialogs.\n- [selectize.js](http://selectize.github.io/selectize.js) - Styleable select\n elements and input tags.\n- [drop.js](http://github.hubspot.com/drop/docs/welcome/) - Powerful\n Javascript and CSS library for creating dropdowns and other floating\n displays.\n- [scrollReveal.js](https://github.com/jlmakes/scrollReveal.js) - Declarative\n on-scroll reveal animations.\n\n## Pro Tips\n\n- Use [async.parallel()](https://github.com/caolan/async#parallel) when you\n need to run multiple asynchronous tasks, and then render a page, but only\n when all tasks are completed. For example, you might want to scrape three\n different websites for some data and render the results in a template after\n all three websites have been scraped.\n- Need to find a specific object inside an Array? Use\n [\\_.find](http://lodash.com/docs#find) function from Lodash. For example,\n this is how you would retrieve a Twitter token from database:\n `var token = _.find(req.user.tokens, { kind: 'twitter' });`, where 1st\n parameter is an array, and a 2nd parameter is an object to search for.\n\n## FAQ\n\n### Why do I get `403 Error: Forbidden` when submitting a form?\n\nYou need to add the following hidden input element to your form. This has been\nadded in the\n[pull request #40](https://github.com/sahat/hackathon-starter/pull/40) as part\nof the CSRF protection.\n\n```\ninput(type='hidden', name='_csrf', value=_csrf)\n```\n\n**Note:** It is now possible to whitelist certain URLs. In other words you can\nspecify a list of routes that should bypass CSRF verification check.\n\n**Note 2:** To whitelist dynamic URLs use regular expression tests inside the\nCSRF middleware to see if `req.originalUrl` matches your desired pattern.\n\n### I am getting MongoDB Connection Error, how do I fix it?\n\nThat's a custom error message defined in `app.js` to indicate that there was a\nproblem connecting to MongoDB:\n\n```js\nmongoose.connection.on(\"error\", (err) => {\n console.error(err);\n console.log(\n \"%s MongoDB connection error. Please make sure MongoDB is running.\",\n chalk.red(\"✗\")\n );\n process.exit();\n});\n```\n\nYou need to have a MongoDB server running before launching `app.js`. You can\ndownload MongoDB [here](https://www.mongodb.com/download-center/community), or\ninstall it via a package manager.\n\nWindows users, read\n[Install MongoDB on Windows](https://docs.mongodb.org/manual/tutorial/install-mongodb-on-windows/).\n\n**Tip:** If you are always connected to the internet, you could just use\n[MongoDB Atlas](https://www.mongodb.com/cloud/atlas) or\n[Compose](https://www.compose.io/) instead of downloading and installing MongoDB\nlocally. You will only need to update database credentials in `.env` file.\n\n### I get an error when I deploy my app, why?\n\nChances are you haven't changed the _Database URI_ in `.env`. If `MONGODB` is\nset to `localhost`, it will only work on your machine as long as MongoDB is\nrunning. When you deploy to Heroku, OpenShift or some other provider, you will\nnot have MongoDB running on `localhost`. You need to create an account with\n[MongoDB Atlas](https://www.mongodb.com/cloud/atlas) or\n[Compose](https://www.compose.io/), then create a free tier database. See\n[Deployment](#deployment) for more information on how to setup an account and a\nnew database step-by-step with MongoDB Atlas.\n\n### Why Pug (Jade) instead of Handlebars?\n\nWhen I first started this project I didn't have any experience with Handlebars.\nSince then I have worked on Ember.js apps and got myself familiar with the\nHandlebars syntax. While it is true Handlebars is easier, because it looks like\ngood old HTML, I have no regrets picking Jade over Handlebars. First off, it's\nthe default template engine in Express, so someone who has built Express apps in\nthe past already knows it. Secondly, I find `extends` and `block` to be\nindispensable, which as far as I know, Handlebars does not have out of the box.\nAnd lastly, subjectively speaking, Jade looks much cleaner and shorter than\nHandlebars, or any non-HAML style for that matter.\n\n### Why do you have all routes defined in app.js?\n\nFor the sake of simplicity. While there might be a better approach, such as\npassing `app` context to each controller as outlined in this\n[blog](http://timstermatic.github.io/blog/2013/08/17/a-simple-mvc-framework-with-node-and-express/),\nI find such style to be confusing for beginners. It took me a long time to grasp\nthe concept of `exports` and `module.exports`, let alone having a global `app`\nreference in other files. That to me is backward thinking. The `app.js` is the\n\"heart of the app\", it should be the one referencing models, routes,\ncontrollers, etc. When working solo on small projects, I prefer to have\neverything inside `app.js` as is the case with\n[this](<(https://github.com/sahat/ember-sass-express-starter/blob/master/app.js)>)\nREST API server.\n\n### How do I switch SendGrid for another email delivery service, like Mailgun or SparkPost?\n\nInside the `nodemailer.createTransport` method arguments, change the service\nfrom `'Sendgrid'` to some other email service. Also, be sure to update both\nusername and password below that. See the\n[list of all supported services](https://github.com/nodemailer/nodemailer-wellknown#supported-services)\nby Nodemailer.\n\n## How It Works (mini guides)\n\nThis section is intended for giving you a detailed explanation of how a\nparticular functionality works. Maybe you are just curious about how it works,\nor perhaps you are lost and confused while reading the code, I hope it provides\nsome guidance to you.\n\n### Custom HTML and CSS Design 101\n\n[HTML5 UP](http://html5up.net/) has many beautiful templates that you can\ndownload for free.\n\nWhen you download the ZIP file, it will come with _index.html_, _images_, _css_\nand _js_ folders. So, how do you integrate it with Hackathon Starter? Hackathon\nStarter uses Bootstrap CSS framework, but these templates do not. Trying to use\nboth CSS files at the same time will likely result in undesired effects.\n\n**Note:** Using the custom templates approach, you should understand that you\ncannot reuse any of the views I have created: layout, home page, api browser,\nlogin, signup, account management, contact. Those views were built using\nBootstrap grid and styles. You will have to manually update the grid using a\ndifferent syntax provided in the template. **Having said that, you can mix and\nmatch if you want to do so: Use Bootstrap for main app interface, and a custom\ntemplate for a landing page.**\n\nLet's start from the beginning. For this example I will use\n[Escape Velocity](http://html5up.net/escape-velocity/) template:\n\n\n**Note:** For the sake of simplicity I will only consider `index.html`, and skip\n`left-sidebar.html`, `no-sidebar.html`, `right-sidebar.html`.\n\nMove all JavaScript files from `html5up-escape-velocity/js` to `public/js`. Then\nmove all CSS files from `html5up-escape-velocity/css` to `public/css`. And\nfinally, move all images from `html5up-escape-velocity/images` to\n`public/images`. You could move it to the existing **img** folder, but that\nwould require manually changing every `img` reference. Grab the contents of\n`index.html` and paste it into [HTML To Pug](https://html-to-pug.com/).\n\n**Note:** Do not forget to update all the CSS and JS paths accordingly.\n\nCreate a new file `escape-velocity.pug` and paste the Pug markup in `views`\nfolder. Whenever you see the code `res.render('account/login')` - that means it\nwill search for `views/account/login.pug` file.\n\nLet's see how it looks. Create a new controller **escapeVelocity** inside\n`controllers/home.js`:\n\n```js\nexports.escapeVelocity = (req, res) => {\n res.render(\"escape-velocity\", {\n title: \"Landing Page\",\n });\n};\n```\n\nAnd then create a route in `app.js`. I placed it right after the index\ncontroller:\n\n```js\napp.get(\"/escape-velocity\", homeController.escapeVelocity);\n```\n\nRestart the server (if you are not using **nodemon**); then you should see the\nnew template at\n[http://localhost:8080/escape-velocity](http://localhost:8080/escape-velocity).\n\nI will stop right here, but if you would like to use this template as more than\njust a single page, take a look at how these Pug templates work: `layout.pug` -\nbase template, `index.pug` - home page, `partials/header.pug` - Bootstrap\nnavbar, `partials/footer.pug` - sticky footer. You will have to manually break\nit apart into smaller pieces. Figure out which part of the template you want to\nkeep the same on all pages - that's your new `layout.pug`. Then, each page that\nchanges, be it `index.pug`, `about.pug`, `contact.pug` will be embedded in your\nnew `layout.pug` via `block content`. Use existing templates as a reference.\n\nThis is a rather lengthy process, and templates you get from elsewhere might\nhave yet another grid system. That's why I chose _Bootstrap_ for the Hackathon\nStarter. Many people are already familiar with _Bootstrap_, plus it's easy to\nget started with it if you have never used _Bootstrap_. You can also buy many\nbeautifully designed _Bootstrap_ themes at\n[Themeforest](http://themeforest.net/), and use them as a drop-in replacement\nfor Hackathon Starter. However, if you would like to go with a completely custom\nHTML/CSS design, this should help you to get started!\n\n\n\n### How do flash messages work in this project?\n\nFlash messages allow you to display a message at the end of the request and\naccess it on next request and only next request. For instance, on a failed login\nattempt, you would display an alert with some error message, but as soon as you\nrefresh that page or visit a different page and come back to the login page,\nthat error message will be gone. It is only displayed once. This project uses\n_express-flash_ module for flash messages. And that module is built on top of\n_connect-flash_, which is what I used in this project initially. With\n_express-flash_ you don't have to explicitly send a flash message to every view\ninside `res.render()`. All flash messages are available in your views via\n`messages` object by default, thanks to _express-flash_.\n\nFlash messages have a two-step process. You use\n`req.flash('errors', { msg: 'Error messages goes here' }` to create a flash\nmessage in your controllers, and then display them in your views:\n\n```pug\nif messages.errors\n .alert.alert-danger.fade.in\n for error in messages.errors\n div= error.msg\n```\n\nIn the first step, `'errors'` is the name of a flash message, which should match\nthe name of the property on `messages` object in your views. You place alert\nmessages inside `if message.errors` because you don't want to show them flash\nmessages are present. The reason why you pass an error like\n`{ msg: 'Error message goes here' }` instead of just a string -\n`'Error message goes here'`, is for the sake of consistency. To clarify that,\n_express-validator_ module which is used for validating and sanitizing user's\ninput, returns all errors as an array of objects, where each object has a `msg`\nproperty with a message why an error has occurred. Here is a more general\nexample of what express-validator returns when there are errors present:\n\n```js\n[\n { param: \"name\", msg: \"Name is required\", value: \"
\n\n### How do I create a new page?\n\nA more correct way to say this would be \"How do I create a new route?\" The main\nfile `app.js` contains all the routes. Each route has a callback function\nassociated with it. Sometimes you will see three or more arguments for a route.\nIn a case like that, the first argument is still a URL string, while middle\narguments are what's called middleware. Think of middleware as a door. If this\ndoor prevents you from continuing forward, you won't get to your callback\nfunction. One such example is a route that requires authentication.\n\n```js\napp.get(\"/account\", passportConfig.isAuthenticated, userController.getAccount);\n```\n\nIt always goes from left to right. A user visits `/account` page. Then\n`isAuthenticated` middleware checks if you are authenticated:\n\n```js\nexports.isAuthenticated = (req, res, next) => {\n if (req.isAuthenticated()) {\n return next();\n }\n res.redirect(\"/login\");\n};\n```\n\nIf you are authenticated, you let this visitor pass through your \"door\" by\ncalling `return next();`. It then proceeds to the next middleware until it\nreaches the last argument, which is a callback function that typically renders a\ntemplate on `GET` requests or redirects on `POST` requests. In this case, if you\nare authenticated, you will be redirected to the _Account Management_ page;\notherwise, you will be redirected to the _Login_ page.\n\n```js\nexports.getAccount = (req, res) => {\n res.render(\"account/profile\", {\n title: \"Account Management\",\n });\n};\n```\n\nExpress.js has `app.get`, `app.post`, `app.put`, `app.delete`, but for the most\npart, you will only use the first two HTTP verbs, unless you are building a\nRESTful API. If you just want to display a page, then use `GET`, if you are\nsubmitting a form, sending a file then use `POST`.\n\nHere is a typical workflow for adding new routes to your application. Let's say\nwe are building a page that lists all books from the database.\n\n**Step 1.** Start by defining a route.\n\n```js\napp.get(\"/books\", bookController.getBooks);\n```\n\n---\n\n**Note:** As of Express 4.x you can define your routes like so:\n\n```js\napp.route(\"/books\")\n .get(bookController.getBooks)\n .post(bookController.createBooks)\n .put(bookController.updateBooks)\n .delete(bookController.deleteBooks);\n```\n\nAnd here is how a route would look if it required an _authentication_ and an\n_authorization_ middleware:\n\n```js\napp.route(\"/api/twitter\")\n .all(passportConfig.isAuthenticated)\n .all(passportConfig.isAuthorized)\n .get(apiController.getTwitter)\n .post(apiController.postTwitter);\n```\n\nUse whichever style that makes sense to you. Either one is acceptable. I think\nthat chaining HTTP verbs on `app.route` is a very clean and elegant approach,\nbut on the other hand, I can no longer see all my routes at a glance when you\nhave one route per line.\n\n**Step 2.** Create a new schema and a model `Book.js` inside the _models_\ndirectory.\n\n```js\nconst mongoose = require(\"mongoose\");\n\nconst bookSchema = new mongoose.Schema({\n name: String,\n});\n\nconst Book = mongoose.model(\"Book\", bookSchema);\nmodule.exports = Book;\n```\n\n**Step 3.** Create a new controller file called `book.js` inside the\n_controllers_ directory.\n\n```js\n/**\n * GET /books\n * List all books.\n */\nconst Book = require(\"../models/Book.js\");\n\nexports.getBooks = (req, res) => {\n Book.find((err, docs) => {\n res.render(\"books\", { books: docs });\n });\n};\n```\n\n**Step 4.** Import that controller in `app.js`.\n\n```js\nconst bookController = require(\"./controllers/book\");\n```\n\n**Step 5.** Create `books.pug` template.\n\n```pug\nextends layout\n\nblock content\n .page-header\n h3 All Books\n\n ul\n for book in books\n li= book.name\n```\n\nThat's it! I will say that you could have combined Step 1, 2, 3 as following:\n\n```js\napp.get(\"/books\", (req, res) => {\n Book.find((err, docs) => {\n res.render(\"books\", { books: docs });\n });\n});\n```\n\nSure, it's simpler, but as soon as you pass 1000 lines of code in `app.js` it\nbecomes a little challenging to navigate the file. I mean, the whole point of\nthis boilerplate project was to separate concerns, so you could work with your\nteammates without running into _MERGE CONFLICTS_. Imagine you have four\ndevelopers working on a single `app.js`, I promise you it won't be fun resolving\nmerge conflicts all the time. If you are the only developer, then it's okay. But\nas I said, once it gets up to a certain LoC size, it becomes difficult to\nmaintain everything in a single file.\n\nThat's all there is to it. Express.js is super simple to use. Most of the time\nyou will be dealing with other APIs to do the real work:\n[Mongoose](http://mongoosejs.com/docs/guide.html) for querying database,\nsocket.io for sending and receiving messages over websockets, sending emails via\n[Nodemailer](http://nodemailer.com/), form validation using\n[express-validator](https://github.com/ctavan/express-validator) library,\nparsing websites using [Cheerio](https://github.com/cheeriojs/cheerio), etc.\n\n
\n\n### How do I use Socket.io with Hackathon Starter?\n\n[Dan Stroot](https://github.com/dstroot) submitted an excellent\n[pull request](https://github.com/dstroot/hackathon-starter/commit/0a632def1ce8da446709d92812423d337c977d75)\nthat adds a real-time dashboard with socket.io. And as much as I'd like to add\nit to the project, I think it violates one of the main principles of the\nHackathon Starter:\n\n> When I started this project, my primary focus was on simplicity and ease of\n> use. I also tried to make it as generic and reusable as possible to cover most\n> use cases of hackathon web apps, **without being too specific**.\n\nWhen I need to use socket.io, I **really** need it, but most of the time - I\ndon't. But more importantly, websockets support is still experimental on most\nhosting providers. As of October 2013, Heroku supports websockets, but not until\nyou opt-in by running this command:\n\n```js\nheroku labs:enable websockets -a myapp\n```\n\nAnd what if you are deploying to OpenShift? They do support websockets, but it\nis currently in a preview state. So, for OpenShift you would need to change the\nsocket.io connect URI to the following:\n\n```js\nconst socket = io.connect(\"http://yoursite-namespace.rhcloud.com:8000\");\n```\n\nWait, why is it on port 8000? Who knows, and if I didn't run across this\n[blog post](http://velin-georgiev-blog.appspot.com/blog/set-up-nodejs-express-socketio-application-using-websockets-on-openshift-by-red-hat/)\nI wouldn't even know I had to use port 8000.\n\nI am really glad that Heroku and OpenShift at least have a websockets support,\nbecause many other PaaS providers still do not support it. Due to the\naforementioned issues with websockets, I cannot include socket.io as part of the\nHackathon Starter. _For now..._ If you need to use socket.io in your app, please\ncontinue reading.\n\nFirst, you need to install socket.io:\n\n```js\nnpm install socket.io\n```\n\nReplace `const app = express();` with the following code:\n\n```js\nconst app = express();\nconst server = require(\"http\").Server(app);\nconst io = require(\"socket.io\")(server);\n```\n\nI like to have the following code organization in `app.js` (from top to bottom):\nmodule dependencies, import controllers, import configs, connect to database,\nexpress configuration, routes, start the server, socket.io stuff. That way I\nalways know where to look for things.\n\nAdd the following code at the end of `app.js`:\n\n```js\nio.on(\"connection\", (socket) => {\n socket.emit(\"greet\", { hello: \"Hey there browser!\" });\n socket.on(\"respond\", (data) => {\n console.log(data);\n });\n socket.on(\"disconnect\", () => {\n console.log(\"Socket disconnected\");\n });\n});\n```\n\nOne last thing left to change:\n\n```js\napp.listen(app.get('port'), () => {\n```\n\nto\n\n```js\nserver.listen(app.get('port'), () => {\n```\n\nAt this point, we are done with the back-end.\n\nYou now have a choice - to include your JavaScript code in Pug templates or have\nall your client-side JavaScript in a separate file - in `main.js`. I admit, when\nI first started with Node.js and JavaScript in general, I placed all JavaScript\ncode inside templates because I have access to template variables passed in from\nExpress right then and there. It's the easiest thing you can do, but also the\nleast efficient and harder to maintain. Since then I almost never include inline\nJavaScript inside templates anymore.\n\nBut it's also understandable if you want to take the easier road. Most of the\ntime you don't even care about performance during hackathons, you just want to\n[_\"get shit done\"_](https://www.startupvitamins.com/media/products/13/aaron_levie_poster_black.jpg)\nbefore the time runs out. Well, either way, use whichever approach makes more\nsense to you. At the end of the day, it's **what** you build that matters, not\n**how** you build it.\n\nIf you want to stick all your JavaScript inside templates, then in\n`layout.pug` - your main template file, add this to `head` block.\n\n```pug\nscript(src='/socket.io/socket.io.js')\nscript.\n let socket = io.connect(window.location.href);\n socket.on('greet', function (data) {\n console.log(data);\n socket.emit('respond', { message: 'Hey there, server!' });\n });\n```\n\n**Note:** Notice the path of the `socket.io.js`, you don't actually have to have\n`socket.io.js` file anywhere in your project; it will be generated automatically\nat runtime.\n\nIf you want to have JavaScript code separate from templates, move that inline\nscript code into `main.js`, inside the `$(document).ready()` function:\n\n```js\n$(document).ready(function () {\n // Place JavaScript code here...\n let socket = io.connect(window.location.href);\n socket.on(\"greet\", function (data) {\n console.log(data);\n socket.emit(\"respond\", { message: \"Hey there, server!\" });\n });\n});\n```\n\nAnd we are done!\n\n## Cheatsheets\n\n###
ES6 Cheatsheet\n\n#### Declarations\n\nDeclares a read-only named constant.\n\n```js\nconst name = \"yourName\";\n```\n\nDeclares a block scope local variable.\n\n```js\nlet index = 0;\n```\n\n#### Template Strings\n\nUsing the **\\`${}\\`** syntax, strings can embed expressions.\n\n```js\nconst name = \"Oggy\";\nconst age = 3;\n\nconsole.log(`My cat is named ${name} and is ${age} years old.`);\n```\n\n#### Modules\n\nTo import functions, objects or primitives exported from an external module.\nThese are the most common types of importing.\n\n```js\nconst name = require(\"module-name\");\n```\n\n```js\nconst { foo, bar } = require(\"module-name\");\n```\n\nTo export functions, objects or primitives from a given file or module.\n\n```js\nmodule.exports = { myFunction };\n```\n\n```js\nmodule.exports.name = \"yourName\";\n```\n\n```js\nmodule.exports = myFunctionOrClass;\n```\n\n#### Spread Operator\n\nThe spread operator allows an expression to be expanded in places where multiple\narguments (for function calls) or multiple elements (for array literals) are\nexpected.\n\n```js\nmyFunction(...iterableObject);\n```\n\n```jsx\n JavaScript Date Cheatsheet\n\n#### Unix Timestamp (seconds)\n\n```js\nMath.floor(Date.now() / 1000);\n```\n\n```MomentJS\nmoment().unix();\n```\n\n#### Add 30 minutes to a Date object\n\n```js\nvar now = new Date();\nnow.setMinutes(now.getMinutes() + 30);\n```\n\n```MomentJS\nmoment().add(30, 'minutes');\n```\n\n#### Date Formatting\n\n```js\n// DD-MM-YYYY\nvar now = new Date();\n\nvar DD = now.getDate();\nvar MM = now.getMonth() + 1;\nvar YYYY = now.getFullYear();\n\nif (DD < 10) {\n DD = \"0\" + DD;\n}\n\nif (MM < 10) {\n MM = \"0\" + MM;\n}\n\nconsole.log(MM + \"-\" + DD + \"-\" + YYYY); // 03-30-2016\n```\n\n```MomentJS\nconsole.log(moment(new Date(), 'MM-DD-YYYY'));\n```\n\n```js\n// hh:mm (12 hour time with am/pm)\nvar now = new Date();\nvar hours = now.getHours();\nvar minutes = now.getMinutes();\nvar amPm = hours >= 12 ? \"pm\" : \"am\";\n\nhours = hours % 12;\nhours = hours ? hours : 12;\nminutes = minutes < 10 ? \"0\" + minutes : minutes;\n\nconsole.log(hours + \":\" + minutes + \" \" + amPm); // 1:43 am\n```\n\n```MomentJS\nconsole.log(moment(new Date(), 'hh:mm A'));\n```\n\n#### Next week Date object\n\n```js\nvar today = new Date();\nvar nextWeek = new Date(today.getTime() + 7 * 24 * 60 * 60 * 1000);\n```\n\n```MomentJS\nmoment().add(7, 'days');\n```\n\n#### Yesterday Date object\n\n```js\nvar today = new Date();\nvar yesterday = date.setDate(date.getDate() - 1);\n```\n\n```MomentJS\nmoment().add(-1, 'days');\n```\n\n:top: [**back to top**](#table-of-contents)\n\n### Mongoose Cheatsheet\n\n#### Find all users:\n\n```js\nUser.find((err, users) => {\n console.log(users);\n});\n```\n\n#### Find a user by email:\n\n```js\nlet userEmail = \"example@gmail.com\";\nUser.findOne({ email: userEmail }, (err, user) => {\n console.log(user);\n});\n```\n\n#### Find 5 most recent user accounts:\n\n```js\nUser.find()\n .sort({ _id: -1 })\n .limit(5)\n .exec((err, users) => {\n console.log(users);\n });\n```\n\n#### Get the total count of a field from all documents:\n\nLet's suppose that each user has a `votes` field and you would like to count the\ntotal number of votes in your database across all users. One very inefficient\nway would be to loop through each document and manually accumulate the count. Or\nyou could use\n[MongoDB Aggregation Framework](https://docs.mongodb.org/manual/core/aggregation-introduction/)\ninstead:\n\n```js\nUser.aggregate(\n { $group: { _id: null, total: { $sum: \"$votes\" } } },\n (err, votesCount) => {\n console.log(votesCount.total);\n }\n);\n```\n\n:top: [**back to top**](#table-of-contents)\n\n## Docker\n\nYou will need docker and docker-compose installed to build the application.\n\n- [Docker installation](https://docs.docker.com/engine/installation/)\n\n- [Common problems setting up docker](https://docs.docker.com/toolbox/faqs/troubleshoot/)\n\nAfter installing docker, start the application with the following commands :\n\n```\n# To build the project for the first time or when you add dependencies\ndocker-compose build web\n\n# To start the application (or to restart after making changes to the source code)\ndocker-compose up web\n\n```\n\nTo view the app, find your docker IP address + port 8080 ( this will typically\nbe http://localhost:8080/ ). To use a port other than 8080, you would need to\nmodify the port in app.js, Dockerfile, and docker-compose.yml.\n\n## Deployment\n\nOnce you are ready to deploy your app, you will need to create an account with a\ncloud platform to host it. These are not the only choices, but they are my top\npicks. From my experience, the easiest way to get started is with **Heroku**. It\nwill automatically restart your Node.js process when it crashes, has\nzero-downtime deployments and supports custom domains on free accounts.\nAdditionally, you can create an account with **MongoDB Atlas** and then pick one\nof the _4_ providers below. Again, there are plenty of other choices, and you\nare not limited to just the ones listed below.\n\n### Deployment to Heroku\n\n\n\n- Download and install [Heroku Toolbelt](https://toolbelt.heroku.com/)\n- In a terminal, run `heroku login` and enter your Heroku credentials\n- From _your app_ directory run `heroku create`\n- Use the command `heroku config:set KEY=val` to set the different environment\n variables (KEY=val) for your application (i.e.\n `heroku config:set BASE_URL=[heroku App Name].herokuapp.com` or\n `heroku config:set MONGODB_URI=mongodb://dbuser:\n\n- Go to\n [https://www.mongodb.com/cloud/atlas](https://www.mongodb.com/cloud/atlas)\n- Click the green **Get started free** button\n- Fill in your information then hit **Get started free**\n- You will be redirected to Create New Cluster page.\n- Select a **Cloud Provider and Region** (such as AWS and a free tier region)\n- Select cluster Tier to **Free Shared Clusters**\n- Give Cluster a name (default: Cluster0)\n- Click on green **:zap:Create Cluster button**\n- Now, to access your database you need to create a DB user. To create a new\n MongoDB user, from the **Clusters view**, select the **Security tab**\n- Under the **MongoDB Users** tab, click on **+Add New User**\n- Fill in a username and password and give it either **Atlas Admin** User\n Privilege\n- Next, you will need to create an IP address whitelist and obtain the\n connection URI. In the Clusters view, under the cluster details (i.e.\n SANDBOX - Cluster0), click on the **CONNECT** button.\n- Under section **(1) Check the IP Whitelist**, click on **ALLOW ACCESS FROM\n ANYWHERE**. The form will add a field with `0.0.0.0/0`. Click **SAVE** to\n save the `0.0.0.0/0` whitelist.\n- Under section **(2) Choose a connection method**, click on **Connect Your\n Application**\n- In the new screen, select **Node.js** as Driver and version **2.2.12 or\n later**. _*WARNING*_: Do not pick 3.0 or later since connect-mongo can't\n handle mongodb+srv:// connection strings.\n- Finally, copy the URI connection string and replace the URI in MONGODB_URI\n of `.env.example` with this URI string. Make sure to replace the \n**NOTE** *These instructions might be out of date due to changes in OpenShift. Heroku is currently a good free alternative. If you the new process, please feel free to help us update this page*\n\n- First, install this Ruby gem: `sudo gem install rhc` :gem:\n- Run `rhc login` and enter your OpenShift credentials\n- From your app directory run `rhc app create MyApp nodejs-0.10`\n- **Note:** _MyApp_ is the name of your app (no spaces)\n- Once that is done, you will be provided with **URL**, **SSH** and **Git\n Remote** links\n- Visit provided **URL**, and you should see the _Welcome to your Node.js\n application on OpenShift_ page\n- Copy and paste **Git Remote** into\n `git remote add openshift YOUR_GIT_REMOTE`\n- Before you push your app, you need to do a few modifications to your code\n\nAdd these two lines to `app.js`, just place them anywhere before `app.listen()`:\n\n```js\nvar IP_ADDRESS = process.env.OPENSHIFT_NODEJS_IP || \"127.0.0.1\";\nvar PORT = process.env.OPENSHIFT_NODEJS_PORT || 8080;\n```\n\nThen change `app.listen()` to:\n\n```js\napp.listen(PORT, IP_ADDRESS, () => {\n console.log(\n `Express server listening on port ${PORT} in ${app.settings.env} mode`\n );\n});\n```\n\nAdd this to `package.json`, after _name_ and _version_. This is necessary\nbecause, by default, OpenShift looks for `server.js` file. And by specifying\n`supervisor app.js` it will automatically restart the server when node.js\nprocess crashes.\n\n```js\n\"main\": \"app.js\",\n\"scripts\": {\n \"start\": \"supervisor app.js\"\n},\n```\n\n- Finally, you can now push your code to OpenShift by running\n `git push -f openshift master`\n- **Note:** The first time you run this command, you have to pass `-f` (force)\n flag because OpenShift creates a dummy server with the welcome page when you\n create a new Node.js app. Passing `-f` flag will override everything with\n your _Hackathon Starter_ project repository. **Do not** run `git pull` as it\n will create unnecessary merge conflicts.\n- And you are done!\n\n---\n\n### Azure\n\n\n**NOTE** *Beyond the initial 12 month trial of Azure, the platform does not seem to offer a free tier for hosting NodeJS apps. If you are looking for a free tier service to host your app, Heroku might be a better choice at this point*\n\n- Login to [Windows Azure Management Portal](https://manage.windowsazure.com/)\n- Click the **+ NEW** button on the bottom left of the portal\n- Click **COMPUTE**, then **WEB APP**, then **QUICK CREATE**\n- Enter a name for **URL** and select the datacenter **REGION** for your web\n site\n- Click on **CREATE WEB APP** button\n- Once the web site status changes to _Running_, click on the name of the web\n site to access the Dashboard\n- At the bottom right of the Quickstart page, select **Set up a deployment\n from source control**\n- Select **Local Git repository** from the list, and then click the arrow\n- To enable Git publishing, Azure will ask you to create a user name and\n password\n- Once the Git repository is ready, you will be presented with a **GIT URL**\n- Inside your _Hackathon Starter_ directory, run\n `git remote add azure [Azure Git URL]`\n- To push your changes run `git push azure master`\n- **Note:** _You will be prompted for the password you created earlier_\n- On **Deployments** tab of your Windows Azure Web App, you will see the\n deployment history\n\n---\n\n## IBM Bluemix Cloud Platform\n\n**NOTE** _At this point it appears that Bluemix's free tier to host NodeJS apps\nis limited to 30 days. If you are looking for a free tier service to host your\napp, Heroku might be a better choice at this point_\n\n1. Create a Bluemix Account\n\n [Sign up](https://console.ng.bluemix.net/registration/?target=%2Fdashboard%2Fapps)\n for Bluemix, or use an existing account.\n\n1. Download and install the\n [Cloud Foundry CLI](https://github.com/cloudfoundry/cli) to push your\n applications to Bluemix.\n\n1. Create a `manifest.yml` file in the root of your application.\n\n```\napplications:\n- name: \n[Conversation](https://www.ibm.com/watson/services/conversation/)** - Quickly\nbuild and deploy chatbots and virtual agents across a variety of channels,\nincluding mobile devices, messaging platforms, and even robots.\n\n**\n[Discovery](https://www.ibm.com/watson/services/discovery/)** - Unlock hidden\nvalue in data to find answers, monitor trends and surface patterns with the\nworld’s most advanced cloud-native insight engine.\n\n**\n[Language Translator](https://www.ibm.com/watson/services/language-translator/)** -\nTranslate text from one language to another.\n\n**\n[Natural Language Classifier](https://www.ibm.com/watson/services/natural-language-classifier/)** -\nInterpret and classify natural language with confidence.\n\n**\n[Natural Language Understanding](https://www.ibm.com/watson/services/natural-language-understanding/)** -\nAnalyze text to extract meta-data from content such as concepts, entities,\nkeywords and more.\n\n**\n[Personality Insights](https://www.ibm.com/watson/services/personality-insights/)** -\nPredict personality characteristics, needs and values through written text.\n\n**\n[Speech to Text](https://www.ibm.com/watson/services/speech-to-text/)** -\nConvert audio and voice into written text for quick understanding of content.\n\n**\n[Text to Speech](https://www.ibm.com/watson/services/text-to-speech/)** -\nConvert written text into natural sounding audio in a variety of languages and\nvoices.\n\n**\n[Tone Analyzer](https://www.ibm.com/watson/services/tone-analyzer/)** -\nUnderstand emotions, social tendencies and perceived writing style.\n\n**\n[Visual Recognition](https://www.ibm.com/watson/services/visual-recognition/)** -\nTag, classify and search visual content using machine learning.\n\n[Click here](https://www.ibm.com/watson/developercloud/services-catalog.html)\nfor live demos of each Watson service.\n\n---\n\n### Google Cloud Platform\n\n\n\n- [Download and install Node.js](https://nodejs.org/)\n- [Select or create](https://console.cloud.google.com/project) a Google Cloud\n Platform Console project\n- [Enable billing](https://support.google.com/cloud/answer/6293499#enable-billing)\n for your project (there's a $300 free trial)\n- Install and initialize the\n [Google Cloud SDK](https://cloud.google.com/sdk/docs/quickstarts)\n- Create an `app.yaml` file at the root of your `hackathon-starter` folder\n with the following contents:\n\n ```yaml\n runtime: nodejs\n env: flex\n manual_scaling:\n instances: 1\n ```\n\n- Make sure you've set `MONGODB_URI` in `.env.example`\n- Run the following command to deploy the `hackathon-starter` app:\n\n ```bash\n gcloud app deploy\n ```\n\n- [Monitor your deployed app](https://console.cloud.google.com/appengine) in\n the Cloud Console\n- [View the logs](https://console.cloud.google.com/logs/viewer) for your app\n in the Cloud Console\n\n## Production\n\nIf you are starting with this boilerplate to build an application for prod\ndeployment, or if after your hackathon you would like to get your project\nhardened for production use, see\n[prod-checklist.md](https://github.com/sahat/hackathon-starter/blob/master/prod-checklist.md).\n\n## Changelog\n\nYou can find the changelog for the project in:\n[CHANGELOG.md](https://github.com/sahat/hackathon-starter/blob/master/CHANGELOG.md)\n\n## Contributing\n\nIf something is unclear, confusing, or needs to be refactored, please let me\nknow. Pull requests are always welcome, but due to the opinionated nature of\nthis project, I cannot accept every pull request. Please open an issue before\nsubmitting a pull request. This project uses\n[Airbnb JavaScript Style Guide](https://github.com/airbnb/javascript) with a few\nminor exceptions. If you are submitting a pull request that involves Pug\ntemplates, please make sure you are using _spaces_, not tabs.\n\n## License\n\nThe MIT License (MIT)\n\nCopyright (c) 2014-2020 Sahat Yalkabov\n\nPermission is hereby granted, free of charge, to any person obtaining a copy of\nthis software and associated documentation files (the \"Software\"), to deal in\nthe Software without restriction, including without limitation the rights to\nuse, copy, modify, merge, publish, distribute, sublicense, and/or sell copies of\nthe Software, and to permit persons to whom the Software is furnished to do so,\nsubject to the following conditions:\n\nThe above copyright notice and this permission notice shall be included in all\ncopies or substantial portions of the Software.\n\nTHE SOFTWARE IS PROVIDED \"AS IS\", WITHOUT WARRANTY OF ANY KIND, EXPRESS OR\nIMPLIED, INCLUDING BUT NOT LIMITED TO THE WARRANTIES OF MERCHANTABILITY, FITNESS\nFOR A PARTICULAR PURPOSE AND NONINFRINGEMENT. IN NO EVENT SHALL THE AUTHORS OR\nCOPYRIGHT HOLDERS BE LIABLE FOR ANY CLAIM, DAMAGES OR OTHER LIABILITY, WHETHER\nIN AN ACTION OF CONTRACT, TORT OR OTHERWISE, ARISING FROM, OUT OF OR IN\nCONNECTION WITH THE SOFTWARE OR THE USE OR OTHER DEALINGS IN THE SOFTWARE.\n","readmeFilename":"README.md","bugs":{"url":"https://github.com/sahat/hackathon-starter/issues"},"homepage":"https://github.com/sahat/hackathon-starter#readme","_id":"@atomist/hackathon-starter@6.0.1-master.10","_nodeVersion":"12.20.0","_npmVersion":"6.14.8","dist":{"integrity":"sha512-sQO1wBJd9sfGbJYDr7Ijfu3RJ2kwURxvyes5CifMD9465NAAAGgESc1t13J3h6WNxrlFDTrnsJAJJlR21eB9TQ==","shasum":"c0e8e8d65d7b9c65c2294dd2cdbf3ac545be2d3a","tarball":"https://registry.npmjs.org/@atomist/hackathon-starter/-/hackathon-starter-6.0.1-master.10.tgz","fileCount":72,"unpackedSize":664323,"npm-signature":"-----BEGIN PGP SIGNATURE-----\r\nVersion: OpenPGP.js v3.0.13\r\nComment: https://openpgpjs.org\r\n\r\nwsFcBAEBCAAQBQJf0IlqCRA9TVsSAnZWagAAZWwP/RBFKoS7pMTJ/SHvBBuh\nc4/Z2AV2kMwx2s7kvuYyrRUbhlA9S6y41dnE8ANt87+bzH5CRKD2w51KJ60R\n0GFEkK/8wRlPCHsMH3jyvGNZQoOYXercdqWEplvITRvDnoO4Pt3DljO1UdaY\nYjMs0blTP0ifrxKZi8uyjiUOs03ioNjSqNUjrCI44770sCTCPXlMpN81xg8g\nX7xOP6m3cD7I5vFKgnCvnNI74F0kRloIhcvMQZrQHggKLdJF/Zy7G/0LoITK\ntnMZNV2rfEJh342GMT5sjPIQCC2e0Dhs4GOTLrGptXLO76AWFg/pLvl90iqj\nKnKwjQhNo/a5PlClneez0T6lYA9EiyeDgpeyB2+/Gawi4NqIcXScATgAms35\nVjU0PMIbWkpJiaJZC2uerSjGF650Eic05Wq+nODIhQYPqUtkfdjAOht/rIDY\nOoQnvw0NeTnKTE6PIF4+P4FTiEvb7B3IDW3xikpkt4lb+lhaFflEtPNPfD8r\nyYehxq6ei/cKz1qcKqMmtY7+5QFmfaqZ6rl5UuKbxYEQNEL6GJqFc/4BNlR6\nmzI7tc9N4uTHvpBh0yz9tmtJqf9XBYwF68HZ7sAk0VlwNhWXTFFVbjrtJGQr\nLiM0Kzy5sQxXZ+0SGcDPZmMboqIsU5/GNArqpxuBFm6xjbVMHI+J5xp7zstA\na9MV\r\n=JaUJ\r\n-----END PGP SIGNATURE-----\r\n","signatures":[{"keyid":"SHA256:jl3bwswu80PjjokCgh0o2w5c2U4LhQAE57gj9cz1kzA","sig":"MEUCIQCY1Jwdn95GcfdIp5pt/W8wPltSHXzxgKDv1rP5ETTTzwIgHgdF1NtraTHAdcdnq9lc4XygeUrhONMUGbD/RGw1W/o="}]},"_npmUser":{"name":"atomist-bot","email":"npm@atomist.com"},"directories":{},"maintainers":[{"name":"slimslenderslacks","email":"slimslenderslacks@gmail.com"},{"name":"cdupuis","email":"cd@atomist.com"},{"name":"ddatomist","email":"david@atomist.com"},{"name":"atomist-bot","email":"npm@atomist.com"}],"_npmOperationalInternal":{"host":"s3://npm-registry-packages","tmp":"tmp/hackathon-starter_6.0.1-master.10_1607502186267_0.021821844021624903"},"_hasShrinkwrap":false},"6.0.1-master.11":{"name":"@atomist/hackathon-starter","version":"6.0.1-master.11","description":"A boilerplate for Node.js web applications","repository":{"type":"git","url":"git+https://github.com/sahat/hackathon-starter.git"},"license":"MIT","author":{"name":"Sahat Yalkabov"},"contributors":[{"name":"Yashar Fakhari","url":"https://github.com/YasharF"}],"scripts":{"postinstall":"npm rebuild node-sass","start":"node app.js","test":"nyc mocha --timeout=10000 --exit","lint":"eslint \"**/*.js\"","atm:lint:prettier":"prettier --write"},"dependencies":{"@fortawesome/fontawesome-free":"^5.15.1","@ladjs/bootstrap-social":"^7.0.2","@octokit/rest":"^18.0.12","axios":"^0.20.0","bcrypt":"^5.0.0","body-parser":"^1.19.0","bootstrap":"^4.5.3","chalk":"^4.1.0","chart.js":"^2.9.4","cheerio":"^1.0.0-rc.3","compression":"^1.7.4","connect-mongo":"^3.2.0","dotenv":"^8.2.0","errorhandler":"^1.5.1","express":"^4.17.1","express-flash":"^0.0.2","express-handlebars":"^5.2.0","express-session":"^1.17.1","express-status-monitor":"^1.3.3","googleapis":"^61.0.0","instagram-node":"^0.5.8","jquery":"^3.5.1","lastfm":"^0.9.3","lob":"^6.1.1","lodash":"^4.17.20","lusca":"^1.6.1","mailchecker":"^3.3.17","moment":"^2.29.1","mongoose":"^5.11.5","morgan":"^1.10.0","multer":"^1.4.2","node-quickbooks":"^2.0.37","node-sass":"^4.14.1","node-sass-middleware":"^0.11.0","nodemailer":"^6.4.16","passport":"^0.4.1","passport-facebook":"^3.0.0","passport-github2":"^0.1.12","passport-google-oauth":"^2.0.0","passport-instagram":"^1.0.0","passport-linkedin-oauth2":"^2.0.0","passport-local":"^1.0.0","passport-oauth":"^1.0.0","passport-oauth2-refresh":"^2.0.1","passport-openid":"^0.4.0","passport-snapchat":"^1.0.0","passport-twitch-new":"^0.0.2","passport-twitter":"^1.0.4","paypal-rest-sdk":"^1.8.1","popper.js":"^1.16.1","pug":"^3.0.0","stripe":"^8.127.0","tumblr.js":"^3.0.0","twilio":"^3.54.0","twitter-lite":"^0.14.0","validator":"^13.5.1"},"devDependencies":{"chai":"^4.2.0","eslint":"^7.15.0","eslint-config-airbnb-base":"^14.2.1","eslint-plugin-chai-friendly":"^0.6.0","eslint-plugin-import":"^2.22.1","husky":"^4.3.5","lint-staged":"^10.5.3","mocha":"^8.2.1","nyc":"^15.1.0","prettier":"^2.2.1","sinon":"^9.2.1","supertest":"^5.0.0"},"engines":{"node":">=10.22.1","npm":">=6.14.6"},"husky":{"hooks":{"pre-commit":"lint-staged"}},"lint-staged":{"**/*.@(graphql|json|markdown|yaml|yml|md)":"npm run atm:lint:prettier"},"gitHead":"f8f4d2f97bec3694628b604253950669620e329f","readme":"\nHackathon Starter =======================\n\n[](https://david-dm.org/sahat/hackathon-starter)\n[](https://david-dm.org/sahat/hackathon-starter?type=dev)\n[](https://travis-ci.org/sahat/hackathon-starter)\n[](https://gitter.im/sahat/hackathon-starter?utm_source=badge&utm_medium=badge&utm_campaign=pr-badge&utm_content=badge)\n\n**Live Demo**: https://hackathon-starter.walcony.com\n\nJump to\n[What's new?](https://github.com/sahat/hackathon-starter/blob/master/CHANGELOG.md)\n\nA boilerplate for **Node.js** web applications.\n\nIf you have attended any hackathons in the past, then you know how much time it\ntakes to get a project started: decide on what to build, pick a programming\nlanguage, pick a web framework, pick a CSS framework. A while later, you might\nhave an initial project up on GitHub and only then can other team members start\ncontributing. Or how about doing something as simple as _Sign in with Facebook_\nauthentication? You can spend hours on it if you are not familiar with how OAuth\n2.0 works.\n\nWhen I started this project, my primary focus was on **simplicity** and **ease\nof use**. I also tried to make it as **generic** and **reusable** as possible to\ncover most use cases of hackathon web apps, without being too specific. In the\nworst case, you can use this as a learning guide for your projects, if for\nexample you are only interested in **Sign in with Google** authentication and\nnothing else.\n\n### Testimonials\n\n> [**“Nice! That README alone is already gold!”**](https://www.producthunt.com/tech/hackathon-starter#comment-224732)\n> — Adrian Le Bas\n\n> [**“Awesome. Simply awesome.”**](https://www.producthunt.com/tech/hackathon-starter#comment-224966)
\n> — Steven Rueter\n\n> [**“I'm using it for a year now and many projects, it's an awesome boilerplate and the project is well maintained!”**](https://www.producthunt.com/tech/hackathon-starter#comment-228610)
\n> — Kevin Granger\n\n> **“Small world with Sahat's project. We were using his hackathon starter for\n> our hackathon this past weekend and got some prizes. Really handy repo!”**
\n> — Interview candidate for one of the companies I used to work with.\n\n
Modern Theme
\n\n\n\nFlatly Bootstrap Theme
\n\n\n\nAPI Examples
\n\n\n\n## Table of Contents\n\n- [Features](#features)\n- [Prerequisites](#prerequisites)\n- [Getting Started](#getting-started)\n- [Obtaining API Keys](#obtaining-api-keys)\n- [Project Structure](#project-structure)\n- [List of Packages](#list-of-packages)\n- [Useful Tools and Resources](#useful-tools-and-resources)\n- [Recommended Design Resources](#recommended-design-resources)\n- [Recommended Node.js Libraries](#recommended-nodejs-libraries)\n- [Recommended Client-side Libraries](#recommended-client-side-libraries)\n- [Pro Tips](#pro-tips)\n- [FAQ](#faq)\n- [How It Works](#how-it-works-mini-guides)\n- [Cheatsheets](#cheatsheets)\n - [ES6](#-es6-cheatsheet)\n - [JavaScript Date](#-javascript-date-cheatsheet)\n - [Mongoose Cheatsheet](#mongoose-cheatsheet)\n- [Deployment](#deployment)\n- [Docker](#docker)\n- [Production](#production)\n- [Changelog](#changelog)\n- [Contributing](#contributing)\n- [License](#license)\n\n## Features\n\n- **Local Authentication** using Email and Password\n- **OAuth 1.0a Authentication** via Twitter\n- **OAuth 2.0 Authentication** via Facebook, Google, GitHub, LinkedIn,\n Instagram\n- Flash notifications\n- MVC Project Structure\n- Node.js clusters support\n- Sass stylesheets (auto-compiled via middleware)\n- Bootstrap 4 + Extra Themes\n- Contact Form (powered by Mailgun, Sendgrid or Mandrill)\n- **Account Management**\n- Gravatar\n- Profile Details\n- Change Password\n- Forgot Password\n- Reset Password\n- Link multiple OAuth strategies to one account\n- Delete Account\n- CSRF protection\n- **API Examples**: Facebook, Foursquare, Last.fm, Tumblr, Twitter, Stripe,\n LinkedIn and more.\n\n## Prerequisites\n\n- [MongoDB](https://www.mongodb.com/download-center/community)\n- [Node.js 10+](http://nodejs.org)\n- Command Line Tools\n- **Mac\n OS X:** [Xcode](https://itunes.apple.com/us/app/xcode/id497799835?mt=12) (or\n **OS X 10.9+**: `xcode-select --install`)\n- **Windows:**\n [Visual Studio](https://www.visualstudio.com/products/visual-studio-community-vs)\n OR [Visual Studio Code](https://code.visualstudio.com) +\n [Windows Subsystem for Linux - Ubuntu](https://docs.microsoft.com/en-us/windows/wsl/install-win10)\n- **Ubuntu**\n /\n **Linux\n Mint:** `sudo apt-get install build-essential`\n- **Fedora**:\n `sudo dnf groupinstall \"Development Tools\"`\n- **OpenSUSE:**\n `sudo zypper install --type pattern devel_basis`\n\n**Note:** If you are new to Node or Express, you may find\n[Node.js & Express From Scratch series](https://www.youtube.com/watch?v=Ad2ngx6CT0M&list=PLillGF-RfqbYRpji8t4SxUkMxfowG4Kqp&index=3)\nhelpful for learning the basics of Node and Express. Alternatively, here is\nanother great tutorial for complete beginners -\n[Getting Started With Node.js, Express, MongoDB](http://cwbuecheler.com/web/tutorials/2013/node-express-mongo/).\n\n## Getting Started\n\nThe easiest way to get started is to clone the repository:\n\n```bash\n# Get the latest snapshot\ngit clone https://github.com/sahat/hackathon-starter.git myproject\n\n# Change directory\ncd myproject\n\n# Install NPM dependencies\nnpm install\n\n# Then simply start your app\nnode app.js\n```\n\n**Warning:** If you want to use some API that need https to work (for example\nPinterest or facebook), you will need to download [ngrok](https://ngrok.com/).\nYou must start ngrok after starting the project.\n\n```bash\n# start ngrok to intercept the data exchanged on port 8080\n./ngrok http 8080\n```\n\nNext, you must use the https URL defined by ngrok, for example,\n`https://hackaton.ngrok.io`\n\n**Note:** I highly recommend installing\n[Nodemon](https://github.com/remy/nodemon). It watches for any changes in your\nnode.js app and automatically restarts the server. Once installed, instead of\n`node app.js` use `nodemon app.js`. It will save you a lot of time in the long\nrun, because you won't need to manually restart the server each time you make a\nsmall change in code. To install, run `sudo npm install -g nodemon`.\n\n## Obtaining API Keys\n\nTo use any of the included APIs or OAuth authentication methods, you will need\nto obtain appropriate credentials: Client ID, Client Secret, API Key, or\nUsername & Password. You will need to go through each provider to generate new\ncredentials.\n\n\n\n- Visit\n Google\n reCAPTCHA Admin Console\n- Enter your application's name as the **Label**\n- Chose **reCAPTCHA v2**, **\"I'm not a robot\" Checkbox**\n- Enter _localhost_ as the domain. You can have other domains added in\n addition to _localhost_\n- Accept the terms and submit the form\n- Copy the _Site Key_ and the _Secret key_ into `.env`. These keys will be\n accessible under Settings, reCAPTCHA keys drop down if you need them again\n later.\n\n\n\n
\n\n- Visit\n Google\n Cloud Console\n- Click on the **Create Project** button\n- Enter _Project Name_, then click on **Create** button\n- Then click on _APIs & auth_ in the sidebar and select _API_ tab\n- Click on **Google+ API** under _Social APIs_, then click **Enable API**\n- Click on **Google Drive API** under _G Suite_, then click **Enable API**\n- Click on **Google Sheets API** under _G Suite_, then click **Enable API**\n- Next, under _APIs & auth_ in the sidebar click on _Credentials_ tab\n- Click on **Create new Client ID** button\n- Select _Web Application_ and click on **Configure Consent Screen**\n- Fill out the required fields then click on **Save**\n- In the _Create Client ID_ modal dialog:\n- **Application Type**: Web Application\n- **Authorized Javascript origins**: http://localhost:8080\n- **Authorized redirect URI**: http://localhost:8080/auth/google/callback\n- Click on **Create Client ID** button\n- Copy and paste _Client ID_ and _Client secret_ keys into `.env`\n\n**Note:** When you ready to deploy to production don't forget to add your new\nURL to _Authorized Javascript origins_ and _Authorized redirect URI_, e.g.\n`http://my-awesome-app.herokuapp.com` and\n`http://my-awesome-app.herokuapp.com/auth/google/callback` respectively. The\nsame goes for other providers.\n\n\n\n
\n\n- Visit Snap Kit\n Developer Portal\n- Click on the **+** button to create an app\n- Enter a name for your app\n- Enable the scopes that you will want to use in your app\n- Click on the **Continue** button\n- Find the **Kits** section and make sure that **Login Kit** is enabled\n- Find the **Redirect URLs** section, click the **+ Add** button, and enter\n `http://localhost:8080/auth/snapchat/callback`\n- Find the **Development Environment** section. Click the **Generate** button\n next to the _Confidential OAuth2 Client_ heading within it.\n- Copy and paste the generated _Private Key_ and _OAuth2 Client ID_ keys into\n `.env`\n- **Note:** _OAuth2 Client ID_ is **SNAPCHAT_ID**, _Private Key_ is\n **SNAPCHAT_SECRET** in `.env`\n- To prepare the app for submission, fill out the rest of the required fields:\n _Category_, _Description_, _Privacy Policy Url_, and _App Icon_\n\n**Note:** For production use, don't forget to:\n\n- generate a _Confidential OAuth2 Client_ in the **Production Environment**\n and use the production _Private Key_ and _OAuth2 Client ID_\n- add the production URL to **Redirect URLs** section, e.g.\n `http://my-awesome-app.herokuapp.com/auth/snapchat/callback`\n- submit the app for review and wait for approval\n\n\n\n
\n\n- Visit Facebook\n Developers\n- Click **My Apps**, then select \\*_Add a New App_ from the dropdown menu\n- Enter a new name for your app\n- Click on the **Create App ID** button\n- Find the Facebook Login Product and click on **Facebook Login**\n- Instead of going through their Quickstart, click on **Settings** for your\n app in the top left corner\n- Copy and paste _App ID_ and _App Secret_ keys into `.env`\n- **Note:** _App ID_ is **FACEBOOK_ID**, _App Secret_ is **FACEBOOK_SECRET**\n in `.env`\n- Enter `localhost` under _App Domains_\n- Choose a **Category** that best describes your app\n- Click on **+ Add Platform** and select **Website**\n- Enter `http://localhost:8080` under _Site URL_\n- Click on the _Settings_ tab in the left nav under Facebook Login\n- Enter `http://localhost:8080/auth/facebook/callback` under Valid OAuth\n redirect URIs\n\n**Note:** After a successful sign in with Facebook, a user will be redirected\nback to the home page with appended hash `#_=_` in the URL. It is _not_ a bug.\nSee this\n[Stack Overflow](https://stackoverflow.com/questions/7131909/facebook-callback-appends-to-return-url)\ndiscussion for ways to handle it.\n\n\n\n
\n\n- Go to Account\n Settings\n- Select **Developer settings** from the sidebar\n- Then click on **OAuth Apps** and then on **Register new application**\n- Enter _Application Name_ and _Homepage URL_\n- For _Authorization Callback URL_: http://localhost:8080/auth/github/callback\n- Click **Register application**\n- Now copy and paste _Client ID_ and _Client Secret_ keys into `.env` file\n\n\n\n
\n\n- Sign in at\n https://apps.twitter.com\n- Click **Create a new application**\n- Enter your application name, website and description\n- For **Callback URL**: http://127.0.0.1:8080/auth/twitter/callback\n- Go to **Settings** tab\n- Under _Application Type_ select **Read and Write** access\n- Check the box **Allow this application to be used to Sign in with Twitter**\n- Click **Update this Twitter's applications settings**\n- Copy and paste _Consumer Key_ and _Consumer Secret_ keys into `.env` file\n\n\n\n
\n\n- Sign in at\n LinkedIn Developer\n Network\n- From the account name dropdown menu select **API Keys**\n- _It may ask you to sign in once again_\n- Click **+ Add New Application** button\n- Fill out all the _required_ fields\n- **OAuth 2.0 Redirect URLs**: http://localhost:8080/auth/linkedin/callback\n- **JavaScript API Domains**: http://localhost:8080\n- For **Default Application Permissions** make sure at least the following is\n checked:\n- `r_basicprofile`\n- Finish by clicking **Add Application** button\n- Copy and paste _API Key_ and _Secret Key_ keys into `.env` file\n- _API Key_ is your **clientID**\n- _Secret Key_ is your **clientSecret**\n\n\n\n
\n\n- Sign up or log into your\n dashboard\n- Click on your profile and click on Account Settings\n- Then click on **API Keys**\n- Copy the **Secret Key**. and add this into `.env` file\n\n\n\n
\n\n- Visit PayPal\n Developer\n- Log in to your PayPal account\n- Click **Applications > Create App** in the navigation bar\n- Enter _Application Name_, then click **Create app**\n- Copy and paste _Client ID_ and _Secret_ keys into `.env` file\n- _App ID_ is **client_id**, _App Secret_ is **client_secret**\n- Change **host** to api.paypal.com if you want to test against production and\n use the live credentials\n\n\n\n
\n\n- Go to Foursquare\n for Developers\n- Click on **My Apps** in the top menu\n- Click the **Create A New App** button\n- Enter _App Name_, _Welcome page url_,\n- For **Redirect URI**: http://localhost:8080/auth/foursquare/callback\n- Click **Save Changes**\n- Copy and paste _Client ID_ and _Client Secret_ keys into `.env` file\n\n\n\n
\n\n- Go to\n http://www.tumblr.com/oauth/apps\n- Once signed in, click **+Register application**\n- Fill in all the details\n- For **Default Callback URL**: `http://localhost:8080/auth/tumblr/callback`\n- Click **✔Register**\n- Copy and paste _OAuth consumer key_ and _OAuth consumer secret_ keys into\n `.env` file\n\n\n\n
\n\n- Go to\n http://steamcommunity.com/dev/apikey\n- Sign in with your existing Steam account\n- Enter your _Domain Name_, then and click **Register**\n- Copy and paste _Key_ into `.env` file\n\n\n
\n\n- Visit the\n Twitch\n developer dashboard\n- If prompted, authorize the dashboard to access your twitch account\n- In the Console, click on Register Your Application\n- Enter the name of your application\n- Use OAuth Redirect URLs enter `http://localhost:8080/auth/twitch/callback`\n- Set Category to Website Integration and press the Create button\n- After the applicaiton has been created, click on the Manage button\n- Copy and paste _Client ID_ into `.env`\n- If there is no Client Secret displayed, click on New Secret button and then\n copy and paste the _Client secret_ into `.env`\n\n\n\n
\n\n- Go to\n https://sendgrid.com/user/signup\n- Sign up and **confirm** your account via the _activation email_\n- Then enter your SendGrid _Username_ and _Password_ into `.env` file\n\n\n\n
\n\n- Go to\n http://www.mailgun.com\n- Sign up and add your _Domain Name_\n- From the domain overview, copy and paste the default SMTP _Login_ and\n _Password_ into `.env` file\n\n\n\n
\n\n- Go to\n https://developer.here.com\n- Sign up and create a Freemium project\n- Create JAVASCRIPT/REST credentials. Copy and paste the APP_ID and APP into\n `.env` file.\n- Note that these credentials are available on the client side, and you need\n to create a domain whitelist for your app credentials when you are publicly\n launching the app.\n\n\n\n
\n\n- Go to\n https://www.twilio.com/try-twilio\n- Sign up for an account.\n- Once logged into the dashboard, expand the link 'show api credentials'\n- Copy your Account Sid and Auth Token\n\n\n\n
\n\n- Go to\n https://developer.intuit.com/app/developer/qbo/docs/get-started\n- Use the Sign Up option in the upper right corner of the screen (nav bar) to\n get a free developer account and a sandbox company.\n- Create a new app by going to your Dashboard using the My Apps option in the\n top nav bar or by going to\n https://developer.intuit.com/app/developer/myapps\n- In your App, under Development, Keys & OAuth (right nav), find the Client ID\n and Client Secret for your `.env` file\n\n## Project Structure\n\n| Name | Description |\n| ---------------------------------- | ------------------------------------------------------------ |\n| **config**/passport.js | Passport Local and OAuth strategies, plus login middleware. |\n| **controllers**/api.js | Controller for /api route and all api examples. |\n| **controllers**/contact.js | Controller for contact form. |\n| **controllers**/home.js | Controller for home page (index). |\n| **controllers**/user.js | Controller for user account management. |\n| **models**/User.js | Mongoose schema and model for User. |\n| **public**/ | Static assets (fonts, css, js, img). |\n| **public**/**js**/application.js | Specify client-side JavaScript dependencies. |\n| **public**/**js**/main.js | Place your client-side JavaScript here. |\n| **public**/**css**/main.scss | Main stylesheet for your app. |\n| **public/css/themes**/default.scss | Some Bootstrap overrides to make it look prettier. |\n| **views/account**/ | Templates for _login, password reset, signup, profile_. |\n| **views/api**/ | Templates for API Examples. |\n| **views/partials**/flash.pug | Error, info and success flash notifications. |\n| **views/partials**/header.pug | Navbar partial template. |\n| **views/partials**/footer.pug | Footer partial template. |\n| **views**/layout.pug | Base template. |\n| **views**/home.pug | Home page template. |\n| .dockerignore | Folder and files ignored by docker usage. |\n| .env.example | Your API keys, tokens, passwords and database URI. |\n| .eslintrc | Rules for eslint linter. |\n| .gitignore | Folder and files ignored by git. |\n| .travis.yml | Configuration files for continuous integration. |\n| app.js | The main application file. |\n| docker-compose.yml | Docker compose configuration file. |\n| Dockerfile | Docker configuration file. |\n| package.json | NPM dependencies. |\n| package-lock.json | Contains exact versions of NPM dependencies in package.json. |\n\n**Note:** There is no preference how you name or structure your views. You could\nplace all your templates in a top-level `views` directory without having a\nnested folder structure, if that makes things easier for you. Just don't forget\nto update `extends ../layout` and corresponding `res.render()` paths in\ncontrollers.\n\n## List of Packages\n\n| Package | Description |\n| --------------------------- | ----------------------------------------------------------------------- |\n| @octokit/rest | GitHub API library. |\n| bcrypt | Library for hashing and salting user passwords. |\n| body-parser | Node.js body parsing middleware. |\n| chai | BDD/TDD assertion library. |\n| chalk | Terminal string styling done right. |\n| cheerio | Scrape web pages using jQuery-style syntax. |\n| compression | Node.js compression middleware. |\n| connect-mongo | MongoDB session store for Express. |\n| dotenv | Loads environment variables from .env file. |\n| errorhandler | Development-only error handler middleware. |\n| eslint | Linter JavaScript. |\n| eslint-config-airbnb-base | Configuration eslint by airbnb. |\n| eslint-plugin-chai-friendly | Makes eslint friendly towards Chai.js 'expect' and 'should' statements. |\n| eslint-plugin-import | ESLint plugin with rules that help validate proper imports. |\n| express | Node.js web framework. |\n| express-flash | Provides flash messages for Express. |\n| express-session | Simple session middleware for Express. |\n| express-status-monitor | Reports real-time server metrics for Express. |\n| instagram-node | Instagram API library. |\n| lastfm | Last.fm API library. |\n| lob | Lob API library. |\n| lodash | A utility library for working with arrays, numbers, objects, strings. |\n| lusca | CSRF middleware. |\n| mailchecker | Verifies that an email address is valid and not a disposable address. |\n| mocha | Test framework. |\n| moment | Parse, validate, compute dates and times. |\n| mongoose | MongoDB ODM. |\n| morgan | HTTP request logger middleware for node.js. |\n| multer | Node.js middleware for handling `multipart/form-data`. |\n| node-foursquare | Foursquare API library. |\n| node-sass | Node.js bindings to libsass. |\n| node-sass-middleware | Sass middleware compiler. |\n| nyc | Coverage test. |\n| nodemailer | Node.js library for sending emails. |\n| node-quickbooks | Quickbooks API library. |\n| passport | Simple and elegant authentication library for node.js. |\n| passport-facebook | Sign-in with Facebook plugin. |\n| passport-github | Sign-in with GitHub plugin. |\n| passport-google-oauth | Sign-in with Google plugin. |\n| passport-instagram | Sign-in with Instagram plugin. |\n| passport-linkedin-oauth2 | Sign-in with LinkedIn plugin. |\n| passport-local | Sign-in with Username and Password plugin. |\n| passport-openid | Sign-in with OpenId plugin. |\n| passport-oauth | Allows you to set up your own OAuth 1.0a and OAuth 2.0 strategies. |\n| passport-oauth2-refresh | A library to refresh OAuth 2.0 access tokens using refresh tokens. |\n| passport-snapchat | Sign-in with Snapchat plugin. |\n| passport-twitter | Sign-in with Twitter plugin. |\n| passport-twitch-new | Sign-in with Twitch plugin. |\n| paypal-rest-sdk | PayPal APIs library. |\n| pug | Template engine for Express. |\n| sinon | Test spies, stubs and mocks for JavaScript. |\n| stripe | Offical Stripe API library. |\n| supertest | HTTP assertion library. |\n| tumblr.js | Tumblr API library. |\n| twilio | Twilio API library. |\n| twitter-lite | Twitter API library. |\n| validator | A library of string validators and sanitizers. |\n\n## Useful Tools and Resources\n\n- [JavaScripting](http://www.javascripting.com/) - The Database of JavaScript\n Libraries\n- [JS Recipes](http://sahatyalkabov.com/jsrecipes/) - JavaScript tutorials for\n backend and frontend development.\n- [HTML to Pug converter](https://html-to-pug.com/) - HTML to PUG is a free\n online converter helping you to convert HTML files to pug syntax in\n real-time.\n- [JavascriptOO](http://www.javascriptoo.com/) - A directory of JavaScript\n libraries with examples, CDN links, statistics, and videos.\n- [Favicon Generator](http://realfavicongenerator.net/) - Generate favicons\n for PC, Android, iOS, Windows 8.\n\n## Recommended Design Resources\n\n- [Code Guide](http://codeguide.co/) - Standards for developing flexible,\n durable, and sustainable HTML and CSS.\n- [Bootsnipp](http://bootsnipp.com/) - Code snippets for Bootstrap.\n- [Bootstrap Zero](https://www.bootstrapzero.com) - Free Bootstrap templates\n themes.\n- [Google Bootstrap](http://todc.github.io/todc-bootstrap/) - Google-styled\n theme for Bootstrap.\n- [Font Awesome Icons](http://fortawesome.github.io/Font-Awesome/icons/) -\n It's already part of the Hackathon Starter, so use this page as a reference.\n- [Colors](http://clrs.cc) - A nicer color palette for the web.\n- [Creative Button Styles](http://tympanus.net/Development/CreativeButtons/) -\n awesome button styles.\n- [Creative Link Effects](http://tympanus.net/Development/CreativeLinkEffects/) -\n Beautiful link effects in CSS.\n- [Medium Scroll Effect](http://codepen.io/andreasstorm/pen/pyjEh) - Fade\n in/out header background image as you scroll.\n- [GeoPattern](https://github.com/btmills/geopattern) - SVG background pattern\n generator.\n- [Trianglify](https://github.com/qrohlf/trianglify) - SVG low-poly background\n pattern generator.\n\n## Recommended Node.js Libraries\n\n- [Nodemon](https://github.com/remy/nodemon) - Automatically restart Node.js\n server on code changes.\n- [geoip-lite](https://github.com/bluesmoon/node-geoip) - Geolocation\n coordinates from IP address.\n- [Filesize.js](http://filesizejs.com/) - Pretty file sizes, e.g.\n `filesize(265318); // \"265.32 kB\"`.\n- [Numeral.js](http://numeraljs.com) - Library for formatting and manipulating\n numbers.\n- [Node Inspector](https://github.com/node-inspector/node-inspector) - Node.js\n debugger based on Chrome Developer Tools.\n- [node-taglib](https://github.com/nikhilm/node-taglib) - Library for reading\n the meta-data of several popular audio formats.\n- [sharp](https://github.com/lovell/sharp) - Node.js module for resizing JPEG,\n PNG, WebP and TIFF images.\n\n## Recommended Client-side Libraries\n\n- [Framework7](http://www.idangero.us/framework7/) - Full Featured HTML\n Framework For Building iOS7 Apps.\n- [InstantClick](http://instantclick.io) - Makes your pages load instantly by\n pre-loading them on mouse hover.\n- [NProgress.js](https://github.com/rstacruz/nprogress) - Slim progress bars\n like on YouTube and Medium.\n- [Hover](https://github.com/IanLunn/Hover) - Awesome CSS3 animations on mouse\n hover.\n- [Magnific Popup](http://dimsemenov.com/plugins/magnific-popup/) - Responsive\n jQuery Lightbox Plugin.\n- [jQuery Raty](http://wbotelhos.com/raty/) - Star Rating Plugin.\n- [Headroom.js](http://wicky.nillia.ms/headroom.js/) - Hide your header until\n you need it.\n- [X-editable](http://vitalets.github.io/x-editable/) - Edit form elements\n inline.\n- [Offline.js](http://github.hubspot.com/offline/docs/welcome/) - Detect when\n user's internet connection goes offline.\n- [Alertify.js](http://fabien-d.github.io/alertify.js/) - Sweet looking alerts\n and browser dialogs.\n- [selectize.js](http://selectize.github.io/selectize.js) - Styleable select\n elements and input tags.\n- [drop.js](http://github.hubspot.com/drop/docs/welcome/) - Powerful\n Javascript and CSS library for creating dropdowns and other floating\n displays.\n- [scrollReveal.js](https://github.com/jlmakes/scrollReveal.js) - Declarative\n on-scroll reveal animations.\n\n## Pro Tips\n\n- Use [async.parallel()](https://github.com/caolan/async#parallel) when you\n need to run multiple asynchronous tasks, and then render a page, but only\n when all tasks are completed. For example, you might want to scrape three\n different websites for some data and render the results in a template after\n all three websites have been scraped.\n- Need to find a specific object inside an Array? Use\n [\\_.find](http://lodash.com/docs#find) function from Lodash. For example,\n this is how you would retrieve a Twitter token from database:\n `var token = _.find(req.user.tokens, { kind: 'twitter' });`, where 1st\n parameter is an array, and a 2nd parameter is an object to search for.\n\n## FAQ\n\n### Why do I get `403 Error: Forbidden` when submitting a form?\n\nYou need to add the following hidden input element to your form. This has been\nadded in the\n[pull request #40](https://github.com/sahat/hackathon-starter/pull/40) as part\nof the CSRF protection.\n\n```\ninput(type='hidden', name='_csrf', value=_csrf)\n```\n\n**Note:** It is now possible to whitelist certain URLs. In other words you can\nspecify a list of routes that should bypass CSRF verification check.\n\n**Note 2:** To whitelist dynamic URLs use regular expression tests inside the\nCSRF middleware to see if `req.originalUrl` matches your desired pattern.\n\n### I am getting MongoDB Connection Error, how do I fix it?\n\nThat's a custom error message defined in `app.js` to indicate that there was a\nproblem connecting to MongoDB:\n\n```js\nmongoose.connection.on(\"error\", (err) => {\n console.error(err);\n console.log(\n \"%s MongoDB connection error. Please make sure MongoDB is running.\",\n chalk.red(\"✗\")\n );\n process.exit();\n});\n```\n\nYou need to have a MongoDB server running before launching `app.js`. You can\ndownload MongoDB [here](https://www.mongodb.com/download-center/community), or\ninstall it via a package manager.\n\nWindows users, read\n[Install MongoDB on Windows](https://docs.mongodb.org/manual/tutorial/install-mongodb-on-windows/).\n\n**Tip:** If you are always connected to the internet, you could just use\n[MongoDB Atlas](https://www.mongodb.com/cloud/atlas) or\n[Compose](https://www.compose.io/) instead of downloading and installing MongoDB\nlocally. You will only need to update database credentials in `.env` file.\n\n### I get an error when I deploy my app, why?\n\nChances are you haven't changed the _Database URI_ in `.env`. If `MONGODB` is\nset to `localhost`, it will only work on your machine as long as MongoDB is\nrunning. When you deploy to Heroku, OpenShift or some other provider, you will\nnot have MongoDB running on `localhost`. You need to create an account with\n[MongoDB Atlas](https://www.mongodb.com/cloud/atlas) or\n[Compose](https://www.compose.io/), then create a free tier database. See\n[Deployment](#deployment) for more information on how to setup an account and a\nnew database step-by-step with MongoDB Atlas.\n\n### Why Pug (Jade) instead of Handlebars?\n\nWhen I first started this project I didn't have any experience with Handlebars.\nSince then I have worked on Ember.js apps and got myself familiar with the\nHandlebars syntax. While it is true Handlebars is easier, because it looks like\ngood old HTML, I have no regrets picking Jade over Handlebars. First off, it's\nthe default template engine in Express, so someone who has built Express apps in\nthe past already knows it. Secondly, I find `extends` and `block` to be\nindispensable, which as far as I know, Handlebars does not have out of the box.\nAnd lastly, subjectively speaking, Jade looks much cleaner and shorter than\nHandlebars, or any non-HAML style for that matter.\n\n### Why do you have all routes defined in app.js?\n\nFor the sake of simplicity. While there might be a better approach, such as\npassing `app` context to each controller as outlined in this\n[blog](http://timstermatic.github.io/blog/2013/08/17/a-simple-mvc-framework-with-node-and-express/),\nI find such style to be confusing for beginners. It took me a long time to grasp\nthe concept of `exports` and `module.exports`, let alone having a global `app`\nreference in other files. That to me is backward thinking. The `app.js` is the\n\"heart of the app\", it should be the one referencing models, routes,\ncontrollers, etc. When working solo on small projects, I prefer to have\neverything inside `app.js` as is the case with\n[this](<(https://github.com/sahat/ember-sass-express-starter/blob/master/app.js)>)\nREST API server.\n\n### How do I switch SendGrid for another email delivery service, like Mailgun or SparkPost?\n\nInside the `nodemailer.createTransport` method arguments, change the service\nfrom `'Sendgrid'` to some other email service. Also, be sure to update both\nusername and password below that. See the\n[list of all supported services](https://github.com/nodemailer/nodemailer-wellknown#supported-services)\nby Nodemailer.\n\n## How It Works (mini guides)\n\nThis section is intended for giving you a detailed explanation of how a\nparticular functionality works. Maybe you are just curious about how it works,\nor perhaps you are lost and confused while reading the code, I hope it provides\nsome guidance to you.\n\n### Custom HTML and CSS Design 101\n\n[HTML5 UP](http://html5up.net/) has many beautiful templates that you can\ndownload for free.\n\nWhen you download the ZIP file, it will come with _index.html_, _images_, _css_\nand _js_ folders. So, how do you integrate it with Hackathon Starter? Hackathon\nStarter uses Bootstrap CSS framework, but these templates do not. Trying to use\nboth CSS files at the same time will likely result in undesired effects.\n\n**Note:** Using the custom templates approach, you should understand that you\ncannot reuse any of the views I have created: layout, home page, api browser,\nlogin, signup, account management, contact. Those views were built using\nBootstrap grid and styles. You will have to manually update the grid using a\ndifferent syntax provided in the template. **Having said that, you can mix and\nmatch if you want to do so: Use Bootstrap for main app interface, and a custom\ntemplate for a landing page.**\n\nLet's start from the beginning. For this example I will use\n[Escape Velocity](http://html5up.net/escape-velocity/) template:\n\n\n**Note:** For the sake of simplicity I will only consider `index.html`, and skip\n`left-sidebar.html`, `no-sidebar.html`, `right-sidebar.html`.\n\nMove all JavaScript files from `html5up-escape-velocity/js` to `public/js`. Then\nmove all CSS files from `html5up-escape-velocity/css` to `public/css`. And\nfinally, move all images from `html5up-escape-velocity/images` to\n`public/images`. You could move it to the existing **img** folder, but that\nwould require manually changing every `img` reference. Grab the contents of\n`index.html` and paste it into [HTML To Pug](https://html-to-pug.com/).\n\n**Note:** Do not forget to update all the CSS and JS paths accordingly.\n\nCreate a new file `escape-velocity.pug` and paste the Pug markup in `views`\nfolder. Whenever you see the code `res.render('account/login')` - that means it\nwill search for `views/account/login.pug` file.\n\nLet's see how it looks. Create a new controller **escapeVelocity** inside\n`controllers/home.js`:\n\n```js\nexports.escapeVelocity = (req, res) => {\n res.render(\"escape-velocity\", {\n title: \"Landing Page\",\n });\n};\n```\n\nAnd then create a route in `app.js`. I placed it right after the index\ncontroller:\n\n```js\napp.get(\"/escape-velocity\", homeController.escapeVelocity);\n```\n\nRestart the server (if you are not using **nodemon**); then you should see the\nnew template at\n[http://localhost:8080/escape-velocity](http://localhost:8080/escape-velocity).\n\nI will stop right here, but if you would like to use this template as more than\njust a single page, take a look at how these Pug templates work: `layout.pug` -\nbase template, `index.pug` - home page, `partials/header.pug` - Bootstrap\nnavbar, `partials/footer.pug` - sticky footer. You will have to manually break\nit apart into smaller pieces. Figure out which part of the template you want to\nkeep the same on all pages - that's your new `layout.pug`. Then, each page that\nchanges, be it `index.pug`, `about.pug`, `contact.pug` will be embedded in your\nnew `layout.pug` via `block content`. Use existing templates as a reference.\n\nThis is a rather lengthy process, and templates you get from elsewhere might\nhave yet another grid system. That's why I chose _Bootstrap_ for the Hackathon\nStarter. Many people are already familiar with _Bootstrap_, plus it's easy to\nget started with it if you have never used _Bootstrap_. You can also buy many\nbeautifully designed _Bootstrap_ themes at\n[Themeforest](http://themeforest.net/), and use them as a drop-in replacement\nfor Hackathon Starter. However, if you would like to go with a completely custom\nHTML/CSS design, this should help you to get started!\n\n\n\n### How do flash messages work in this project?\n\nFlash messages allow you to display a message at the end of the request and\naccess it on next request and only next request. For instance, on a failed login\nattempt, you would display an alert with some error message, but as soon as you\nrefresh that page or visit a different page and come back to the login page,\nthat error message will be gone. It is only displayed once. This project uses\n_express-flash_ module for flash messages. And that module is built on top of\n_connect-flash_, which is what I used in this project initially. With\n_express-flash_ you don't have to explicitly send a flash message to every view\ninside `res.render()`. All flash messages are available in your views via\n`messages` object by default, thanks to _express-flash_.\n\nFlash messages have a two-step process. You use\n`req.flash('errors', { msg: 'Error messages goes here' }` to create a flash\nmessage in your controllers, and then display them in your views:\n\n```pug\nif messages.errors\n .alert.alert-danger.fade.in\n for error in messages.errors\n div= error.msg\n```\n\nIn the first step, `'errors'` is the name of a flash message, which should match\nthe name of the property on `messages` object in your views. You place alert\nmessages inside `if message.errors` because you don't want to show them flash\nmessages are present. The reason why you pass an error like\n`{ msg: 'Error message goes here' }` instead of just a string -\n`'Error message goes here'`, is for the sake of consistency. To clarify that,\n_express-validator_ module which is used for validating and sanitizing user's\ninput, returns all errors as an array of objects, where each object has a `msg`\nproperty with a message why an error has occurred. Here is a more general\nexample of what express-validator returns when there are errors present:\n\n```js\n[\n { param: \"name\", msg: \"Name is required\", value: \"
\n\n### How do I create a new page?\n\nA more correct way to say this would be \"How do I create a new route?\" The main\nfile `app.js` contains all the routes. Each route has a callback function\nassociated with it. Sometimes you will see three or more arguments for a route.\nIn a case like that, the first argument is still a URL string, while middle\narguments are what's called middleware. Think of middleware as a door. If this\ndoor prevents you from continuing forward, you won't get to your callback\nfunction. One such example is a route that requires authentication.\n\n```js\napp.get(\"/account\", passportConfig.isAuthenticated, userController.getAccount);\n```\n\nIt always goes from left to right. A user visits `/account` page. Then\n`isAuthenticated` middleware checks if you are authenticated:\n\n```js\nexports.isAuthenticated = (req, res, next) => {\n if (req.isAuthenticated()) {\n return next();\n }\n res.redirect(\"/login\");\n};\n```\n\nIf you are authenticated, you let this visitor pass through your \"door\" by\ncalling `return next();`. It then proceeds to the next middleware until it\nreaches the last argument, which is a callback function that typically renders a\ntemplate on `GET` requests or redirects on `POST` requests. In this case, if you\nare authenticated, you will be redirected to the _Account Management_ page;\notherwise, you will be redirected to the _Login_ page.\n\n```js\nexports.getAccount = (req, res) => {\n res.render(\"account/profile\", {\n title: \"Account Management\",\n });\n};\n```\n\nExpress.js has `app.get`, `app.post`, `app.put`, `app.delete`, but for the most\npart, you will only use the first two HTTP verbs, unless you are building a\nRESTful API. If you just want to display a page, then use `GET`, if you are\nsubmitting a form, sending a file then use `POST`.\n\nHere is a typical workflow for adding new routes to your application. Let's say\nwe are building a page that lists all books from the database.\n\n**Step 1.** Start by defining a route.\n\n```js\napp.get(\"/books\", bookController.getBooks);\n```\n\n---\n\n**Note:** As of Express 4.x you can define your routes like so:\n\n```js\napp.route(\"/books\")\n .get(bookController.getBooks)\n .post(bookController.createBooks)\n .put(bookController.updateBooks)\n .delete(bookController.deleteBooks);\n```\n\nAnd here is how a route would look if it required an _authentication_ and an\n_authorization_ middleware:\n\n```js\napp.route(\"/api/twitter\")\n .all(passportConfig.isAuthenticated)\n .all(passportConfig.isAuthorized)\n .get(apiController.getTwitter)\n .post(apiController.postTwitter);\n```\n\nUse whichever style that makes sense to you. Either one is acceptable. I think\nthat chaining HTTP verbs on `app.route` is a very clean and elegant approach,\nbut on the other hand, I can no longer see all my routes at a glance when you\nhave one route per line.\n\n**Step 2.** Create a new schema and a model `Book.js` inside the _models_\ndirectory.\n\n```js\nconst mongoose = require(\"mongoose\");\n\nconst bookSchema = new mongoose.Schema({\n name: String,\n});\n\nconst Book = mongoose.model(\"Book\", bookSchema);\nmodule.exports = Book;\n```\n\n**Step 3.** Create a new controller file called `book.js` inside the\n_controllers_ directory.\n\n```js\n/**\n * GET /books\n * List all books.\n */\nconst Book = require(\"../models/Book.js\");\n\nexports.getBooks = (req, res) => {\n Book.find((err, docs) => {\n res.render(\"books\", { books: docs });\n });\n};\n```\n\n**Step 4.** Import that controller in `app.js`.\n\n```js\nconst bookController = require(\"./controllers/book\");\n```\n\n**Step 5.** Create `books.pug` template.\n\n```pug\nextends layout\n\nblock content\n .page-header\n h3 All Books\n\n ul\n for book in books\n li= book.name\n```\n\nThat's it! I will say that you could have combined Step 1, 2, 3 as following:\n\n```js\napp.get(\"/books\", (req, res) => {\n Book.find((err, docs) => {\n res.render(\"books\", { books: docs });\n });\n});\n```\n\nSure, it's simpler, but as soon as you pass 1000 lines of code in `app.js` it\nbecomes a little challenging to navigate the file. I mean, the whole point of\nthis boilerplate project was to separate concerns, so you could work with your\nteammates without running into _MERGE CONFLICTS_. Imagine you have four\ndevelopers working on a single `app.js`, I promise you it won't be fun resolving\nmerge conflicts all the time. If you are the only developer, then it's okay. But\nas I said, once it gets up to a certain LoC size, it becomes difficult to\nmaintain everything in a single file.\n\nThat's all there is to it. Express.js is super simple to use. Most of the time\nyou will be dealing with other APIs to do the real work:\n[Mongoose](http://mongoosejs.com/docs/guide.html) for querying database,\nsocket.io for sending and receiving messages over websockets, sending emails via\n[Nodemailer](http://nodemailer.com/), form validation using\n[express-validator](https://github.com/ctavan/express-validator) library,\nparsing websites using [Cheerio](https://github.com/cheeriojs/cheerio), etc.\n\n
\n\n### How do I use Socket.io with Hackathon Starter?\n\n[Dan Stroot](https://github.com/dstroot) submitted an excellent\n[pull request](https://github.com/dstroot/hackathon-starter/commit/0a632def1ce8da446709d92812423d337c977d75)\nthat adds a real-time dashboard with socket.io. And as much as I'd like to add\nit to the project, I think it violates one of the main principles of the\nHackathon Starter:\n\n> When I started this project, my primary focus was on simplicity and ease of\n> use. I also tried to make it as generic and reusable as possible to cover most\n> use cases of hackathon web apps, **without being too specific**.\n\nWhen I need to use socket.io, I **really** need it, but most of the time - I\ndon't. But more importantly, websockets support is still experimental on most\nhosting providers. As of October 2013, Heroku supports websockets, but not until\nyou opt-in by running this command:\n\n```js\nheroku labs:enable websockets -a myapp\n```\n\nAnd what if you are deploying to OpenShift? They do support websockets, but it\nis currently in a preview state. So, for OpenShift you would need to change the\nsocket.io connect URI to the following:\n\n```js\nconst socket = io.connect(\"http://yoursite-namespace.rhcloud.com:8000\");\n```\n\nWait, why is it on port 8000? Who knows, and if I didn't run across this\n[blog post](http://velin-georgiev-blog.appspot.com/blog/set-up-nodejs-express-socketio-application-using-websockets-on-openshift-by-red-hat/)\nI wouldn't even know I had to use port 8000.\n\nI am really glad that Heroku and OpenShift at least have a websockets support,\nbecause many other PaaS providers still do not support it. Due to the\naforementioned issues with websockets, I cannot include socket.io as part of the\nHackathon Starter. _For now..._ If you need to use socket.io in your app, please\ncontinue reading.\n\nFirst, you need to install socket.io:\n\n```js\nnpm install socket.io\n```\n\nReplace `const app = express();` with the following code:\n\n```js\nconst app = express();\nconst server = require(\"http\").Server(app);\nconst io = require(\"socket.io\")(server);\n```\n\nI like to have the following code organization in `app.js` (from top to bottom):\nmodule dependencies, import controllers, import configs, connect to database,\nexpress configuration, routes, start the server, socket.io stuff. That way I\nalways know where to look for things.\n\nAdd the following code at the end of `app.js`:\n\n```js\nio.on(\"connection\", (socket) => {\n socket.emit(\"greet\", { hello: \"Hey there browser!\" });\n socket.on(\"respond\", (data) => {\n console.log(data);\n });\n socket.on(\"disconnect\", () => {\n console.log(\"Socket disconnected\");\n });\n});\n```\n\nOne last thing left to change:\n\n```js\napp.listen(app.get('port'), () => {\n```\n\nto\n\n```js\nserver.listen(app.get('port'), () => {\n```\n\nAt this point, we are done with the back-end.\n\nYou now have a choice - to include your JavaScript code in Pug templates or have\nall your client-side JavaScript in a separate file - in `main.js`. I admit, when\nI first started with Node.js and JavaScript in general, I placed all JavaScript\ncode inside templates because I have access to template variables passed in from\nExpress right then and there. It's the easiest thing you can do, but also the\nleast efficient and harder to maintain. Since then I almost never include inline\nJavaScript inside templates anymore.\n\nBut it's also understandable if you want to take the easier road. Most of the\ntime you don't even care about performance during hackathons, you just want to\n[_\"get shit done\"_](https://www.startupvitamins.com/media/products/13/aaron_levie_poster_black.jpg)\nbefore the time runs out. Well, either way, use whichever approach makes more\nsense to you. At the end of the day, it's **what** you build that matters, not\n**how** you build it.\n\nIf you want to stick all your JavaScript inside templates, then in\n`layout.pug` - your main template file, add this to `head` block.\n\n```pug\nscript(src='/socket.io/socket.io.js')\nscript.\n let socket = io.connect(window.location.href);\n socket.on('greet', function (data) {\n console.log(data);\n socket.emit('respond', { message: 'Hey there, server!' });\n });\n```\n\n**Note:** Notice the path of the `socket.io.js`, you don't actually have to have\n`socket.io.js` file anywhere in your project; it will be generated automatically\nat runtime.\n\nIf you want to have JavaScript code separate from templates, move that inline\nscript code into `main.js`, inside the `$(document).ready()` function:\n\n```js\n$(document).ready(function () {\n // Place JavaScript code here...\n let socket = io.connect(window.location.href);\n socket.on(\"greet\", function (data) {\n console.log(data);\n socket.emit(\"respond\", { message: \"Hey there, server!\" });\n });\n});\n```\n\nAnd we are done!\n\n## Cheatsheets\n\n###
ES6 Cheatsheet\n\n#### Declarations\n\nDeclares a read-only named constant.\n\n```js\nconst name = \"yourName\";\n```\n\nDeclares a block scope local variable.\n\n```js\nlet index = 0;\n```\n\n#### Template Strings\n\nUsing the **\\`${}\\`** syntax, strings can embed expressions.\n\n```js\nconst name = \"Oggy\";\nconst age = 3;\n\nconsole.log(`My cat is named ${name} and is ${age} years old.`);\n```\n\n#### Modules\n\nTo import functions, objects or primitives exported from an external module.\nThese are the most common types of importing.\n\n```js\nconst name = require(\"module-name\");\n```\n\n```js\nconst { foo, bar } = require(\"module-name\");\n```\n\nTo export functions, objects or primitives from a given file or module.\n\n```js\nmodule.exports = { myFunction };\n```\n\n```js\nmodule.exports.name = \"yourName\";\n```\n\n```js\nmodule.exports = myFunctionOrClass;\n```\n\n#### Spread Operator\n\nThe spread operator allows an expression to be expanded in places where multiple\narguments (for function calls) or multiple elements (for array literals) are\nexpected.\n\n```js\nmyFunction(...iterableObject);\n```\n\n```jsx\n JavaScript Date Cheatsheet\n\n#### Unix Timestamp (seconds)\n\n```js\nMath.floor(Date.now() / 1000);\n```\n\n```MomentJS\nmoment().unix();\n```\n\n#### Add 30 minutes to a Date object\n\n```js\nvar now = new Date();\nnow.setMinutes(now.getMinutes() + 30);\n```\n\n```MomentJS\nmoment().add(30, 'minutes');\n```\n\n#### Date Formatting\n\n```js\n// DD-MM-YYYY\nvar now = new Date();\n\nvar DD = now.getDate();\nvar MM = now.getMonth() + 1;\nvar YYYY = now.getFullYear();\n\nif (DD < 10) {\n DD = \"0\" + DD;\n}\n\nif (MM < 10) {\n MM = \"0\" + MM;\n}\n\nconsole.log(MM + \"-\" + DD + \"-\" + YYYY); // 03-30-2016\n```\n\n```MomentJS\nconsole.log(moment(new Date(), 'MM-DD-YYYY'));\n```\n\n```js\n// hh:mm (12 hour time with am/pm)\nvar now = new Date();\nvar hours = now.getHours();\nvar minutes = now.getMinutes();\nvar amPm = hours >= 12 ? \"pm\" : \"am\";\n\nhours = hours % 12;\nhours = hours ? hours : 12;\nminutes = minutes < 10 ? \"0\" + minutes : minutes;\n\nconsole.log(hours + \":\" + minutes + \" \" + amPm); // 1:43 am\n```\n\n```MomentJS\nconsole.log(moment(new Date(), 'hh:mm A'));\n```\n\n#### Next week Date object\n\n```js\nvar today = new Date();\nvar nextWeek = new Date(today.getTime() + 7 * 24 * 60 * 60 * 1000);\n```\n\n```MomentJS\nmoment().add(7, 'days');\n```\n\n#### Yesterday Date object\n\n```js\nvar today = new Date();\nvar yesterday = date.setDate(date.getDate() - 1);\n```\n\n```MomentJS\nmoment().add(-1, 'days');\n```\n\n:top: [**back to top**](#table-of-contents)\n\n### Mongoose Cheatsheet\n\n#### Find all users:\n\n```js\nUser.find((err, users) => {\n console.log(users);\n});\n```\n\n#### Find a user by email:\n\n```js\nlet userEmail = \"example@gmail.com\";\nUser.findOne({ email: userEmail }, (err, user) => {\n console.log(user);\n});\n```\n\n#### Find 5 most recent user accounts:\n\n```js\nUser.find()\n .sort({ _id: -1 })\n .limit(5)\n .exec((err, users) => {\n console.log(users);\n });\n```\n\n#### Get the total count of a field from all documents:\n\nLet's suppose that each user has a `votes` field and you would like to count the\ntotal number of votes in your database across all users. One very inefficient\nway would be to loop through each document and manually accumulate the count. Or\nyou could use\n[MongoDB Aggregation Framework](https://docs.mongodb.org/manual/core/aggregation-introduction/)\ninstead:\n\n```js\nUser.aggregate(\n { $group: { _id: null, total: { $sum: \"$votes\" } } },\n (err, votesCount) => {\n console.log(votesCount.total);\n }\n);\n```\n\n:top: [**back to top**](#table-of-contents)\n\n## Docker\n\nYou will need docker and docker-compose installed to build the application.\n\n- [Docker installation](https://docs.docker.com/engine/installation/)\n\n- [Common problems setting up docker](https://docs.docker.com/toolbox/faqs/troubleshoot/)\n\nAfter installing docker, start the application with the following commands :\n\n```\n# To build the project for the first time or when you add dependencies\ndocker-compose build web\n\n# To start the application (or to restart after making changes to the source code)\ndocker-compose up web\n\n```\n\nTo view the app, find your docker IP address + port 8080 ( this will typically\nbe http://localhost:8080/ ). To use a port other than 8080, you would need to\nmodify the port in app.js, Dockerfile, and docker-compose.yml.\n\n## Deployment\n\nOnce you are ready to deploy your app, you will need to create an account with a\ncloud platform to host it. These are not the only choices, but they are my top\npicks. From my experience, the easiest way to get started is with **Heroku**. It\nwill automatically restart your Node.js process when it crashes, has\nzero-downtime deployments and supports custom domains on free accounts.\nAdditionally, you can create an account with **MongoDB Atlas** and then pick one\nof the _4_ providers below. Again, there are plenty of other choices, and you\nare not limited to just the ones listed below.\n\n### Deployment to Heroku\n\n\n\n- Download and install [Heroku Toolbelt](https://toolbelt.heroku.com/)\n- In a terminal, run `heroku login` and enter your Heroku credentials\n- From _your app_ directory run `heroku create`\n- Use the command `heroku config:set KEY=val` to set the different environment\n variables (KEY=val) for your application (i.e.\n `heroku config:set BASE_URL=[heroku App Name].herokuapp.com` or\n `heroku config:set MONGODB_URI=mongodb://dbuser:\n\n- Go to\n [https://www.mongodb.com/cloud/atlas](https://www.mongodb.com/cloud/atlas)\n- Click the green **Get started free** button\n- Fill in your information then hit **Get started free**\n- You will be redirected to Create New Cluster page.\n- Select a **Cloud Provider and Region** (such as AWS and a free tier region)\n- Select cluster Tier to **Free Shared Clusters**\n- Give Cluster a name (default: Cluster0)\n- Click on green **:zap:Create Cluster button**\n- Now, to access your database you need to create a DB user. To create a new\n MongoDB user, from the **Clusters view**, select the **Security tab**\n- Under the **MongoDB Users** tab, click on **+Add New User**\n- Fill in a username and password and give it either **Atlas Admin** User\n Privilege\n- Next, you will need to create an IP address whitelist and obtain the\n connection URI. In the Clusters view, under the cluster details (i.e.\n SANDBOX - Cluster0), click on the **CONNECT** button.\n- Under section **(1) Check the IP Whitelist**, click on **ALLOW ACCESS FROM\n ANYWHERE**. The form will add a field with `0.0.0.0/0`. Click **SAVE** to\n save the `0.0.0.0/0` whitelist.\n- Under section **(2) Choose a connection method**, click on **Connect Your\n Application**\n- In the new screen, select **Node.js** as Driver and version **2.2.12 or\n later**. _*WARNING*_: Do not pick 3.0 or later since connect-mongo can't\n handle mongodb+srv:// connection strings.\n- Finally, copy the URI connection string and replace the URI in MONGODB_URI\n of `.env.example` with this URI string. Make sure to replace the \n**NOTE** *These instructions might be out of date due to changes in OpenShift. Heroku is currently a good free alternative. If you the new process, please feel free to help us update this page*\n\n- First, install this Ruby gem: `sudo gem install rhc` :gem:\n- Run `rhc login` and enter your OpenShift credentials\n- From your app directory run `rhc app create MyApp nodejs-0.10`\n- **Note:** _MyApp_ is the name of your app (no spaces)\n- Once that is done, you will be provided with **URL**, **SSH** and **Git\n Remote** links\n- Visit provided **URL**, and you should see the _Welcome to your Node.js\n application on OpenShift_ page\n- Copy and paste **Git Remote** into\n `git remote add openshift YOUR_GIT_REMOTE`\n- Before you push your app, you need to do a few modifications to your code\n\nAdd these two lines to `app.js`, just place them anywhere before `app.listen()`:\n\n```js\nvar IP_ADDRESS = process.env.OPENSHIFT_NODEJS_IP || \"127.0.0.1\";\nvar PORT = process.env.OPENSHIFT_NODEJS_PORT || 8080;\n```\n\nThen change `app.listen()` to:\n\n```js\napp.listen(PORT, IP_ADDRESS, () => {\n console.log(\n `Express server listening on port ${PORT} in ${app.settings.env} mode`\n );\n});\n```\n\nAdd this to `package.json`, after _name_ and _version_. This is necessary\nbecause, by default, OpenShift looks for `server.js` file. And by specifying\n`supervisor app.js` it will automatically restart the server when node.js\nprocess crashes.\n\n```js\n\"main\": \"app.js\",\n\"scripts\": {\n \"start\": \"supervisor app.js\"\n},\n```\n\n- Finally, you can now push your code to OpenShift by running\n `git push -f openshift master`\n- **Note:** The first time you run this command, you have to pass `-f` (force)\n flag because OpenShift creates a dummy server with the welcome page when you\n create a new Node.js app. Passing `-f` flag will override everything with\n your _Hackathon Starter_ project repository. **Do not** run `git pull` as it\n will create unnecessary merge conflicts.\n- And you are done!\n\n---\n\n### Azure\n\n\n**NOTE** *Beyond the initial 12 month trial of Azure, the platform does not seem to offer a free tier for hosting NodeJS apps. If you are looking for a free tier service to host your app, Heroku might be a better choice at this point*\n\n- Login to [Windows Azure Management Portal](https://manage.windowsazure.com/)\n- Click the **+ NEW** button on the bottom left of the portal\n- Click **COMPUTE**, then **WEB APP**, then **QUICK CREATE**\n- Enter a name for **URL** and select the datacenter **REGION** for your web\n site\n- Click on **CREATE WEB APP** button\n- Once the web site status changes to _Running_, click on the name of the web\n site to access the Dashboard\n- At the bottom right of the Quickstart page, select **Set up a deployment\n from source control**\n- Select **Local Git repository** from the list, and then click the arrow\n- To enable Git publishing, Azure will ask you to create a user name and\n password\n- Once the Git repository is ready, you will be presented with a **GIT URL**\n- Inside your _Hackathon Starter_ directory, run\n `git remote add azure [Azure Git URL]`\n- To push your changes run `git push azure master`\n- **Note:** _You will be prompted for the password you created earlier_\n- On **Deployments** tab of your Windows Azure Web App, you will see the\n deployment history\n\n---\n\n## IBM Bluemix Cloud Platform\n\n**NOTE** _At this point it appears that Bluemix's free tier to host NodeJS apps\nis limited to 30 days. If you are looking for a free tier service to host your\napp, Heroku might be a better choice at this point_\n\n1. Create a Bluemix Account\n\n [Sign up](https://console.ng.bluemix.net/registration/?target=%2Fdashboard%2Fapps)\n for Bluemix, or use an existing account.\n\n1. Download and install the\n [Cloud Foundry CLI](https://github.com/cloudfoundry/cli) to push your\n applications to Bluemix.\n\n1. Create a `manifest.yml` file in the root of your application.\n\n```\napplications:\n- name: \n[Conversation](https://www.ibm.com/watson/services/conversation/)** - Quickly\nbuild and deploy chatbots and virtual agents across a variety of channels,\nincluding mobile devices, messaging platforms, and even robots.\n\n**\n[Discovery](https://www.ibm.com/watson/services/discovery/)** - Unlock hidden\nvalue in data to find answers, monitor trends and surface patterns with the\nworld’s most advanced cloud-native insight engine.\n\n**\n[Language Translator](https://www.ibm.com/watson/services/language-translator/)** -\nTranslate text from one language to another.\n\n**\n[Natural Language Classifier](https://www.ibm.com/watson/services/natural-language-classifier/)** -\nInterpret and classify natural language with confidence.\n\n**\n[Natural Language Understanding](https://www.ibm.com/watson/services/natural-language-understanding/)** -\nAnalyze text to extract meta-data from content such as concepts, entities,\nkeywords and more.\n\n**\n[Personality Insights](https://www.ibm.com/watson/services/personality-insights/)** -\nPredict personality characteristics, needs and values through written text.\n\n**\n[Speech to Text](https://www.ibm.com/watson/services/speech-to-text/)** -\nConvert audio and voice into written text for quick understanding of content.\n\n**\n[Text to Speech](https://www.ibm.com/watson/services/text-to-speech/)** -\nConvert written text into natural sounding audio in a variety of languages and\nvoices.\n\n**\n[Tone Analyzer](https://www.ibm.com/watson/services/tone-analyzer/)** -\nUnderstand emotions, social tendencies and perceived writing style.\n\n**\n[Visual Recognition](https://www.ibm.com/watson/services/visual-recognition/)** -\nTag, classify and search visual content using machine learning.\n\n[Click here](https://www.ibm.com/watson/developercloud/services-catalog.html)\nfor live demos of each Watson service.\n\n---\n\n### Google Cloud Platform\n\n\n\n- [Download and install Node.js](https://nodejs.org/)\n- [Select or create](https://console.cloud.google.com/project) a Google Cloud\n Platform Console project\n- [Enable billing](https://support.google.com/cloud/answer/6293499#enable-billing)\n for your project (there's a $300 free trial)\n- Install and initialize the\n [Google Cloud SDK](https://cloud.google.com/sdk/docs/quickstarts)\n- Create an `app.yaml` file at the root of your `hackathon-starter` folder\n with the following contents:\n\n ```yaml\n runtime: nodejs\n env: flex\n manual_scaling:\n instances: 1\n ```\n\n- Make sure you've set `MONGODB_URI` in `.env.example`\n- Run the following command to deploy the `hackathon-starter` app:\n\n ```bash\n gcloud app deploy\n ```\n\n- [Monitor your deployed app](https://console.cloud.google.com/appengine) in\n the Cloud Console\n- [View the logs](https://console.cloud.google.com/logs/viewer) for your app\n in the Cloud Console\n\n## Production\n\nIf you are starting with this boilerplate to build an application for prod\ndeployment, or if after your hackathon you would like to get your project\nhardened for production use, see\n[prod-checklist.md](https://github.com/sahat/hackathon-starter/blob/master/prod-checklist.md).\n\n## Changelog\n\nYou can find the changelog for the project in:\n[CHANGELOG.md](https://github.com/sahat/hackathon-starter/blob/master/CHANGELOG.md)\n\n## Contributing\n\nIf something is unclear, confusing, or needs to be refactored, please let me\nknow. Pull requests are always welcome, but due to the opinionated nature of\nthis project, I cannot accept every pull request. Please open an issue before\nsubmitting a pull request. This project uses\n[Airbnb JavaScript Style Guide](https://github.com/airbnb/javascript) with a few\nminor exceptions. If you are submitting a pull request that involves Pug\ntemplates, please make sure you are using _spaces_, not tabs.\n\n## License\n\nThe MIT License (MIT)\n\nCopyright (c) 2014-2020 Sahat Yalkabov\n\nPermission is hereby granted, free of charge, to any person obtaining a copy of\nthis software and associated documentation files (the \"Software\"), to deal in\nthe Software without restriction, including without limitation the rights to\nuse, copy, modify, merge, publish, distribute, sublicense, and/or sell copies of\nthe Software, and to permit persons to whom the Software is furnished to do so,\nsubject to the following conditions:\n\nThe above copyright notice and this permission notice shall be included in all\ncopies or substantial portions of the Software.\n\nTHE SOFTWARE IS PROVIDED \"AS IS\", WITHOUT WARRANTY OF ANY KIND, EXPRESS OR\nIMPLIED, INCLUDING BUT NOT LIMITED TO THE WARRANTIES OF MERCHANTABILITY, FITNESS\nFOR A PARTICULAR PURPOSE AND NONINFRINGEMENT. IN NO EVENT SHALL THE AUTHORS OR\nCOPYRIGHT HOLDERS BE LIABLE FOR ANY CLAIM, DAMAGES OR OTHER LIABILITY, WHETHER\nIN AN ACTION OF CONTRACT, TORT OR OTHERWISE, ARISING FROM, OUT OF OR IN\nCONNECTION WITH THE SOFTWARE OR THE USE OR OTHER DEALINGS IN THE SOFTWARE.\n","readmeFilename":"README.md","bugs":{"url":"https://github.com/sahat/hackathon-starter/issues"},"homepage":"https://github.com/sahat/hackathon-starter#readme","_id":"@atomist/hackathon-starter@6.0.1-master.11","_nodeVersion":"12.20.0","_npmVersion":"6.14.8","dist":{"integrity":"sha512-RCIigMYdFvuS/FVx+/9NfJlLM4vqx16wxO8CPpfziNNAfU5qpXHQtbLte52OrpbcAgr53s1TfL72aBkmzBp2UA==","shasum":"87f5aa133f8c76ab1d4102ed6b9c6c19a3f16308","tarball":"https://registry.npmjs.org/@atomist/hackathon-starter/-/hackathon-starter-6.0.1-master.11.tgz","fileCount":72,"unpackedSize":664323,"npm-signature":"-----BEGIN PGP SIGNATURE-----\r\nVersion: OpenPGP.js v3.0.13\r\nComment: https://openpgpjs.org\r\n\r\nwsFcBAEBCAAQBQJf0Il8CRA9TVsSAnZWagAABtUQAJB5cEfSrxs7QR5VZW9b\nQg9XQFQhjph6wQupvvAna9SykWyLk8KNijcIUHlGwDTGYIScPsoSH5qkCg/T\nFIhnXQNQvkxwcesgSjvl/x9a497XJ0nDW4qeeLC2ZftjO1uITLhxspYUIT4B\nBvtPZF/gBg6ZSeJjhxIVZ0k1ysLuwwuqoHUZNdKqRhoEeEmxlBbr7HCWwE+T\no+l7rpcoSn0cqzDrGTgNOsBblFxesYLhy+YX42s76H4HsONtAioG2nPJ17fT\nCNlH920lh2UvkrQaWp7Xp54HQuFxoB8D8lDnzp0tObQY0yi++VtB4mW8X9z5\nHxRe7LpCr0eONp4ZCdl1WJbNNpwg+gYBe4mz8qsfjv/kikX3yhAt3jxNFJsw\nWiXdTD1eY5EBLCTiXDuqpDvdIvBlv8rd7+dhxzbuGVGCAtZm4M2hC9WIoRHx\nR/e1INDwLVbV4oR+KURLET5kiUAllyCl9Aw40c3wM6ljYN1bjA3AxyRlShio\n4lXUa2qWOVRXu45iounM10p7ustl9m3ig1cm8kpEnHy9ophM4ormgi8ELzJd\nbLO2G2261QVYil7tFjPLmZjBYttYUYLL5yrW1CP/QJ8RDknFjLp7QoFU0H19\n2iK64BoStfeYqn32ztvtavtgK/ujzcAutlipKapWV92rTAUjqHzwG5vVhwDX\ncpZ9\r\n=gjvS\r\n-----END PGP SIGNATURE-----\r\n","signatures":[{"keyid":"SHA256:jl3bwswu80PjjokCgh0o2w5c2U4LhQAE57gj9cz1kzA","sig":"MEQCIDQ2P+udb4iHq3ZlqRLirW7YwshHRu2AUW2FvuxdZ89sAiAqSoq6tcu+3ejpOCIQnPDcN+DiYVkd9dYAOZ5TSJrIow=="}]},"_npmUser":{"name":"atomist-bot","email":"npm@atomist.com"},"directories":{},"maintainers":[{"name":"slimslenderslacks","email":"slimslenderslacks@gmail.com"},{"name":"cdupuis","email":"cd@atomist.com"},{"name":"ddatomist","email":"david@atomist.com"},{"name":"atomist-bot","email":"npm@atomist.com"}],"_npmOperationalInternal":{"host":"s3://npm-registry-packages","tmp":"tmp/hackathon-starter_6.0.1-master.11_1607502204312_0.8451107260091901"},"_hasShrinkwrap":false}},"time":{"created":"2020-12-09T08:20:42.251Z","6.0.1-master.4":"2020-12-09T08:20:42.706Z","modified":"2023-02-23T17:59:10.884Z","6.0.1-master.5":"2020-12-09T08:21:15.510Z","6.0.1-branch-atomist-prettier-config-master.1":"2020-12-09T08:21:24.265Z","6.0.1-branch-atomist-npm-update-master.0":"2020-12-09T08:22:18.748Z","6.0.1-branch-atomist-prettier-master.3":"2020-12-09T08:22:46.461Z","6.0.1-master.10":"2020-12-09T08:23:06.450Z","6.0.1-master.11":"2020-12-09T08:23:24.443Z"},"maintainers":[{"email":"neil.prosser+npmjs@gmail.com","name":"neilprosser"},{"email":"npm@atomist.com","name":"atomist-bot"},{"email":"cd@atomist.com","name":"cdupuis"},{"email":"slimslenderslacks@gmail.com","name":"slimslenderslacks"}],"description":"A boilerplate for Node.js web applications","homepage":"https://github.com/sahat/hackathon-starter#readme","repository":{"type":"git","url":"git+https://github.com/sahat/hackathon-starter.git"},"contributors":[{"name":"Yashar Fakhari","url":"https://github.com/YasharF"}],"author":{"name":"Sahat Yalkabov"},"bugs":{"url":"https://github.com/sahat/hackathon-starter/issues"},"license":"MIT","readme":"","readmeFilename":""}